Amped 2/Routing
From SDA Knowledge Base
Contents
100%
General route considerations
- In a segmented run, try to finish off segments on challenges that unlock videos. That saves ~0.5 seconds in menu time compared.
- Each rank countdown after completing a sponsor, photoshoot or pro challenge costs ~1 second. The countdown time is cancelled once you reach rank 1. Since the menu screen when completing score or own the mountain (otm) challenges is different and doesn't add time, these should be completed before reaching rank 1.
- For a few of the challenges, your board will not be enough upgraded to complete them in the fastest way when you first unlock them. The most obvious examples are Millicent 1 sponsor 1 (Sp1) and Sp3, a few of the gaps in Breckenridge, Sp1 and Sp3.
- A few of the challenges will become harder the more jump skills you have beyond a certain point. The most obvious examples are Millicent 1 Photoshoot 3 (PS3), a few of the gaps in Breckenridge, Millicent PS2.
- Some challenges won't become faster, but easier with more jumps stats. Obvious examples are Millicent PS3, Laax PS3, Mt Buller otm run (on snowskate).
- In order to complete the otm challenge for Laax 1, you need to have unlocked the method grab. That's done by completing pro 1 in Breckenridge. No other otm tricks require unlocking grabs from any of the pro 1 challenges.
Upgrade strats
Since you can't play any given challenge with any given combination of upgrades for testing purposes, it's difficult to provide an optimal upgrade strategy. It's very important to correctly assign the skill points you gain, but there are also many different possibilities that can work out to achieve the same result.
Each regular level gives 5 skill points (SP). 3 from completing the score requirements and 2 from completing pro 2. The four event levels give 3 SP each. In total, that gives 10x5 + 4x3 = 62 SP to distribute among the five stats. Each stat starts on 3 and maxes out on 20. So in total it would require 85 SP to max everything out. Here are a few considerations to take into account when planning the upgrades:
- There are three reasons for why the switch stat should never be upgraded. The purpose of the switch stat is to improve the jump and control when boarding switch, which allows you to get the 20% score bonus from doing tricks switch. There is nowhere in the game where this makes a significant difference. The second reason is that it can actually be an advantage to have two fairly distinctly different jump heights to choose between. One example of when this is useful is when you want to land the last trick of a pro challenge as early as possible. The third reason is that this stat has no impact on grinding, buttering or jibbing, which means you anyways can fully benefit from the switch bonus for these tricks.
- Even with switch excluded, you can still not max out the other four stats. From a menu navigation point of view, it's obviously faster to upgrade "spin / flip" or "big air" than "ollie" or "balance". It's also preferable to mainly use the pro 2 upgrades for the former and the upgrades from the other challenges for the other two. This can prevent a few additional trips to the menu choices that are furthest away.
- Before Bear Mtn. 1, you should upgrade at least some for balance or it will become hard to reach one of the snowmen far out on a rail.
- There are two problematic own the mountain (otm) tricks in Laax 1. The "1080 spin" and the "late 360 spin". Both require some upgrades for spin/flip and for jump power to even be possible.
- The "double flip + late 180 spin" trick on Millicent will require a fair amount of upgrades for the jump and spin stats.
- Several of the gaps in Bear Mtn. require that you have thought about the jump stats when you first plan to play that level.
- The challenges that determine how far you need to upgrade balance are Millicent 1 Legend (L), Mt Buller L (and maybe Laax L). If you're able to complete those for a given balance, you'll also be able to complete every other challenge in the game that requires grinding with the same balance stats.
- The challenges that determine how far you need to upgrade the two jump stats are mainly Breckenridge otm, Mt Buller otm (snowskate), New Zealand otm.
Own the mountain routes
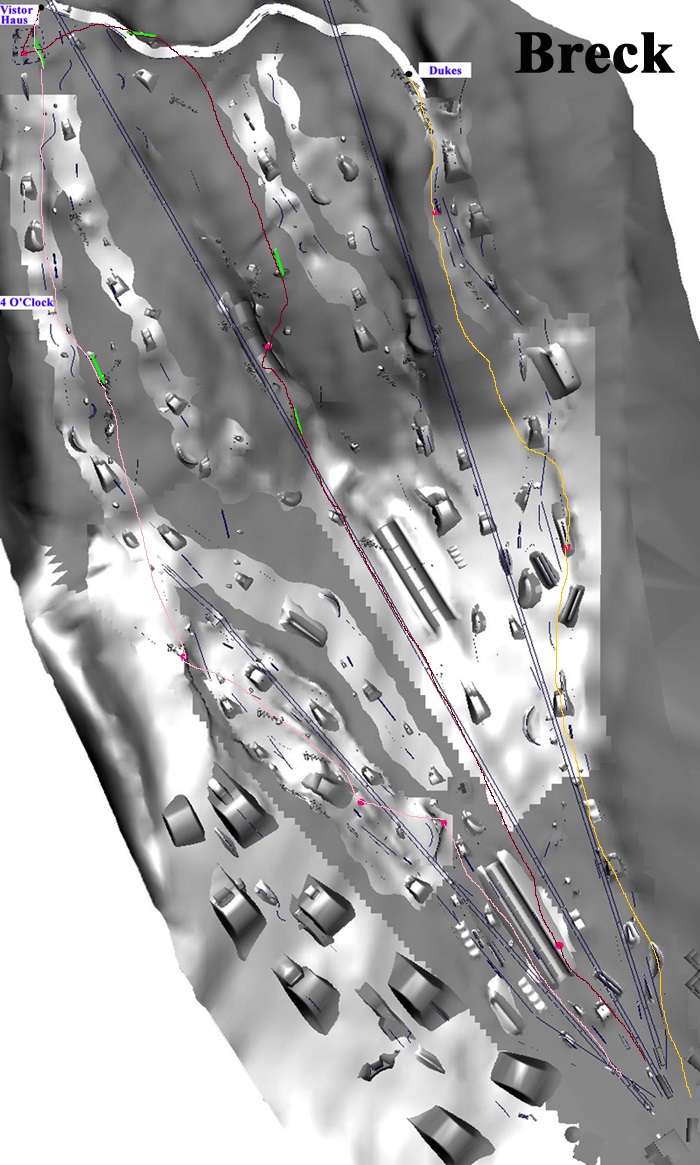
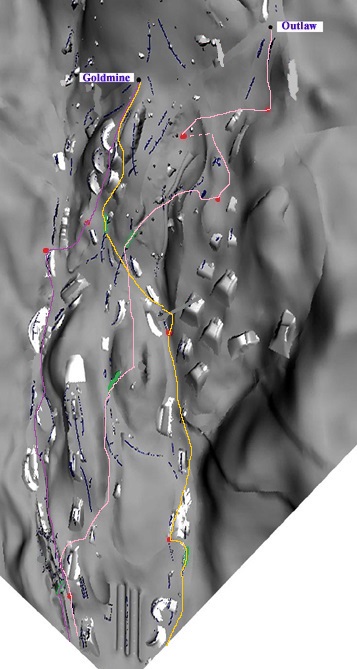
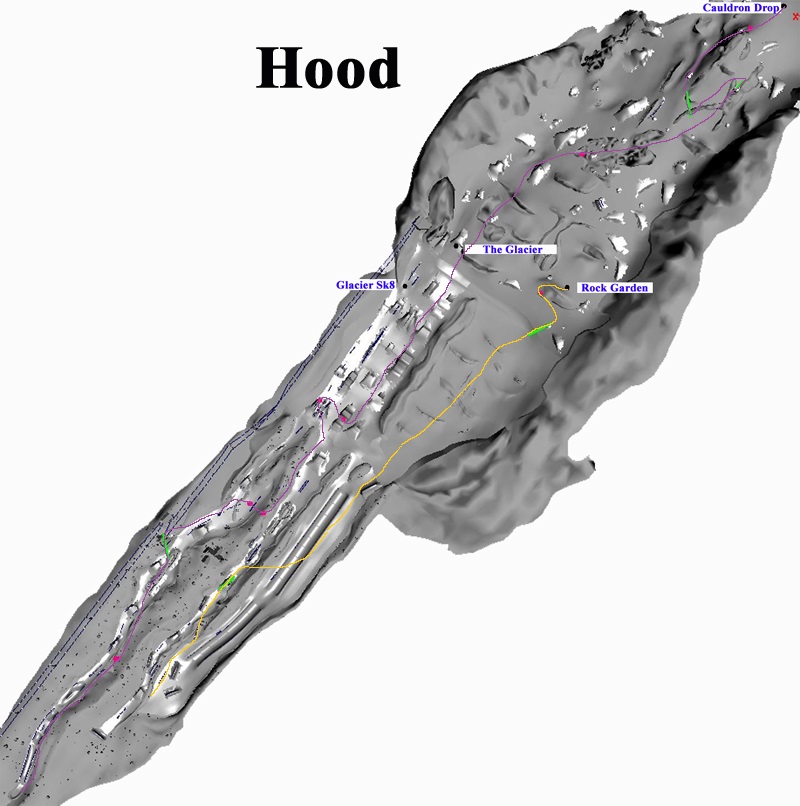
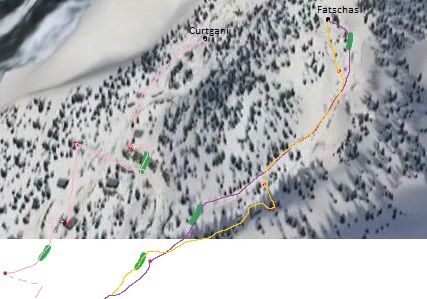
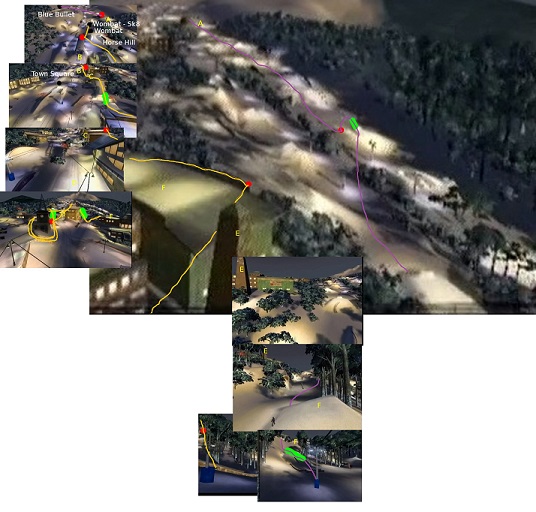
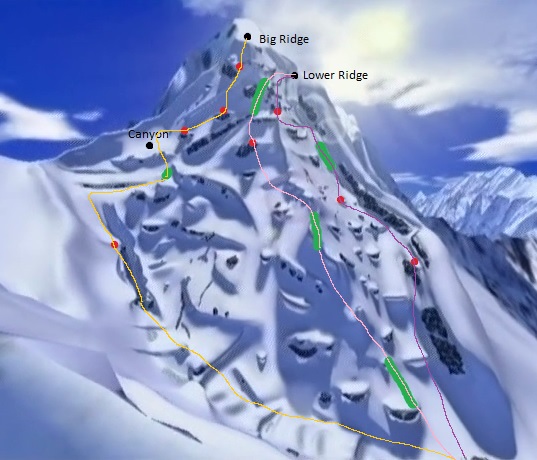
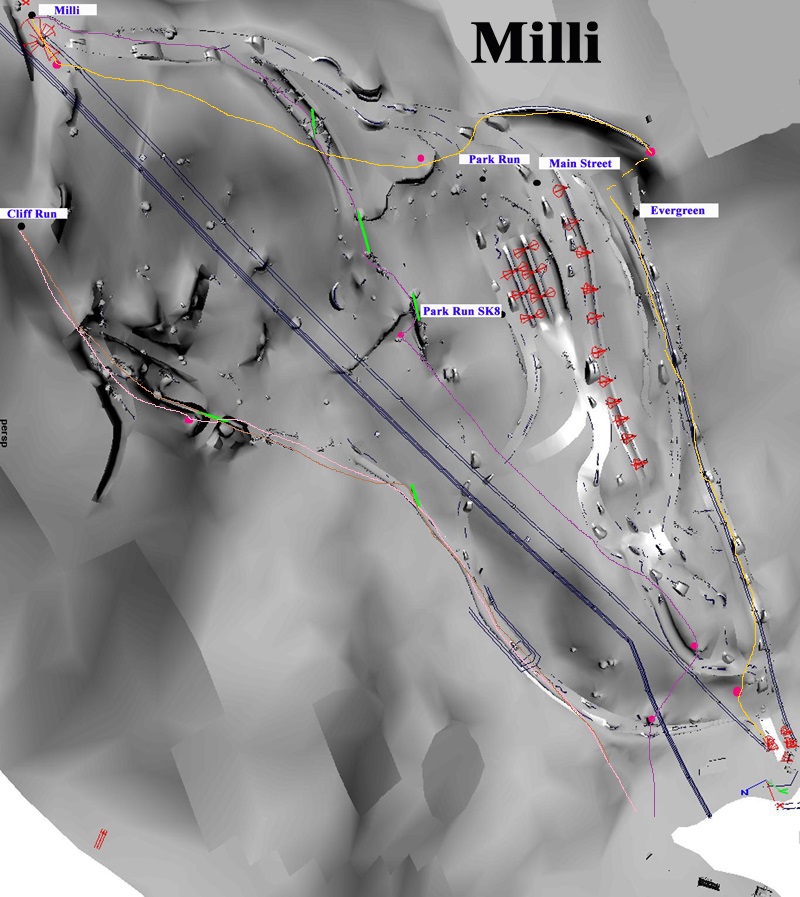
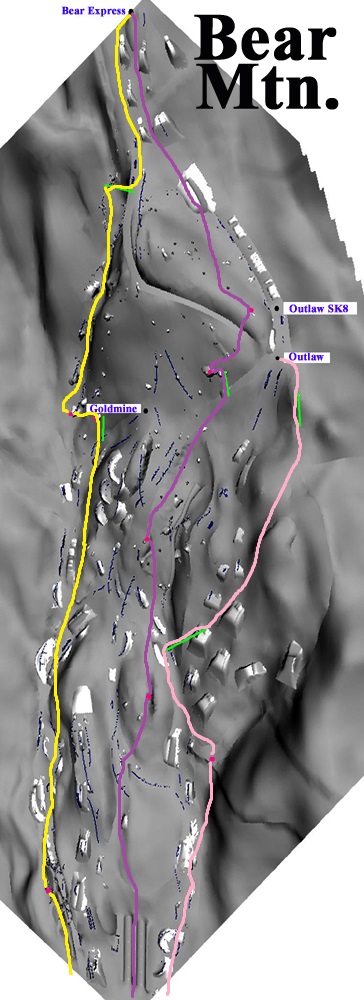
Below are suggested routes through all the mountains for getting all the own the mountain goals. These routes also give opportunities to complete the own the mountain tricks, as well as enough score opportunities to achieve the third score and media goals. Dotted parts of the lines show the "teleportation" from resetting the boarder.
Millicent 1
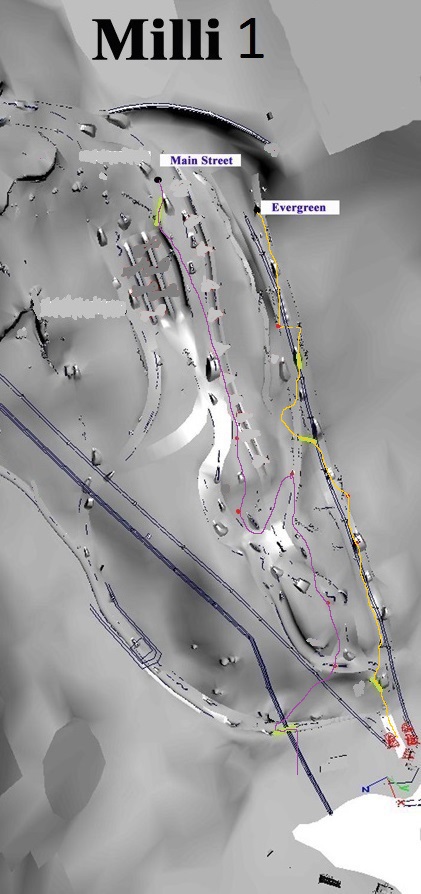
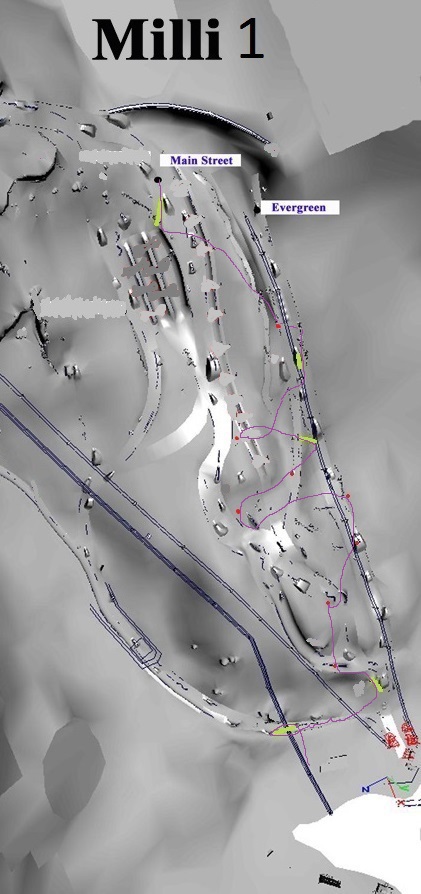
As shown in the right picture, this mountain can be done in one run. However, the two-run route is still faster by 30-45 seconds.
Any%
[Feel free to add content to this section]
