Darksiders
From SDA Knowledge Base
Contents
General Information
This guide will cover the Warmastered Edition of the game on PC, using the most current version. Keyboard and mouse are the preferred method for speedrunning, as it allows for more precision and extra keybinds that make the run much faster. The spec requirements are not demanding, but if you notice excess loading hiccups while playing, lowering the Texture Quality in the advanced options settings should alleviate them. Framerate is incredibly important, however, it affects things like attack speed and the physics glitches, so if you're getting under 60-100 it's recommended to play in a lower resolution window so that the tricks work properly.
Timing is done with the in-game timer. It's active anytime the game world, so in-game cutscenes count toward your time, but menus, Vulgrim's shop, and movie cutscenes do not. All movie cutscenes can be skipped by holding RMB. The game's difficulty settings don't have an impact on the time, so everyone plays on Apocalyptic. The only difference is that enemies deal more damage to War, so while learning it's advised to play on Easy for the couple of fights that might be tough. Be sure to disable subtitles in the game options, when they're present it hides the minimap, which you'll use through a lot of the run to keep track of where you're going.
Glossary
- Focus: This game's version of Z-targeting, activated by holding Shift or toggled with F. Locks onto the closest enemy and generally behaves as a Zelda Z-target would.
- Q-mode: Aim mode. Gets canceled with weapon attacks, but not Gear usage.
- Gear: Sub-weapon.
General Tricks and Glitches
Listed in order of appearance, covering what is required on the any% route.
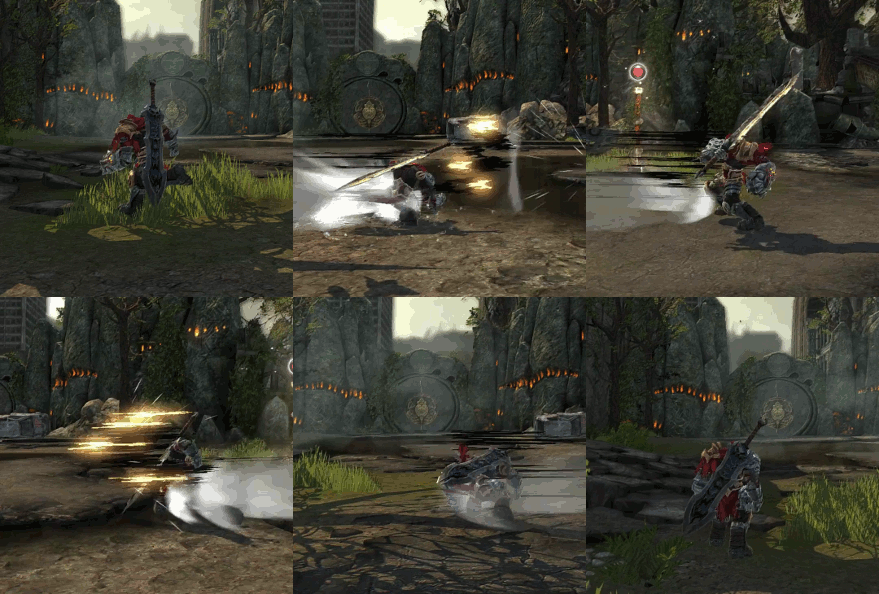
Sword-Dashing
This is the main form of movement for the first third of the run, it chains the sword uppercut with War’s dash to move much faster than normal. It’s performed by holding Focus (Shift), then dashing (Alt) with A|S|D to go backwards or sideways, then holding LMB to interrupt the end of the animation with the sword uppercut. Continue to hold Shift, a direction, and LMB while tapping Alt to cancel the sword uppercut into as many dashes as you want.
The main limit to this skill, one you’ll see repeatedly anytime Focus is involved, is that you can only move sideways or backwards. Forward uses a different dash that can’t be chained, so it’s important to practice your movements and learn how to use the minimap effectively. The other hindrance is that, since Focus locks on the closest enemy, there are some sections where backdashing isn’t a viable option.
Rebinding dash to your mouse’s scroll wheel is highly recommended, since you’ll be able to spam dash much faster. This guide will assume dash is on Alt and Down Scroll. A free-scroll mouse makes this trick even more effective.
AirBlock
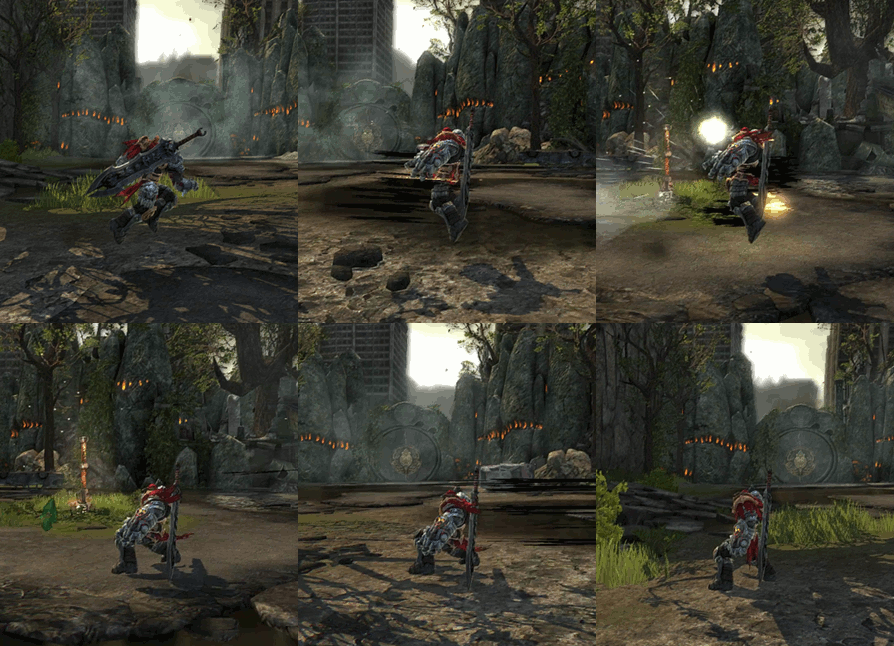
In the prologue, War is able to gain some additional height in the air by Blocking (Alt). In order to block in the air, you have to let go of all movement keys, most easily done by rocking your hand from W to Alt and back. If you start a sword swing just before, you can get a little additional height, as well. The other benefit to the sword swing is that it pauses you in midair, so you don't have to be as quick when going from W to Alt.
Carglitch
A physics glitch that causes thrown cars to get stuck partway into the wall, making a platform for War. It’s done by tossing a car at a wall from a short distance and while airborne so that it gets damaged before War’s throw animation completes, forcing the car model to load in with the door on the other side of the wall as the main body. After the throw is complete and as long as your framerate is high enough, it will stay stable due to however the game does physics. There are two instances of this glitch, each with their own setup.
Sword Canceling
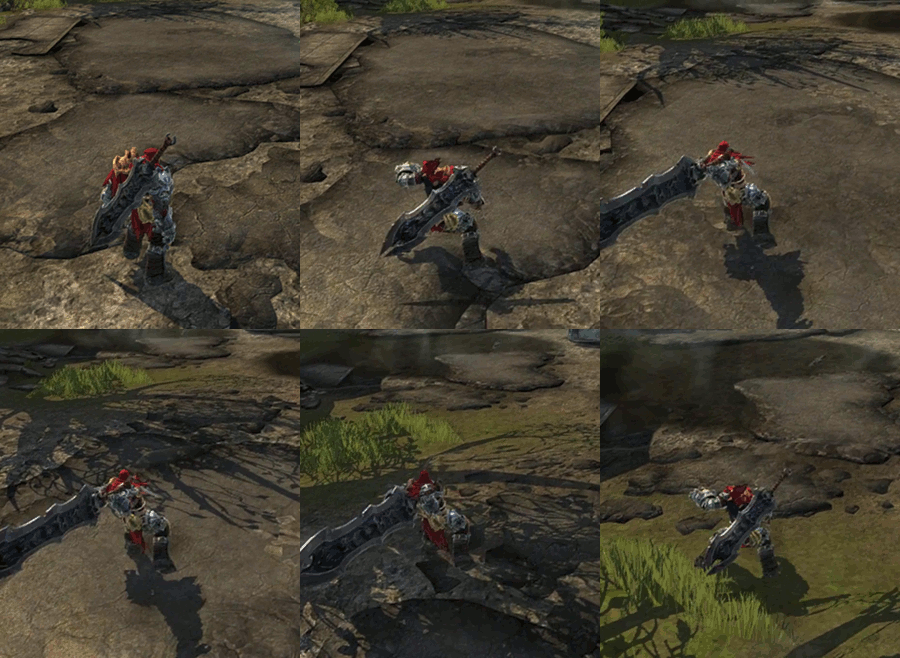
While attacking (LMB), if you tap Block (Alt) and follow with LMB as soon as you release block, War will cancel the first swing and be able to immediately start a second swing. Repeat this Alt-LMB combo as soon as your sword hits the enemy to deal way more damage than the game intended. The maneuver is awkward at first, it helps to start slow and work on consistency before spamming, the key is reducing the block time as much as you can. One trap people get caught in is to alternate between each, which means you either won't have your sword hit or your block time will be much too long. It's best to confirm the hit, then tap Alt and hit LMB as you release it. If you get stuck in the block animation, it's from not releasing Alt fast enough.
Savewarping
A common speedrun exploit usable in a few areas of Darksiders. Making manual saves and reloading them is first done to move you across a room, but expands to load back in-bounds or skip to the destination when going through warp paths. Autosaves serve similar purposes and are used much more commonly than manual saves.
Fast Bomb
Hitting a tossable sticky bomb with War’s sword before throwing it, so that it explodes almost instantly. Done by canceling out of sword swing with the Action (E) button, entering Q-mode, then throwing the bomb as soon as possible.
Infinite Jump
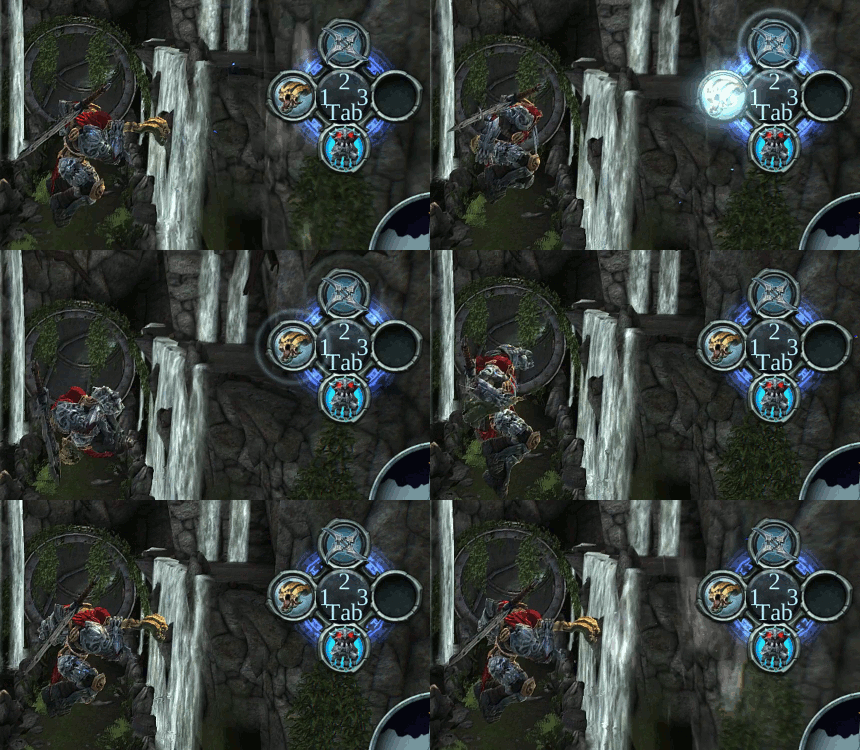
The main method of breaking the game, the refinement of this trick over the years has completely transformed the run. While in mid-air, using a Gear with MMB (also recommended to bind to Up Scroll), then swapping Gears and jumping on the same frame will make War do a fresh ground jump. This requires 2 Gears and some rebinding to perform. The action “Next Gear” can be pressed at the same time as jump to easily perform the IJ on keyboard. Some runners have used F for Next Gear and Space for jump, two of us use 4 and 5 for Next Gear and the second Jump binding, respectively.
However you bind it, the instructions are pretty simple: Start on your first Gear (Horn or Gun), Double Jump in the air, use the Gear with Scroll Up, then press Jump and Next Gear 3 times and you should see War double jump again. The subweapon will get canceled with Jump and Next Gear, giving you the IJ, the next 2 presses of those keys rotate the Gear selection back to the first slot, letting you repeat the whole process. With the recommended bindings, the inputs are Space, Space, Up Scroll, F + Space, F + Space, F + Space, which you then repeat with Up Scroll, F + Space, F + Space, F + Space as much as you need.
From there, adding movement and midair dashing are the next steps. The skips in this guide will first teach the game forward, once you get a feel for the geometry of each area and can do the technique consistently, it’s not too difficult to transition to more advanced infinite jump movement.
Note: To gain the maximum height it is not helpful to spam the buttons. If you use the weapon when War begins his flip you should get the optimal height bonus. A lot of time in the run depends on how efficient one can Infinite Jump. Learning how to correct screw ups and how to be consistent are key to a good run!
Gundash
Another trick that’s fairly easy to pick up and enables very fast and fluid ground movement. Once you get the gun after clearing the second dungeon, it’s performed by holding Focus, moving backwards or sideways, then jumping, dashing, and shooting, all in quick succession. The gun will preserve your aerial momentum for a couple of seconds, so once you land, repeat the jump, dash, shoot process again to continue. This trick uses Focus, but is free from the normal limitation of needing an empty area since the gun won’t cancel the Q-mode. In areas with enemies, activate Q-mode and follow the normal steps for gundashing.
It's best to go sideways with the gundash, if you're going uphill backwards, sometimes the ground will interrupt the midair dash before the gunshot. One alternate method for fast, reliable gundashes is to hold Alt after the first dash, you won't get a second dash on the ground, but as soon as you jump you'll dash as soon as possible. Doing this saves time and eliminates a lot of the movement errors present with tapping Alt each time. Another thing to note is that it's possible to cancel dash too early with the gun, you'll always want to allow about .1 seconds between starting the dash and using the gun.
Horse Height Boost:
If War summons his horse while pressing against certain walls or in certain areas, he’ll get teleported into the air and jump off the horse. This is useful in one area so far, getting to the final boss without needing to go into the shadow realm.
Prologue
First Fight
The goal of this fight is to kill the Car Thrower on top of the bus. Normally, he won't jump down until the first wave of minions is killed, but damaging him directly will force him to jump at you. During the intro cutscenes, hold D and tap Alt to dash to the right and end up near a lightpost. Grab the lamppost with the Action button and strafe back to the left until you're standing on the far left crack in the asphalt. The Car Thrower will still be in a roar, wait for his hands to go back in front of him, then throw the lamppost with Q-mode.
Once he recoils, stand still and hit Block (Alt) just as he's landing to counter, then spam V to go into Chaos form. This position should get a hit as you land from the Chaos Form, after which you can do the fast combo of LMB RMB LMB to kill him. Untransform with V and dash forward to the right side of the bus in front and wait for the cutscene.
Once the cutscene is finished, dash forward and slightly towards the building on the right, then hold focus. Doing this sets you up to always target an enemy in the starting zone, otherwise you have a risk of getting a bad camera angle. Since you're facing backwards, hold S and Sword-Dash to the end of the block, then hold A to go left into the cutscene.
Golem Skip
The next section normally has a cutscene that weakens War by taking a bunch of his health tanks, but using the AirBlock you can skip over it and keep extra HP into the main game. After the cutscene, dash forward twice and grab the van on the left. Turn back toward the Golem, activate Q-mode, and throw the car below the Golem's feet and aimed within the median. The goal is that the car stops just in front of the foot, creating a platform to get onto it.
Once the angel cutscene is over, dash forward and jump onto your van. Double jump at the foot, then use the AirBlock to get on top. Double jump forward onto the Golem's hip and turn slightly left and double jump to the back. The platform here extends up pretty far, but is pretty thin, so stick towards the right side. Take note of the Golem's movement up and down as it struggles and look to the left at the JUNK poster where it's on fire. A leap of faith when the Golem's back is high and coupled with an AirBlock will get you onto an invisible platform here. Look forward again and doublejump up and AirBlock one last time to get on another invisible platform that lets you fall into the next zone.
Carglitch
Once you land, dash straight ahead to the second van and pick it up. The brick wall on the right has the vines needed to climb to the next section, but the bricks won't allow War to grab on, so you'll have to build yourself some platforms. Jump and throw the van a bit in front of the wall (similar to what you did on the Golem) then move forward to the white sedan, pick it up, and walk left into the cutscene. War will move slightly faster if he jumps while holding a car, but you don't want to try bunnyhopping, wait for him to get to normal walking speed, then jump. There's only enough space to do one jump before the cutscene, but after it's finished, you can do two more forward until you reach the brick wall. If you face it head on, you'll notice a small recessed area on the right, this is the perfect distance for performing the carglitch. Position War's body using the line where the main wall goes back to the recessed area, lining it up anywhere between War's shoulder and elbow. You also need to be pressed against the wall and have your camera perpendicular to the wall or very slightly to the right. Then, jump and throw the car. It's not necessary to throw it at the peak of your jump, about 60-80% of your jump height is ideal.
There are a few outcomes. The best outcome is that the car gets thrown forward, goes into its damaged state, then gets stuck in the wall as a stable platform. This means you did everything correctly. If War didn't throw the car, you were too far to the left or way too far to the right. If you throw it and it blows up, you weren't close enough to the wall. The other thing that can happen is that it stays, but bounces around a lot or slips out. This is a result of framerate, you'll want to lower the game resolution or textures to make sure you're maintaining a high framerate.
From here you should have the van nearby, jump on it and onto the car and look at the brick wall. There's a rather obvious ledge, but you can only stand on a small part of it next to the pillar to the right. Jump onto this and push forward and right to stand. Then double jump to the left and move into the wall, War should grab the vines and you can move up.
The next couple of sections play out normally, climb the vines, use the wire to cross the chasm, climb up the next set of vines and get to the next roof for the last skip in the prologue.
Fourth Fight Skip
Head to the far back left of the roof and look to the North. The intersection below is the next goal, but it requires using an invisible platform to get to. If you stand on the edge of the building, you'll see a big hole in the wall, our platform is near the bottom on the far side. Jumping out requires delaying your second jump until the first has nearly hit terminal velocity, then doing an AirBlock from the second to reset your falling speed.
There is a visual marker for when to do the second jump in the form of a window on the building. Two floors down, the second window out, where the hole in the building starts, the base of the window is the perfect point to double jump for distance. Then, about halfway to the other side of the hole, use AirBlock to reset your speed. You don't have to hug the wall, the platform extends out a little more than a body length to the left. If things went well, you should land next to the broken pillar and be standing midair. Jump straight forward to the intersection below and keep running forward.
Keep to the Easy half of the intersection, it contains the loading trigger for Straga, so if you wander too far West it may not load. Keep moving forward and enter the cutscene for the Prologue boss.
Straga
To understand this fight, let me explain what normally happens and what is done to break the pattern. Normally, Straga throws cars at War, which you can grab and toss back, needing two hits to stagger Straga and make him fall forward. His impact destroys any cars still left in the area. You can then damage his face to move to the next phase. The second and third phase start with him picking up the ground and slamming it back down, then doing a couple of fist attacks before throwing more cars. In all, there's a lot of waiting involved between being able to damage Straga. However, there's a small safe spot in the far right corner where cars aren't destroyed from Straga staggering and another perk to the Golem skip is that War kept Chaos Form, which allows us to push cars without damaging them.
In the first phase only, Straga has multiple rounds that he'll throw cars, 9 in total. By standing near the safe area, we can stockpile cars that will last between rounds, allowing us to go straight from hitting his face to throwing the next volley of cars. You can estimate the area that's safe by drawing a straight line from the corner of the building straight out to the lava, imagining that the face of wall keeps extending out to the lava pit. The safe zone gets marginally wider as it goes to the lava, but even if the cars don't get blown up, Straga's hands can start pushing them around so it's best to think of it that way when stacking the cars. After each throw, you have about 5 seconds to rearrange the cars before he throws the next set. The best cycle is a two-cycle, so we want to push the first three cars into the safe zone and maybe off to the left a bit, then get back in position.
On the second throw, you really only need to keep 1 car safe, the other 2 can be thrown at Straga, so even if the cars don't land perfectly, it should be alright. Once you make sure that 4 will be safe, get out of Chaos Form and pick up the closest car, enter Q-mode, and throw it at his body. Using Focus or no aiming will sometimes work, but there are some animations Straga can do that will cause these throws to miss. Be careful not to throw the second car too early, wait until his left hand comes down to brace himself before throwing the second car, any earlier and he'll be immune. When he's falling down, we want to jump where his face will be as he land, this accomplishes two things; we skip getting hit and a Flipsaw (hold LMB in the air) will deal the full damage for the round. If you land but he hasn't taken enough damage, it means you used Flipsaw too early, you should be able to Sword Cancel and deal the rest of the damage.
When he gets back up, he has another brief invincibility phase. Make your way to your next car, but wait to throw it until he starts to raise his arms. It's possible to throw it when his hands are in a neutral position in front, but the window for this is small. After the first hit, repeat the same thing you did with the second car, waiting for his left hand to reach the concrete before throwing, then get in position to Flipsaw his face again. The third round should go exactly as the previous, although instead of Flipsaw, you'll want to mash the Action (E) key while near his face to trigger the ending cutscene for the Prologue. We generally split when War gets slapped or at the end of the cutscene as it goes into the Charred Council cutscene.
Charred Council
Hold D and mash Alt to make your way to the right towards your sword. Head up the stairs to take it. While in the animation, hold Focus and mash dash backwards to start going back down the stairs to the next trigger. One thing to note is that the stairs will eat your dashes, this is true with all slopes in the game when Sword Dashing. To get around it, let go of LMB for one dash cycle, which makes War smoothly move down the slope, then hold LMB again and continue as normal, whatever slope you're on will no longer stop your dashes. The bottom of the stairs has another short cutscene, hold S during this to turn around when you get control, then let go of S and start holding Focus. Once the camera pans around, hold S again and Sword Dash straight back until the escape cutscene. The reason you want to let go of S while you activate Focus is that you will move to the side a little while the camera swings around, which will break your alignment or, if you started Sword Dashing early, make you dash the wrong way.
Hotel and Crossroads
Parking Garage
During the cutscene introducing the area, move your mouse left slowly and tap dash forward. During the fade in, but before you get character control, it'll spin the camera and line you up with the vines to climb. Once you make it up, dash off to the right and toward a black SUV near the wall. This will be used for the carglitch, but needs one hit of damage to make it change models when thrown, so swing your sword and use the action button for the sword cancel. The next destination is the pillar on the right, in front of the ramp. Make your way to the right side of it, lining up right in the middle and facing south. Tap S twice to create enough space for the carglitch, then jump and throw the SUV. If you look behind War's feet, there's a tire mark texture you can try to use for spacing, put the back of War's feet barely in front of it and you should be good.
If you do the throw and it doesn't stick, you were too far away. If it explodes or doesn't throw, too close. If it bounces off unharmed, you didn't hit it with you sword. As with the first carglitch, it's best not to throw it from the full jump height since it makes getting onto it difficult. To get on top of your platform, jump back and to the right to get on the railing of the ramp. Back up until you have the necessary height, then jump onto the SUV and jump onto the second story and dash to the elevator. If your car is a little low, you'll find that the AirBlock no longer works (it requires the counter move you have in prologue), but you can do sword swings in midair to get the extra height you need.
Pillar Jump
Jump to the right after you open the elevator to grab the vines, then jump up and right to go into the next room. Dashing forward, go to the broken pillar and double jump on top of it. Swinging your camera around and looking up, you'll see a broken balcony above, to get up you'll need to jump up in place, then hold forward and double jump at the ledge, War should grab it as long as you didn't move under it. This trick isn't very difficult, but if you miss jumping onto the pillar the first time, the yellow enemy can start harassing War and knocking you off the pillar. Once you make it up, though, dash to the end of the room and jump onto the vines. Do two jumps up, two to the right, then hold up right to get enough height to jump right and make it onto the next wall. Jump up to get up and dash forward into the next fight.
Furniture Fight
This fight is broken into two parts. The first is to kill 10 zombies, at which point a big blue enemy will drop in and you have to kill it to progress. War's sword is exceptionally weak, to the point where throwing the tables and chairs in the room does vastly more damage to the big enemy. For this reason, avoid breaking any of the furniture on the right side of the room, since that's where you'll be teleported to for the second part.
Dash in toward the group at the opposite side of the room, then use sword canceling to take out all of the zombies. Which ones get up and how they move is random, so there's not a perfect strategy other than trying not to break your furniture-ammo. Once you kill 10, a cutscene starts after a few seconds, dropping in the new enemy. Dash left and mash action to pick up and throw the tables. When you make it to the left side of your area, head back slightly and throw the piano, then loop back to the right and throw the remaining tables. Chairs also do decent damage, the advantage to tables is that it's a guaranteed stagger on a direct hit and there's one attack to hope to interrupt. Once you've thrown most everything, he should either die or fall into a stunned state, at which point it's safe to kill him with your sword. After it's killed, head to the right to the barrier while you wait for it to drop.
Sword dash right once it's down, then navigate this hallway and jump up the stairs. A trick for setting up sword dashing in the next section is to hold Focus as soon as you jump up the broken stairs, walk to the right past the wall partition, then dash backwards to the far wall before dashing left. War will lock onto a ghoul, but holding left will still give you good dashes. Stay locked on and alternate to backdashes when necessary, switching between the two angles to get around the next corner and across the room to load the next cutscene.
Crossroads
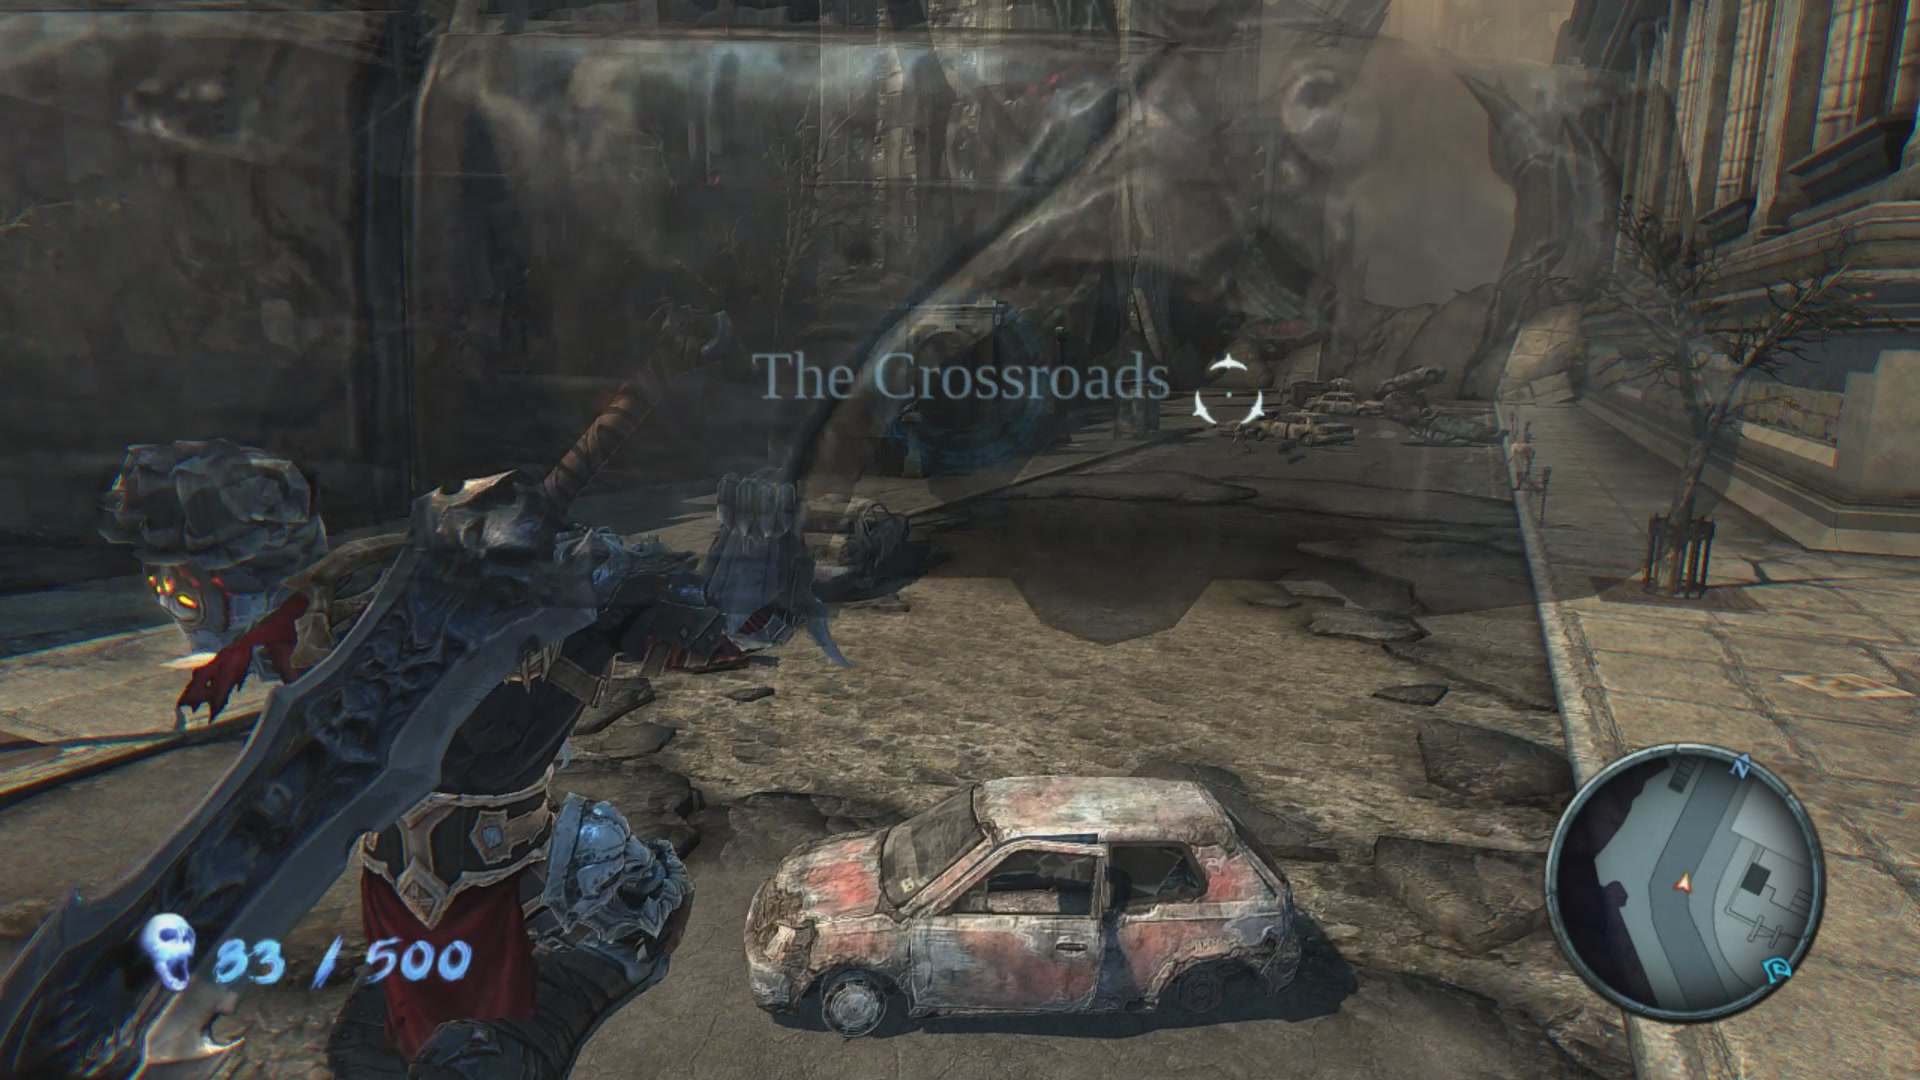
This area has a long history and is the first point where strategies greatly differ based on the runner's skill level. The point of this zone is to collect 500 souls and meet with Vulgrim to get an item to progress. There's a hidden chest with 500 souls that appears when one destroys all 6 fire hydrants here, which is our goal. First start holding forward and left and dashing once you gain control, heading toward the gray sedan in the street. Pick it up and look to the right (North) while jumping. At the T-junction, the corner of the far sidewalk has a fire hydrant just out of view. Luckily, this specific car explodes when thrown and can hit it from a distance. The length of sidewalk to the left of the hydrant and up to where the shadow starts will work for destroying the hydrant. It's necessary to throw it out of a jump, not only for the angle, but so that you don't target a ghoul wandering about in front. You'll also want to pull the camera down and to the right as you go into Q-mode, this also gives you a larger area to aim for without targeting a zombie. You can't throw it directly at the hydrant or very far to the right or the car hits the other car piles and explodes.
If you see water shoot up from near your explosion, you know it worked and you can sword dash to the East side of the room off of a ghoul. There's one hydrant on your left before you cross the street, then one near the corner of the sidewalk. Head down this street for two more hydrants on either side of the street and then loop back for the last one on the start of the curb in front of the hotel. Once you've broken all of them, a short cutscene reveals the chest. Open it and head to Vulgrim to get the Horn. Once out of the cutscene, as soon as the text pops up on the screen, open your inventory and equip the horn, using it as soon as you exit. You don't need to get very close to the Golem for it to activate, so don't dash from Vulgrim or anything. Once it's gone, head through the doors and into the Library (?). Make your way left and up the stairs, you can do 4 sword dashes to the right to line up with the entrance to the next room. Drop down, jump over the water and dash to the vines. You may have to dodge the yellow enemy's attack, but go up the vines and continue through the hallways and open the two sets of double doors, revealing the Scalding Gallows.
Dash straight ahead to get down the stairs, then turn around and Sword Dash straight back (don't forget to let go of LMB for one dash if you get caught). You'll end up locking onto an enemy and needing to readjust which direction you dash, but you should be able to make it out of the building and head for the center of the map.
General Fight
When the cutscene ends, hold S until War turns around, then blow the Horn to push the General back. The General has three phases and four attacks. Phases one and three have him attacking, here's what he can do:
- Side Swing: A quick side swing that knocks War back slightly. Short windup, but you can use the Horn to knock him out of it or double jump and do a sword flip to dodge it. Can be blocked.
- Axe Slam: Long windup with a red glow that hits all around the General and knocks War back a long way. Can't be blocked, but you can use the horn or jump over the hitbox with the sword flip.
- Block: He blocks all damage, signified by a white ring when you hit rather than blood pouring out. The Horn won't knock him down. Jump in the air and hold LMB to break him out of this. Instant animation, so it throws off the fight timing if he does it.
- Spin to win: Guaranteed attack at the start of the third phase, but he can start it again if you're too far away. Immune to all damage while in the animation. Can hold block to block, just be careful of a hit at the very end of it for no reason.
The first phase can be cheesed by immediately knocking him down at the start of the fight, then dashing to him and Sword Canceling. 14 attacks deals enough damage to go to phase 2, so keep an eye on your combo meter since you can stunlock him forever if you want. Phase 2 consists of 2 rounds of summoned minions, we want to group them up and use Blade Geyser to kill each wave in one hit. There's a lot of patterns and factors for which one he uses, it basically ends up being random. While they are summoning, use Sword Canceling to push them together (at least 3) and wait to see if the 4th approaches. If it does, hit all of them with a Blade Geyser and see what the next pattern is. If it runs or stays, hit your 3 and chase down the last one. Same idea for the second wave, with the additional goals of not being too near the wall and being somewhat near the General. The barrier counts as a hittable object and your Sword canceling will be much slower if you're hitting it along with the General in phase 3.
The start of phase 3 is holding block until the General stops spinning (if you're far he'll do multiple spins), at which point you Sword Cancel him to death. You should see 2 of the first 3 attacks listed above. Basically, when you see him start something, just double jump and time your sword flip to keep attacking. After the second attack, he should get the prompt to be killed and you won't need to dodge anymore attacks. It's faster to kill him normally than use the prompt.
Once the cutscene is over, dash forward and start the puzzle. Sword Dash to the right and complete it with the second statue to make Samael appear.
Vulgrim
After the cutscene, dash forward to the corner of Samael's platform and double jump out to Vulgrim's house. You'll get a couple of popups during the flight, remember to keep holding Spacebar until you're done with the flight. Once you land, jump to Vulgrim and activate his cutscene. Hit shift to go to the second page, scroll down once, and purchase the Meteor Strike, which is War's midair dash. If you got unlucky with double 3-minion spawns in the General fight, you'll need to open the chest in the house to get the 250 required souls. Once you've bought the item, exit the shop and quickly enter the menu to do a manual save, this will be the first savewarp.
Choking Grounds
Wrong Warps
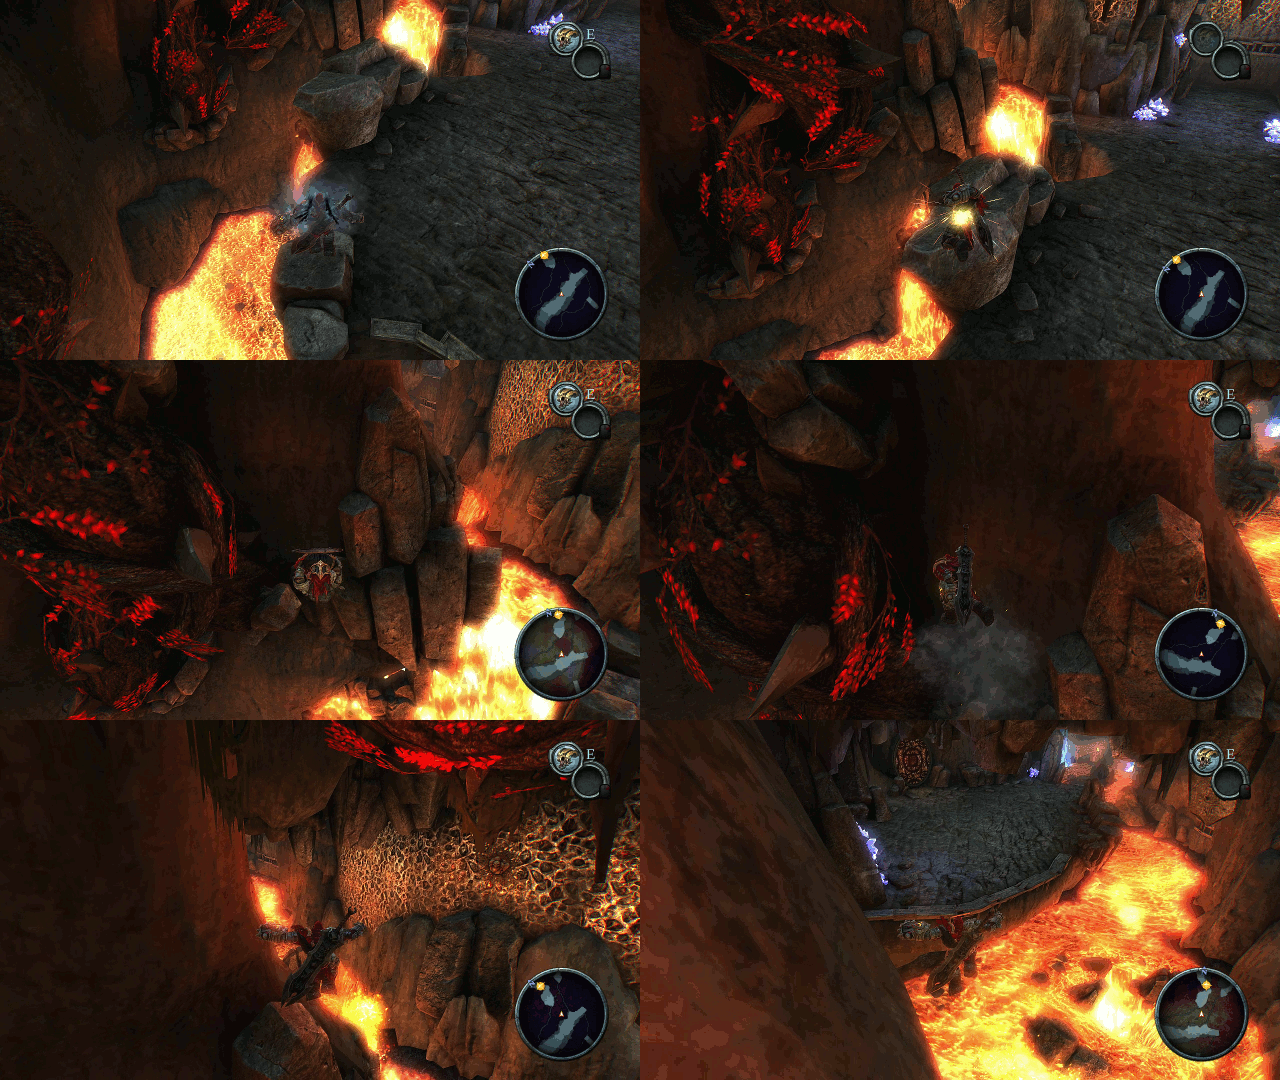
Load your manual save file, you'll get teleported to the start of the room and trigger a cutscene. From there dash forward and jump at the blue orb. You can delay the wings coming out by releasing space after the double jump. If you use your wings as you enter the blue orb, you fly up really high, costing time from slower movement speed and the crater you make from landing. Delaying the wings until you're nearly past the orb will reduce the boost you get, putting you very neatly onto the platform with no big landing. Dash forward and do the same on the second blue orb. Once you cross, dash past the ghoul, then turn and backdash off of it 6 times, then to the right into the cave. As you make your way down via the minimap, remember to release LMB if your dash is getting eaten. The smoothing effect lasts until you change directions, so optimizing your angle is something to practice.
When you get to the bottom, jump up the blue orb and onto the rocks on the left of the next platform. Jump from those onto the next set of rocks, then jump left onto an invisible platform against the wall. Run left to go up the slope, then press space and D at the same time to jump with full side momentum to make it onto the rock outcrop next to you. This lets you turn the corner and jump to the next platform. Dash forward here until the glowing crystals and spire. Single jump on to the crystals, then double jump onto the spire and look out toward the lava. Double jump forward and slightly to the right, rubbing on the ceiling before falling into the lava. The flag for being in the Choking Grounds extends through the ground here. When you respawn, you should appear above the cave in the next zone, The Choking Grounds. If not, try adjusting your angle or using a sword swing to extend how long you're near the ceiling, for some reason the Warmastered Edition can take longer to register flags like respawn points.
- When you hit the lava, make sure to hit Caps Lock and use your life potion with 2. War only has one bottle during this run and we need to empty it so we can use it for Chaos Form later. In a normal run, this will be the only place you take damage (only guaranteed place, at least).
Choking Grounds
This area is the first place where people start getting stuck on the speedrun route. There's a couple of minutes of precise jumping that force a reload if messed up.
