Difference between revisions of "Test DS Capture page"
From SDA Knowledge Base
(→Using the capture software) |
(→Using the capture software) |
||
| Line 35: | Line 35: | ||
=== Using the capture software === | === Using the capture software === | ||
| − | Open the capture software | + | [[image:DSCapturesoftware.JPG | frame | right | DS Recording Software]]Open the capture software. Click Video settings. In the drop down menu, a list of all of the codecs that are installed on your computer will appear. You need to select a [https://kb.speeddemosarchive.com/Lossless_Codecs_Comparison lossless codec] from the list. Under FPS, select 30 or 60 depending on the game. Select the screens to be recorded. If there is gameplay on both screens (example: Contra 4) then both screens must be recorded. Click OK. Click Audio settings. Select the audio input that your line in jack uses (example: Realtek Audio input). Click OK. When you are ready start recording. The recording will be an AVI file that is created in the same folder as the capture software. Make sure that the location on your computer that you are running your capture software from has enough hard drive space for very large file size recordings. A recording will be well over a gigabyte within a few minutes. |
| − | Click Video settings. In the drop down menu, a list of all of the codecs that are installed on your computer will appear. You need to select a [https://kb.speeddemosarchive.com/Lossless_Codecs_Comparison lossless codec] from the list. Under FPS, select 30 or 60 depending on the game. Select the screens to be recorded. If there is gameplay on both screens (example: Contra 4) then both screens must be recorded. Click OK. Click Audio settings. Select the audio input that your line in jack uses (example: Realtek Audio input). Click OK. When you are ready start recording. The recording will be an AVI file that is created in the same folder as the capture software. Make sure that the location on your computer that you are running your capture software from has enough hard drive space for very large file size recordings. A recording will be well over a gigabyte within a few minutes. | + | |
| − | We prefer that you start recording your game play at the DS/3DS power on screen before the game is loaded. | + | We prefer that you start recording your game play at the DS/3DS power on screen before the game is loaded. |
Revision as of 18:11, 19 May 2013
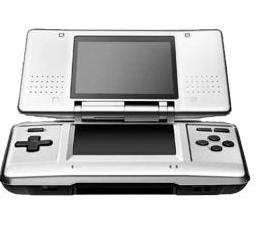
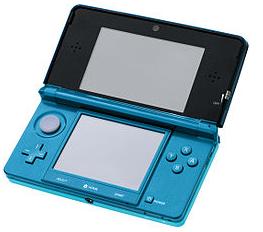
Unlike previous handheld systems, Nintendo hasn't released an add-on that allows you to play Nintendo DS or 3DS games on your television like they did for the Game Boy And Game Boy Advance. An SDA forum member, Loopy, developed a method of capturing video footage from the Nintendo DS and 3DS. The method involves installing a small capture board into your handheld console that allows you to play the DS or 3DS normally, but it will simultaneously send a video signal over USB.
The Nintendo DS and Nintendo 3DS do not have a video out option which makes recording video footage quite difficult. To get a good recording of video footage you will need to install a modification that allows for video out.
Contents
Capturing Video
You will need to get your handheld system modified to include the capture board. Modifications are available for both the Nintendo DS and 3DS. You have the option of either sending in your system to be modified or purchasing a pre-modified system.
Website for the Nintendo DS modification
Website for the Nintendo 3DS modification
The prices are very reasonable. The modification for the 3DS is more complex and costs more than the DS modification. If you plan on speedrunning games on the DS and 3DS it may be worth the investment as the 3DS is backwards compatible with DS games. What the modification does is that it will send a video signal over a USB cable. Plug the cable into the computer and open up the DS or 3DS capture software and you can record footage. You will need to use the capture software provided on the website. Other capture software will not work.
Capturing sound
To record audio you'll need to plug in a stereo cable that has 3.5 mm male plug on both sides. You'll be plugging one end of the cable into the head phone jack and the other end of the cable to the line in jack. If you have a desktop computer, the line in jack is usually the blue audio plug in the back.
Using the capture software
Get the capture driver software installed
After you've got your handheld modified you'll need to get the driver installed.
DS Driver installation instructions
3DS driver installation instructions
Download the capture software
After the driver is installed, you can download the capture software by clicking on the Software link on the page below:
DS Download page
3DS Download page
Using the capture software
Open the capture software. Click Video settings. In the drop down menu, a list of all of the codecs that are installed on your computer will appear. You need to select a lossless codec from the list. Under FPS, select 30 or 60 depending on the game. Select the screens to be recorded. If there is gameplay on both screens (example: Contra 4) then both screens must be recorded. Click OK. Click Audio settings. Select the audio input that your line in jack uses (example: Realtek Audio input). Click OK. When you are ready start recording. The recording will be an AVI file that is created in the same folder as the capture software. Make sure that the location on your computer that you are running your capture software from has enough hard drive space for very large file size recordings. A recording will be well over a gigabyte within a few minutes.We prefer that you start recording your game play at the DS/3DS power on screen before the game is loaded.


