Difference between revisions of "Grand Theft Auto: San Andreas/Missions"
From SDA Knowledge Base
(→Ryder) |
(→Safe Parking) |
||
| (111 intermediate revisions by 4 users not shown) | |||
| Line 1: | Line 1: | ||
This page should contain facts about missions, how specific missions work, but not necessarily how to do them in a certain category. Questions like "What triggers X?" or "Is Y on a timer?" should be answered here. | This page should contain facts about missions, how specific missions work, but not necessarily how to do them in a certain category. Questions like "What triggers X?" or "Is Y on a timer?" should be answered here. | ||
| + | |||
| + | Interesting subpages: | ||
| + | * [[Grand Theft Auto: San Andreas/Missions/Chains|Mission Chains]] | ||
| + | * [[Grand Theft Auto: San Andreas/Missions/Weapons|Weapons given or removed during missions]] | ||
| + | * [[Grand Theft Auto: San Andreas/Missions/Dupes|Specific Dupes]] | ||
=Los Santos= | =Los Santos= | ||
| Line 9: | Line 14: | ||
Why did you blow up Ryder's car? | Why did you blow up Ryder's car? | ||
| − | Failing the mission makes 30s worth of cutscene in front of the pizza place that is the tutorial for eating | + | Failing the mission makes 30s worth of cutscene in front of the pizza place that is the tutorial for eating skippable. Since you can easily blow up Ryder's car, this mission can be failed easily. |
==Drive-Thru== | ==Drive-Thru== | ||
| Line 15: | Line 20: | ||
==Drive-By== | ==Drive-By== | ||
| − | It seems that the Pay&Spray is completely scripted and is needed for the Mission End Marker to appear. After you were in the Pay&Spray, you can even get police stars again and still finish the mission. | + | * To make sure that the second group of enemies spawns, you should look away from it after killing the first group. |
| + | * It seems that the Pay&Spray is completely scripted and is needed for the Mission End Marker to appear. After you were in the Pay&Spray, you can even get police stars again and still finish the mission. | ||
| + | |||
| + | ==Sweet's Girl== | ||
| + | {{GTASAAiAim}} | ||
| + | |||
| + | ==Life's A Beach== | ||
| + | You can skip the dancing by getting a homie into the locked van and then shooting him, so he falls out and leaves the door open for you to get in. | ||
| + | |||
| + | The homie seems to immediately leave the car after he gets in if: | ||
| + | * You have more than one gangmember recruited at this time | ||
| + | * You have told the gangmember to follow you after recruiting him (e.g. using the G button) | ||
| + | |||
| + | The getting out of the homie apparently can be delayed by a few seconds by disbanding the gang once the gangmember is starting to get into the van. Disbanding the gang makes the gangmember get out after a few seconds (even if he was in there for a while already), which apparently somehow overrides his usual getting out (or something :D). | ||
| + | |||
| + | ''Careful: Aiming at the party or shooting near the party fails the mission, so make sure you only aim and shoot at a safe position.'' | ||
| + | |||
| + | ===Skip with disbanding the gang=== | ||
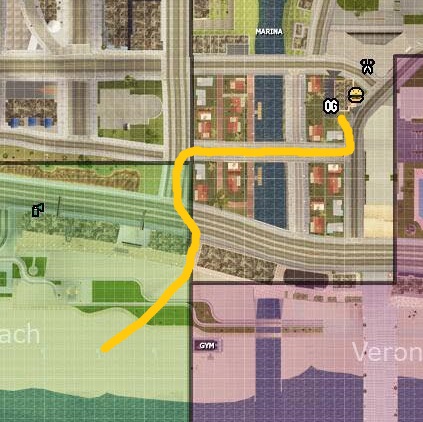
| + | [[File:GTASA LifesABeach route.jpg|thumb|right|Taking this route may make Grove member spawns more consistent]] | ||
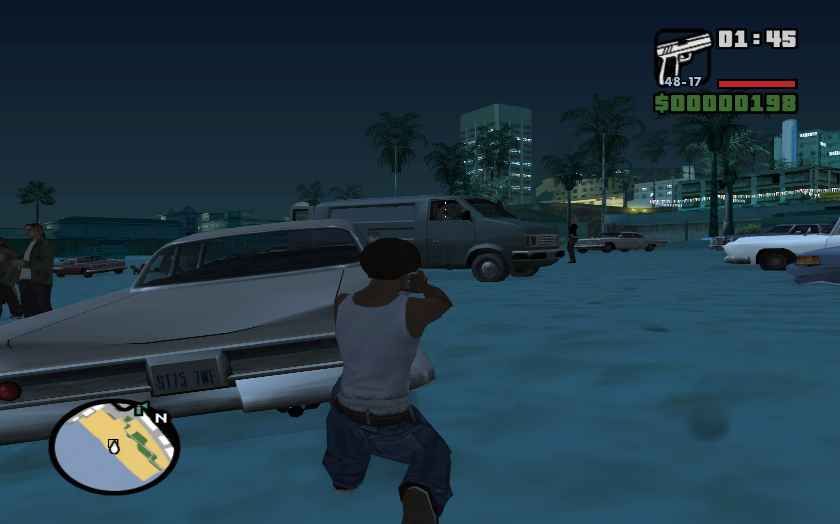
| + | [[File:GTASA_Lifes_A_Beach_Shooting_position.jpg|thumb|right|Safe shooting position (but don't aim at the party)]] | ||
| + | # Find a Grove Street gangmember, recruit him and get him to the locked van | ||
| + | # Try to get into the locked van (doesn't matter on which side) | ||
| + | # CJ won't be able to get in, but if you keep trying, the homie will eventually open the passenger side door and get in | ||
| + | # Once the homie shows any sign of opening the door, hold down either of the gang buttons (G or H by default) until CJ says "See you later homie." which means the gang is disbanded | ||
| + | #* Make sure you actually hold down the button, don't just press it shortly, it may seem like it takes a long time for CJ to react | ||
| + | #* For some the G button seems to work better, for others the H button | ||
| + | # While disbanding the gang, you move towards the water behind the parked car there and headshot the homie in the van, which should make him fall out leaving the door open | ||
| + | #* The homie will get out of the van after a few seconds, then get back in switching to the driver side. If the getting out animation has already started when you kill him, he will get out of the van, close the door and then die, so you won't get in. If you are not sure you can make it, wait for him to get back in and then shoot him when he is sitting on the driver side. | ||
| + | |||
| + | * Video: [https://www.youtube.com/watch?v=btn4IdZM34M Dance Skip Tutorial] | ||
| + | |||
| + | ===Skip without disbanding the gang=== | ||
| + | # Recruit one Grove Street gangmember (and only one), don't press any gang related key after recruiting him | ||
| + | # Get him to the locked van | ||
| + | # Try to get into the driver side of the locked van, keep trying to get in until the homie is sitting in the passenger seat and closed his door | ||
| + | # Now go to the trunk of the car that is parked towards the beach and headshot the homie from there, don't aim towards the party | ||
| + | |||
| + | ''Sometimes when you headshot the homie in the van, he will just get out, close the door and then die. It is unclear why that happens exactly. Just try the method that seems to work best for you.'' | ||
| + | |||
| + | ==OG Loc== | ||
| + | # Follow Freddy through the alleys, if you keep close he drives faster | ||
| + | # Turn left to the quick shot spot and wait for him there, shooting your SMG as he passes to set his bike on fire | ||
| + | #* If you fail the first spot, you can go to the backup spot | ||
| + | #* There are different positions to wait at the quick shot spot (on the road, on the sidewalk), important is that you face the right direction and can shoot Freddy quickly | ||
| + | #*Sometimes cars around the corner you wait get spooked and ram into you, making it harder for you to shoot Freddy | ||
| + | # After setting his bike on fire, start driving towards your next destination | ||
| + | #* Unfortunately you loose your bike after the cutscene, so you'll have to find a vehicle on the road, but drive with the bike as far as you can | ||
| + | |||
| + | {| | ||
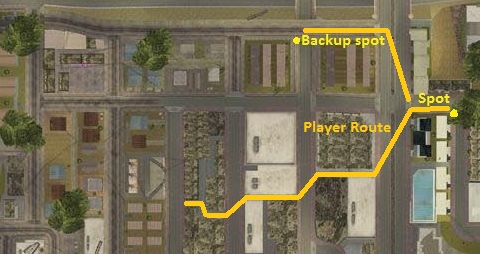
| + | |[[File:Gtasa ogloc map.jpg|thumb|Player route and positions]] | ||
| + | |[[File:Gtasa ogloc position.jpg|thumb|Position]] | ||
| + | |[[File:Gtasa ogloc backup position.jpg|thumb|Backup position]] | ||
| + | |} | ||
| + | |||
| + | * The mission sets your SMG ammo to 78 once you get on the bike (so it doesn't add an amount to what you had before, it sets it to 78). If you had more than 78 ammo before, it doesn't change it. If you already had a Tec-9, it doesn't replace it. | ||
| + | * Pushing Freddy off his bike (which you can do when you wait at the quick shot spot) crashes the game. | ||
| + | |||
| + | ==Just Business== | ||
| + | * Once you enter the building with Smoke, the game gives you a Micro-SMG (replacing any previous weapon in that slot) and adds 120 ammo to it (adding to ammo you might have had before). After the autoscroller, the game always gives you a Micro-SMG with 80 ammo (replacing any other weapon in that slot you may have picked up during the mission). | ||
| + | |||
| + | ==Doberman== | ||
| + | |||
| + | ===Safe Parking=== | ||
| + | * ''Mission start:'' There is a small despawn area beside the marker (towards the road), but it should be safe to park in the half of the marker towards the door. Parking too close towards the door may be dangerous though. You can also get on the bike during the fadeout (press key as soon as the red marker disappears), which will prevent despawning (and is also a bit faster). | ||
| + | |||
| + | {| | ||
| + | |[[File:GTASA Doberman Despawn Area.jpg|thumb|Mission Start Despawn Areas]] | ||
| + | |} | ||
| + | |||
| + | ==Burning Desire== | ||
| + | {{GTASAAiAim|Driving a car to the house will cause the Vagos defending it to be affected by the bug. If a bike is taken however it is possible to simply ignore all the enemies and live.}} | ||
| + | * You need to pick up the Molotovs in this mission to make the house vulnerable to fire, picking them up prior to the mission does not help. | ||
| + | * In the house, you have to pick up the Fire Extinguisher to trigger the cutscene with Denise after which she follows you. If you go up without there is a cutscene that tells you to get it, but even if you enter her room (you can jump over the fire), she just stands there and it doesn't trigger the cutscene after which she follows you. | ||
| + | * After getting the Fire Extinguisher, you can jump over the fire in her room and trigger the cutscene, but she won't follow you unless you put out the fires in her way. If you let her stay in her room and go out the front door, it still tells you to go back in and get the girl. | ||
| + | ** However, if you manage to push her through the first fire in front of ther room, she will follow you through the other fires. | ||
| + | * After triggering the cutscene in Denise's room (after which she follows you), the fires disappear when you go out and back into the house. But since you still have to go back up and guide the girl out of the house, it's probably not very useful. | ||
| + | |||
| + | ===Safe Parking=== | ||
| + | * ''Mission start:'' You shouldn't park directly in the marker (and possibly where the police car will spawn), but if you park a few meters away, it should be fine. The despawn area isn't as big as in Grey Imports. ([https://forum.speeddemosarchive.com/post/gta_san_andreas_official_thread__484.html#gta_san_andreas_official_thread__484 Forum]) | ||
| + | |||
| + | ==Grey Imports== | ||
| + | ===Safe Parking=== | ||
| + | * ''Mission start:'' The despawn area is pretty big. Parking on the middle of the road to the east of the marker should be fine though (on the double-line in the center). | ||
| + | |||
| + | {| | ||
| + | |[[File:GTASA GreyImports Despawn Area.jpg|thumb|Mission Start Despawn Area]] | ||
| + | |} | ||
==Home Invasion== | ==Home Invasion== | ||
| + | ===Walking Animation=== | ||
This mission has a special walking animation that makes you move slower. However, if you hold certain weapons, you don't get this slower walking. Most importantly this also affects walking speed when you carry a crate (which is the only time you would be walking anyway, since moving crouched is faster), even though CJ isn't actually holding the weapon in his hands. | This mission has a special walking animation that makes you move slower. However, if you hold certain weapons, you don't get this slower walking. Most importantly this also affects walking speed when you carry a crate (which is the only time you would be walking anyway, since moving crouched is faster), even though CJ isn't actually holding the weapon in his hands. | ||
Weapons that seem to work for this are weapons you can't sprint with, including: Baseball Bat, Shotgun, Combat Shotgun, Rifle, M4, AK, Sniper Rifle, Flame Thrower, Rocket Launchers | Weapons that seem to work for this are weapons you can't sprint with, including: Baseball Bat, Shotgun, Combat Shotgun, Rifle, M4, AK, Sniper Rifle, Flame Thrower, Rocket Launchers | ||
| + | ===Delayed Noise-Meter=== | ||
With the Shotgun in particular (and maybe other weapons like the M4 or AK, but not the Baseball Bat) there's another strange behaviour where the noise-meter doesn't fill as fast. Normally if you just run, it fills almost instantly, but while holding the shotgun (again, also when carrying a crate) you can run for about a second before the noise-meter reacts. It fills about 2/3 when you run too long and fills completely after about 0.5 seconds. Important is that you don't press the walk button at all when doing this. Changing between walking and running seems to trigger the noise-meter a lot faster. Just run normally by pressing the move forward button, let go of it after a second, then run again. | With the Shotgun in particular (and maybe other weapons like the M4 or AK, but not the Baseball Bat) there's another strange behaviour where the noise-meter doesn't fill as fast. Normally if you just run, it fills almost instantly, but while holding the shotgun (again, also when carrying a crate) you can run for about a second before the noise-meter reacts. It fills about 2/3 when you run too long and fills completely after about 0.5 seconds. Important is that you don't press the walk button at all when doing this. Changing between walking and running seems to trigger the noise-meter a lot faster. Just run normally by pressing the move forward button, let go of it after a second, then run again. | ||
| Line 28: | Line 121: | ||
Even with the delayed noise-meter while having the shotgun selected, the noise-meter seems to fill faster if it is already filled a bit, so be careful with that. | Even with the delayed noise-meter while having the shotgun selected, the noise-meter seems to fill faster if it is already filled a bit, so be careful with that. | ||
| − | + | ===Sliding=== | |
| + | You can slide to the crates the normal way, which saves about 1 second for each of the further away crates. You can also slide while holding a crate if you start the slide without fulling crouching. Moving while being crouched will drop the crate, so you have to do the move/sprint part of starting the slide before you are fully crouched. If you want to stop sliding, it's better to unaim than to stop moving, because aiming after the slide will drop the crate, which can be a problem when entering the door marker for which you have to stop sliding. | ||
* [http://www.youtube.com/watch?v=lHkqIWX48Ms Video: Comparison between different moving speeds in this mission] | * [http://www.youtube.com/watch?v=lHkqIWX48Ms Video: Comparison between different moving speeds in this mission] | ||
* [http://www.youtube.com/watch?v=YJ5RB7kzWt0 Video: Demonstration of running with the shotgun] | * [http://www.youtube.com/watch?v=YJ5RB7kzWt0 Video: Demonstration of running with the shotgun] | ||
| + | |||
| + | ==Los Sepulcros== | ||
| + | At the start of the mission, if you recruit both gang members before Sweet closes the door of the car, the mission softlocks and you won't be able to get into the car at all. If that happens you can blow up the car and try again. To avoid this, wait until Sweet closed the door to recruit the second gangmember. Another way is to aim at Sweet for a few seconds directly after the fade (usually he will take his arms up, down, then up again, then you can stop aiming at him), which will make him walk away and getting the gangmembers and CJ in the car is enough to continue. | ||
==The Green Sabre== | ==The Green Sabre== | ||
Enemies you kill before driving into the marker where you have to save Sweet, just respawn. The first van spawns once you killed 3 enemies, the second van once you killed 6 enemies and the car once you killed 9 enemies. The mission is completed once you killed all enemies. | Enemies you kill before driving into the marker where you have to save Sweet, just respawn. The first van spawns once you killed 3 enemies, the second van once you killed 6 enemies and the car once you killed 9 enemies. The mission is completed once you killed all enemies. | ||
| + | |||
| + | ===Safe Parking=== | ||
| + | * ''Mission start:'' Vehicles seem to despawn when you park them in the marker. CJ can also sometimes get blocked by a vehicle and has to run around it before answering the phonecall, although it doesn't seem to affect the time, the cutscene always seems to be about 7.6 seconds long. Parking where the Greenwood spawns can prevent that from spawning though. | ||
| + | |||
| + | =Badlands= | ||
| + | ==Against All Odds== | ||
| + | After leaving the Betting Shop, your Wanted Level will usually be decreased after a short time, leaving you with 3 stars. This doesn't appear to happen when you run a police officer over on the way (or something like that). You can use the two bribe stars in Blueberry to get rid of two more stars, leaving you with only one that should disappear 10 seconds after picking up the last bribe. If you don't loose a star to begin with (leaving you with the initial 4), you can wait a bit after picking up the first bribe, so that another star disappears on it's own before picking up the second bribe. | ||
| + | |||
| + | As opposed to some other missions, you can't finish the mission if you regain a wanted level after loosing it. The marker is only there if you don't have a wanted level at all. | ||
=San Fierro= | =San Fierro= | ||
| + | |||
| + | ==Photo Opportunity== | ||
| + | |||
| + | * Video: [http://www.youtube.com/watch?v=w6yR4xS4SfU Safe spot to do the drop] | ||
| + | |||
| + | ==Jizzy (Cutscene)== | ||
| + | ===Safe Parking=== | ||
| + | * ''Cutscene:'' It appears there is not set despawn zone, so it should be safe to park anywhere reasonable. | ||
| + | |||
| + | ==Outrider== | ||
| + | |||
| + | The Van starts driving after you get on the Sanchez the mission gives you and arrives at the destination about 4:15 later (if you destroy the roadblocks, it might take longer if it's obstructed in some way). | ||
| + | |||
| + | The enemies at the roadblocks don't attack you (even if you get really close) unless you shoot near them. | ||
| + | |||
| + | ===Safe Parking=== | ||
| + | * ''Mission start:'' There is a huge despawn area when you start the mission. You can keep a vehicle is in the garage or apply the same trick as for [[#Doberman|Doberman]] (pressing F directly after triggering the marker, you won't actually spawn in the vehicle, but you have to start to get in during the fade). | ||
| + | |||
| + | {| | ||
| + | | [[File:GTASA Outrider Despawn Area.jpg|thumb|Despawn Area]] | ||
| + | |} | ||
==Snail Trail== | ==Snail Trail== | ||
| − | [[ | + | ''See [[Grand Theft Auto: San Andreas/Missions/Snail Trail]]'' |
| − | + | ||
| − | + | ||
| − | + | ==Ice Cold Killa== | |
| + | * Before entering the building shoot Jizzy's car with the Sniper Rifle 6 times, which will make it smoke. Then, leaving the building, you can shoot it with the Sniper one additional time to set it on fire (you can also use other weapons for that like the Silenced Pistol or an AK). | ||
| + | * If you destroy Jizzy's car before entering the building, it will be replaced with a Pizza Boy which he will take instead. | ||
| + | * There is a load trigger on the roof, around the skylight that you use to enter the building, which loads some stuff and then sets $ONMISSION=1. If you are trying to carry a phonecall through the mission, you have to enter that trigger and wait for it to be loaded while the phone is ringing. You can tell that it set $ONMISSION=1 by the camera jumping a bit, since the same section in the script also sets the camera behind CJ. | ||
| + | |||
| + | ===Safe Parking=== | ||
| + | * ''Mission start'': The mission start doesn't seem to have a despawn area, you should be safe to just park it anywhere reasonable | ||
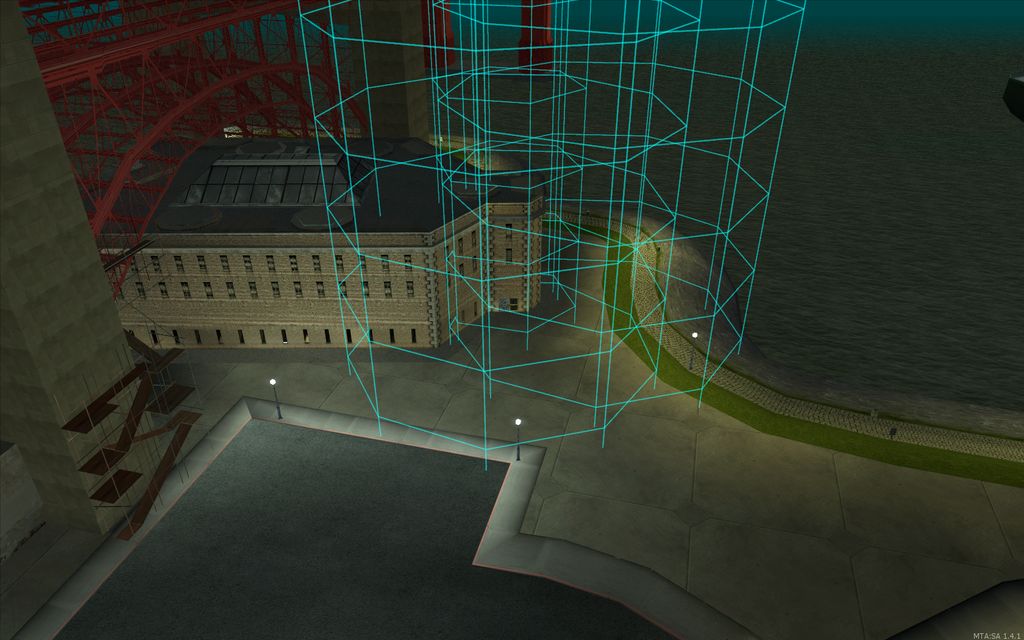
| + | * ''During the mission'': There are despawn zones at Jizzy's club that can despawn your vehicle | ||
{| | {| | ||
| − | + | | [[File:GTASA_IceColdKilla_Despawn_zones.jpg|thumb|Despawn Zones]] | |
| − | + | | [[File:GTASA IceColdKilla Load trigger.jpg|thumb|Load trigger setting $ONMISSION=1]] | |
| − | + | ||
| − | + | ||
| − | | | + | |
| − | + | ||
| − | + | ||
| − | + | ||
| − | + | ||
| − | + | ||
| − | + | ||
| − | + | ||
| − | + | ||
| − | + | ||
| − | + | ||
| − | + | ||
| − | + | ||
| − | + | ||
| − | | | + | |
| − | | | + | |
| − | | | + | |
| − | + | ||
| − | + | ||
| − | + | ||
| − | + | ||
| − | + | ||
| − | + | ||
| − | | | + | |
| − | | | + | |
| − | + | ||
| − | + | ||
| − | + | ||
| − | + | ||
| − | + | ||
| − | + | ||
| − | + | ||
| − | + | ||
| − | + | ||
| − | + | ||
| − | + | ||
| − | + | ||
| − | + | ||
| − | + | ||
| − | + | ||
| − | + | ||
| − | + | ||
| − | + | ||
| − | + | ||
| − | + | ||
| − | + | ||
|} | |} | ||
| − | + | ==Amphibious Assault== | |
| + | {{GTASAAiAim|Using a boat in this mission will trigger this bug in this mission, it is possible to avoid this by only swimming instead of stealing a boat}} | ||
| + | {{GTASA Duped Mission|Amphibious Assault}} | ||
| − | === | + | After going into the marker near the water and spawning in the water channel between the rocks, you can just climb/jump out of there, walk over the rocks to the water and swim to the ship. |
| − | * [ | + | |
| + | * Video: [http://www.youtube.com/watch?v=3jwN9A3EX50 Swimming strats] | ||
| + | * Video: [https://www.youtube.com/watch?v=2cqpgkJdHP8 Dingy strats] | ||
| + | |||
| + | ===Safe Parking=== | ||
| + | * ''Mission start'': The mission start doesn't seem to have a set despawn area, you should be safe to just park anywhere resonable (although it seems if you park it directly against the wall of the house it despawns, so just park it in the marker or something) | ||
| + | * ''During the mission'': There is a huge area where vehicles are despawned, but there might also be other effects that make certain position unsafe for parking vehicles during all of the mission (picture with safe area needed) | ||
| + | |||
| + | {| | ||
| + | | [[File:GTASA Amphibious Assault Despawn zone.jpg|thumb|Despawn Zone when entering the first marker by the parking lot]] | ||
| + | |} | ||
| + | |||
| + | ==Pier 69== | ||
| + | {{GTASAAiAim|Using a car to drive to T-Bone after the Sniping section will trigger this effect. This isn't run ending, however it can add to the difficulty if T-Bone is not killed quickly. Stealing a bike instead or simply running to T-Bone is the way around this.}} | ||
| + | * During the mission, you get a Sniper Rifle with 24 ammo (unless you already have more ammo) and a Tec9 with 300 ammo (unless you already have a weapon in the same slot with any ammo). | ||
| + | |||
| + | ===Safe Parking=== | ||
| + | * ''Mission start'': If you park the bike a few meters away from the mission start marker, it should be fine (kind of on the half of the sidewalk towards the road) | ||
| + | * ''After sniping the enemies on the roof'': Pier 69 has a huge despawn area, but there is a specific spot on the roof where you can park a bike so it won't despawn (picture needed) | ||
| + | ** Video: [http://www.youtube.com/watch?v=Ic7bO9QruOY Parking Position] | ||
| + | |||
| + | ==Toreno's Last Flight== | ||
| + | {{GTASAAiAim|Using a bike which is stored inside the San Fierro Garage to get to the helipad is a common way to get around this. You can also get on/off the bike in front of the helipad to reset the AI accuracy before doing the rest of the mission.}} | ||
| + | |||
| + | [[File:GTASA Torenos Last Flight Trigger.jpg|thumb|right|Mission Trigger (guy starts shooting RPG)]] | ||
| + | * At the helipad, if you trigger the cutscene within 4 seconds of the guy on the helipad shooting his RPG for the first time (entering the mission area), the cutscene will be 4 seconds longer. You'll know that happened when the guy shoots another 2 rockets during the cutscene. ([https://youtu.be/OxYGc4DV2lI Video]) | ||
| + | * The mission creates a pickup of 60 rockets and an AK with 120 ammo on the helipad, both of which aren't removed after the mission. However, the mission removes the RPG from the player at the end of the mission, so you want to pick up the 60 rockets after the mission ends in order to keep them. | ||
| + | |||
| + | ===Homing Rockets Strategy=== | ||
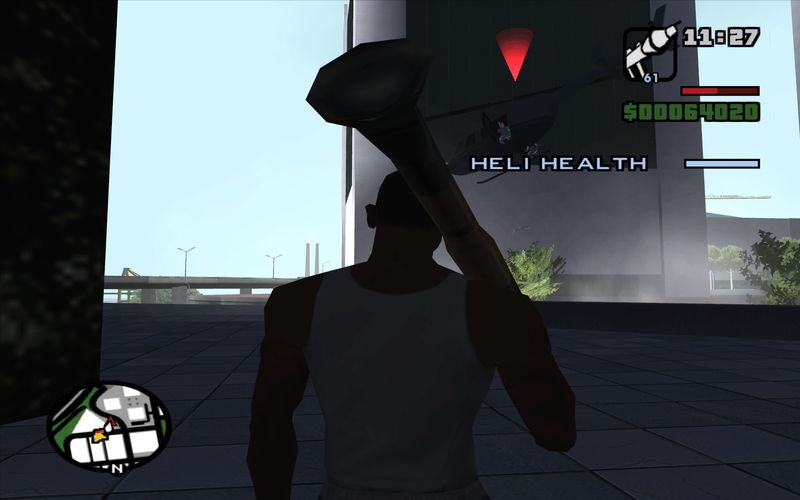
| + | You need to get Homing Rockets before the mission, then while standing where you spawn after the cutscene, you acquire the helicopter as target and shoot it down. | ||
| + | |||
| + | ===Normal Rockets Strategy=== | ||
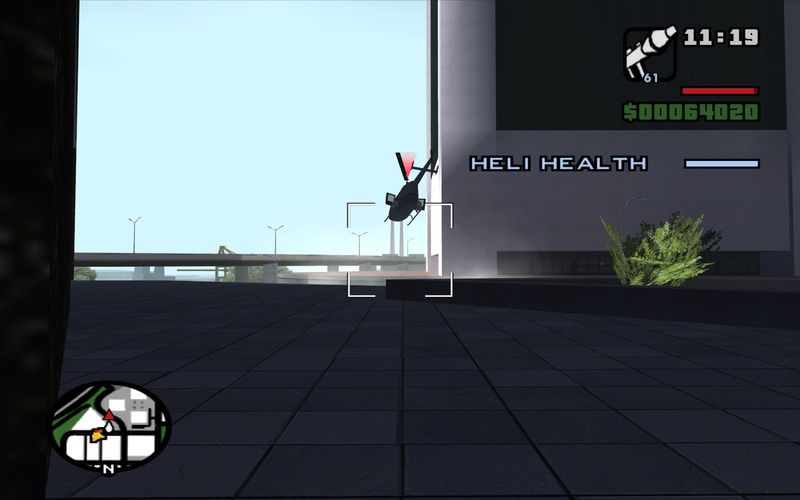
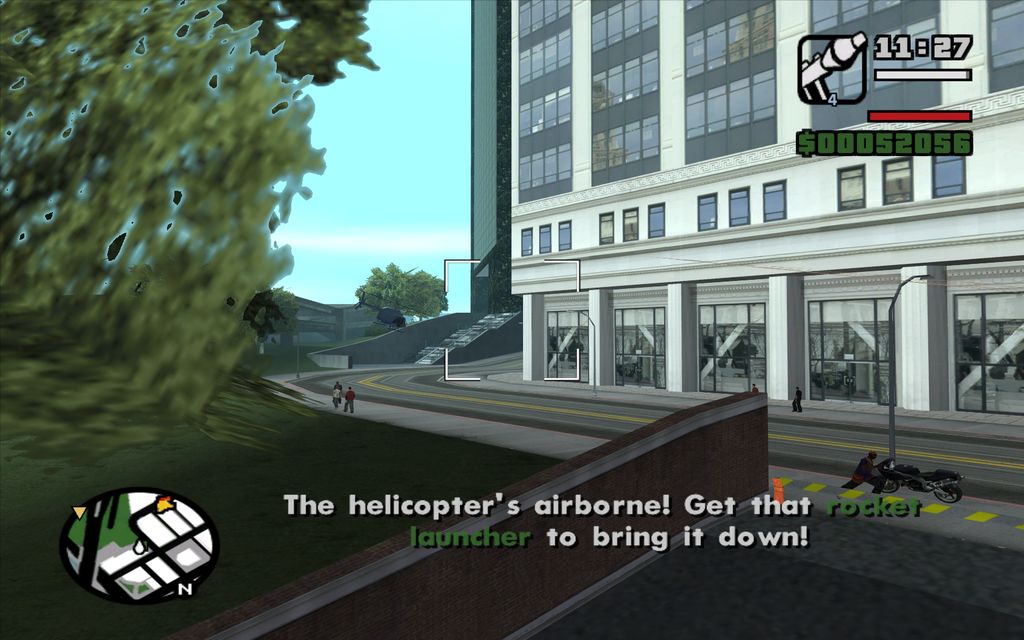
| + | If you use normal rockets to shoot down the helicopter (either by having some before or taking the ones on the helipad), you can get on the parked bike quickly and drive to where the helicopter turns left towards the highway. If you are fast, you have a few seconds to shoot it there. If you miss, you can also do a backup strat from that position, if you have plenty of rockets: Rockets always seem to explode at the same distance, as long as they don't hit anything before. So if you spam them in the direction of the helicopter's path, they will eventually damage it, even if you don't hit it directly. | ||
| + | |||
| + | {| | ||
| + | |[[File:TorenosLastFlight.jpg|thumb|Shooting position]] | ||
| + | |[[File:TorenosLastFlightBackup.jpg|thumb|Backup Strategy]] | ||
| + | |} | ||
| + | |||
| + | ===Normal Rockets Strategy from Helipad=== | ||
| + | You can also shoot the helicopter right from the helipad, from where you are standing after the cutscene. Aim so the rocket will just go past the building (towards the stairs), at roughly the height the helicopter will take and then shoot as soon as the helicopter "touches" the wall (a bit after it turned). ([https://www.youtube.com/watch?v=-EbrbHq5rpg Video]) | ||
| + | |||
| + | {| | ||
| + | |[[File:GTASA Torenos Last Flight Helipad shot.jpg|thumb|Shooting Position/Moment]] | ||
| + | |} | ||
| + | |||
| + | ===Safe Parking=== | ||
| + | * ''Mission start'': The mission start doesn't seem to have a set despawn area, you should be safe to just park anywhere resonable. Also it doesn't seem to matter at all when you obstruct CJ for the cutscene. Whether you don't obstruct him at all, park a bike where he spawns or even a car where he is supposed to go, the cutscene seems always skipable after 4.6 seconds. | ||
=Las Venturas= | =Las Venturas= | ||
| + | ==Stowaway== | ||
| + | You need a parachute to finish the mission. There are two different basic ways, either already having a parachute (e.g. from N.O.E.) or doing the intended way and killing the guy on the plane with the parachute and picking that up. | ||
| + | |||
| + | When you have a parachute, you have different ways of blowing up the plane: | ||
| + | |||
| + | [[File:GTASA Stowaway Satchel.jpg|thumb|Satchel Position when not killing parachute guy]] | ||
| + | * Place the satchel the mission gives you and jump out of the plane (without exploding it yourself): | ||
| + | ** When you killed the parachute guy, you can just place the satchel anywhere (intended strats). | ||
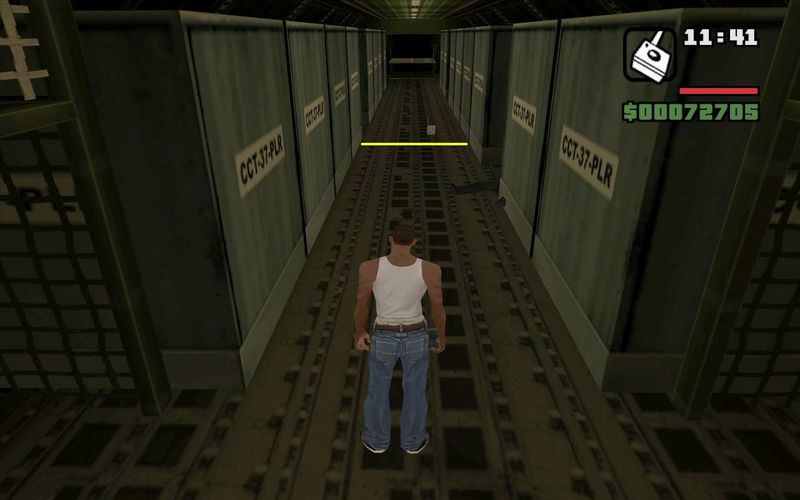
| + | ** When you didn't kill the parachute guy, it appears that you have to place the satchel close enough to his position for the mission to not fail when you jump out. If the parachute guy didn't move from his starting position (which he doesn't unless you get close to him), then it's usually enough to place the satchel at least at the first space between the containers on the left (image). The other enemies don't seem to matter in regards to the mission failing or not. (The correct satchel position seems to be relative to the parachute guy, because if he is near the cockpit (at the other end from where you enter it) and you place the satchel there, the mission passes when you jump out, but if you place the satchel at the same place but the parachute guy followed you to the ramp (thus far away from the cockpit), the mission fails when you jump out.) | ||
| + | * Use a gun to blow up the plane just before jumping out of the plane: | ||
| + | ** Stand on the ramp just by the edge and shoot, then immediately jump off (you have to be fast jumping off after shooting) | ||
| + | ** Slide with a gun you can shoot while sliding (e.g. AK on Hitman skill) and shoot the ramp just before sliding off | ||
| + | * Using explosives like exploding the satchel or shooting rockets doesn't seem to work. | ||
| + | |||
| + | ''Important:'' If you died while having a parachute and [[Grand_Theft_Auto:_San_Andreas/Game_Mechanics_and_Glitches/Duping#Note_on_Blood_Bowl_.26_Bike_School|kept all your stuff because of the Blood Bowl duping setup]], then the parachute won't actually open properly (despite still being equipped), even if you pick up another parachute on top of that. You can save/reload to fix the parachute. | ||
| + | |||
==Fender Ketchup== | ==Fender Ketchup== | ||
You have to scare the guy by driving around. The fastest way appears to be doing left handbrake turns. You need to reach a certain speed, then press the handbrake and turn left (turning right doesn't work for some reason). You can do this on the parking lot where the mission starts/ends and just do handbrake U-Turns. If you use the whole space, you just gain enough speed for it. | You have to scare the guy by driving around. The fastest way appears to be doing left handbrake turns. You need to reach a certain speed, then press the handbrake and turn left (turning right doesn't work for some reason). You can do this on the parking lot where the mission starts/ends and just do handbrake U-Turns. If you use the whole space, you just gain enough speed for it. | ||
| Line 133: | Line 282: | ||
* [http://www.youtube.com/watch?v=CKJmiwssjsI Video: Explanation of a specific strat for this mission] | * [http://www.youtube.com/watch?v=CKJmiwssjsI Video: Explanation of a specific strat for this mission] | ||
* [http://www.youtube.com/watch?v=pjPNRsbOJ7A Video: Possible safer Rocket Strat for the beginning] | * [http://www.youtube.com/watch?v=pjPNRsbOJ7A Video: Possible safer Rocket Strat for the beginning] | ||
| + | |||
| + | ==Don Peyote== | ||
| + | At the snake farm, you need to kill all four farmers, or else they come after you once you activate the marker at the casino, which triggers a cutscene and apparently has a chance to softlock the game. | ||
| + | |||
| + | ==The Meat Business== | ||
| + | ===Safe Parking=== | ||
| + | * ''Mission start:'' There is no despawn zone, however parking where Rosenberg will spawn does remove the vehicle. | ||
| + | * ''During the mission:'' You have to park your vehicle inside the compound of the Meat Factory in order to keep it when you get back outside. In that case, the game neatly spawns a vehicle of the same model for you. For some reason that vehicle also seems to be immune to the despawn zone at the end of the mission (although not to the removal of the vehicle by the mission script, read the next section). | ||
| + | * ''Mission end:'' The mission tracks what vehicle you were last in and removes that at the end of the mission. This is probably because it creates a new vehicle of the same model as you were driving outside when you leave the Meat Factory. However it keeps tracking it throughout the mission, so also on the way back. If you want to keep the vehicle you are driving, you have to switch into another "throwaway" vehicle and then trigger the mission end marker. There is also a despawn zone around the casino: | ||
| + | ** You can park the vehicle you want to keep ''inside'' the despawn zone if it's still the same as the one from outside the Meat Factory. | ||
| + | ** You have to park the vehicle you want to keep ''outside'' the despawn zone if you switched to it after leaving the Meat Factory (which includes not parking the vehicle inside the compound of the Meat Factory before entering the building, which means it doesn't spawn). | ||
| + | {| | ||
| + | | [[File:GTASA Meat Business Rosenberg spawn.jpg|thumb|Rosenberg spawn at the start of the mission]] | ||
| + | | [[File:GTASA Meat Business Parking zone.jpg|thumb|Parking zone at the Meat Factory]] | ||
| + | | [[File:GTASA Meat Business Despawn zone.jpg|thumb|Despawn zone at the end of the mission]] | ||
| + | |} | ||
| + | |||
| + | ==Madd Dogg== | ||
| + | [[File:GTASA MaddDogg Landing Trigger.jpg|thumb|right|Landing Trigger]]After driving the Truck into the marker and skipping the cutscene, Madd Dogg will walk around for a randomly chosen amount of time before jumping, either 16, 18, 20, 22 or 24 seconds (stored in 0xA51334 at the start of the mission). The path he takes is always the same, the randomness in the jumping position comes from the randomized time until he jumps as mentioned before. After about 10 seconds of walking around Madd Dogg will say a random line, indicating that he may jump soon. | ||
| + | |||
| + | Madd Dogg has to hit a trigger relative to the Walton (truck) to survive the fall. | ||
| + | |||
| + | ==Misappropriation== | ||
| + | |||
| + | ===If you fail to kill him before he escapes=== | ||
| + | Please note that these are very rough numbers. If the target gets into his heli, the chase takes about 2:00-2:30 (depending on how close you keep to him apparently) to the helipad where he lands and you can shoot him. From there it takes about 35s to landing in front of Caligula's Casino with the helicopter. So given the any% route, it takes about 3 minutes. If you manage to kill him before he escapes, it takes about 1:45 to landing in front of Caligula's Casino, so that is about 1:15 faster. If you die, it takes about 1 minute back to the mission start marker, with trip skip you get to the mission pretty fast, but you still need some time to actually kill the target (also you need to get a weapon for that). | ||
| + | |||
| + | ==Black Project== | ||
| + | * [http://www.youtube.com/watch?v=Axjx-IvALkA Video: Black Project Tutorial] | ||
| + | |||
| + | ==High Noon== | ||
| + | Turn the car around so that you block it long enough to be able to get in the passenger side. Keep Sprint or Jump held when entering the car to kill Pulaski. This exploits the bug that keeping the door open while entering a car from the passenger side kills the driver. | ||
| + | |||
| + | ==Green Goo== | ||
| + | {{GTASAAiAim|It is common to arrive at the start of the mission in a Buffalo, meaning the AIs will be very accurate with their M4s. There is however a PCJ Spawn and the end of the runway which can be used to reset the AI PRIOR to starting the mission. Because you cannot exit the Jetpack during the mission it must be done before.}} | ||
| + | |||
| + | ==Saint Mark's Bistro== | ||
| + | This mission gives you and equips a Pistol with 60 ammo when you spawn in the restaurant, replacing any other weapon in the same slot (Silenced Pistol or Desert Eagle). | ||
| + | |||
| + | [[File:GTASA SaintMarks Health Trigger.jpg|thumb|Forelli Health Trigger]]Forelli (the guy you have to kill) has 1000 health at first, until he reaches a trigger shortly before the kitchen, where it sets Forellis health to 100 (unless it is already below 100). He doesn't get stunned by shots and wields dual Micro SMGs (Hitman skill), making him potentially dangerous. He also is immune to headshots. Sometimes he will stay just downstairs of the room you spawn in, which means he still has 1000 health, making it more difficult to kill him compared to him running to the end (unless you have a Minigun of course). ''(This info is partly from the mission script, so hopefully I interpreted that correctly.)'' | ||
| + | |||
| + | When he waits and shoots you in the first room, there sometimes seems to be no way to make him move again. Based on tests, it seems to take 40 shots with the Pistol to kill him. It is unclear what makes him stay there. | ||
| + | |||
| + | ===Safe Parking=== | ||
| + | * ''Mission start:'' There is a big despawn area (radius 120 units) around the Casino that only allows parking of vehicles across the street. | ||
| + | |||
| + | {| | ||
| + | |[[File:GTASA SaintMarks Despawn Area.jpg|thumb|Mission Start Despawn Area]] | ||
| + | |} | ||
| + | |||
| + | ==A Home in the Hills== | ||
| + | {{GTASAAiAim|Taking a car to the building will result in this bug, making the mission extremely difficult. To avoid this either steal a bike or simply run instead.}} | ||
| + | |||
| + | =Return to Los Santos= | ||
| + | ==Vertical Bird== | ||
| + | If you drive the boat into the back of the ship, then the enemies will have higher accuracy than when you jump out beforehand and swim in. | ||
| + | |||
| + | * Video: [http://www.youtube.com/watch?v=QmfOtvrvQy0 End of the mission] | ||
| + | |||
| + | ==Beat Down on BDup== | ||
| + | {{GTASAAiAim}} | ||
| + | |||
| + | ===Safe Parking=== | ||
| + | [[File:GTASA BeatDownOnBDup main despawn last cutscene.jpg|thumb|Despawn Area]] | ||
| + | * ''Last Cutscene:'' There is a big despawn area for the last cutscene of the mission, however it appears that the vehicle you were last in (or are in) when you enter the first marker of the mission ''doesn't'' despawn (the marker at BDup's house). Even though there doesn't appear to be an explicit function in the mission script that prevents the despawning, it's possible that the game saves some sort of reference to the car that causes it. If you got a vehicle after the BDup cutscene you want to keep at the end of the mission, parking it outside of the despawn area should probably work. | ||
| + | |||
| + | ==Cut Throat Business== | ||
| + | ===Safe Parking=== | ||
| + | * ''Mission start:'' This mission seems to have a huge despawn area (400 units radius), so there doesn't seem to be a practical way of keeping a vehicle. | ||
| + | |||
| + | ==Los Desperados== | ||
| + | If you take the territory closest to the train station, then Grove Street gangmembers spawn at the train station, if you approach it through Grove territory. During the mission, the gangmembers required to make the marker appear can be recruited directly at the train station, instead of having to get them into the car and driving them there. | ||
| + | * Video: [http://www.youtube.com/watch?v=Pl4UXO4BsPM Strategy Explanation] | ||
| + | * Video: [http://www.youtube.com/watch?v=IwjGNXT6o0A Strategy Comparison] | ||
| + | |||
| + | ==End of the Line== | ||
| + | This mission has Checkpoint Technology: If you die after killing Big Smoke, you start again at the point after killing him if you restart the mission (without loading a save, like trip skip). This is a bit dangerous though (see next paragraph). If you fail the mission during the car section, you start again at the beginning of the car section. | ||
| + | |||
| + | {{GTASAAiAim|When you use Checkpoint Technology and restart the mission from the point after killing Smoke and were in a car before, getting on a bike resets the AI to normal. If you already got to the car part and have to restart the mission there, this doesn't matter because you don't get shot anymore (and are in a car anyway).}} | ||
| + | |||
| + | * Video: [http://www.youtube.com/watch?v=kBb8c7FXmIY AI Accuracy Comparison] | ||
| + | * Video: [http://www.youtube.com/watch?v=89T-11IBWzc Minigun Slide Demonstration] | ||
Latest revision as of 21:31, 18 June 2016
This page should contain facts about missions, how specific missions work, but not necessarily how to do them in a certain category. Questions like "What triggers X?" or "Is Y on a timer?" should be answered here.
Interesting subpages:
Contents
- 1 Los Santos
- 2 Badlands
- 3 San Fierro
- 4 Las Venturas
- 5 Return to Los Santos
Los Santos
Big Smoke
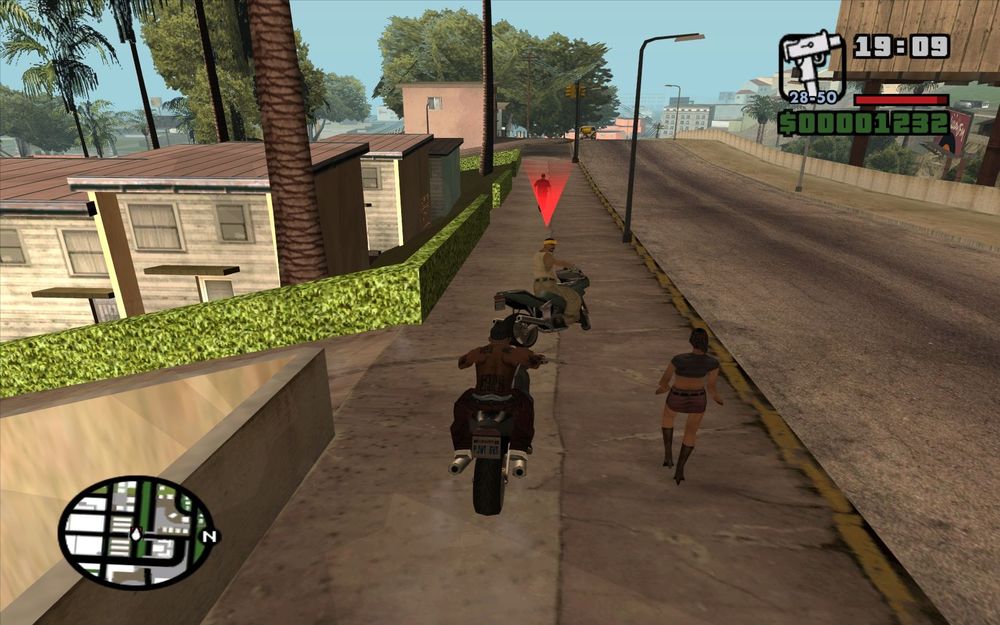
You don't have to stay on the bike, but you have to stay close to the others so they keep moving. The first cutscene is triggered by Sweet, the mission end is triggered by Ryder (of course you have to be there as well).
Ryder
Why did you blow up Ryder's car?
Failing the mission makes 30s worth of cutscene in front of the pizza place that is the tutorial for eating skippable. Since you can easily blow up Ryder's car, this mission can be failed easily.
Drive-Thru
Killing the passenger of the Drive-By car makes the driver get out.
Drive-By
- To make sure that the second group of enemies spawns, you should look away from it after killing the first group.
- It seems that the Pay&Spray is completely scripted and is needed for the Mission End Marker to appear. After you were in the Pay&Spray, you can even get police stars again and still finish the mission.
Sweet's Girl
|
This mission is affected by the Increased AI Accuracy Bug |
Life's A Beach
You can skip the dancing by getting a homie into the locked van and then shooting him, so he falls out and leaves the door open for you to get in.
The homie seems to immediately leave the car after he gets in if:
- You have more than one gangmember recruited at this time
- You have told the gangmember to follow you after recruiting him (e.g. using the G button)
The getting out of the homie apparently can be delayed by a few seconds by disbanding the gang once the gangmember is starting to get into the van. Disbanding the gang makes the gangmember get out after a few seconds (even if he was in there for a while already), which apparently somehow overrides his usual getting out (or something :D).
Careful: Aiming at the party or shooting near the party fails the mission, so make sure you only aim and shoot at a safe position.
Skip with disbanding the gang
- Find a Grove Street gangmember, recruit him and get him to the locked van
- Try to get into the locked van (doesn't matter on which side)
- CJ won't be able to get in, but if you keep trying, the homie will eventually open the passenger side door and get in
- Once the homie shows any sign of opening the door, hold down either of the gang buttons (G or H by default) until CJ says "See you later homie." which means the gang is disbanded
- Make sure you actually hold down the button, don't just press it shortly, it may seem like it takes a long time for CJ to react
- For some the G button seems to work better, for others the H button
- While disbanding the gang, you move towards the water behind the parked car there and headshot the homie in the van, which should make him fall out leaving the door open
- The homie will get out of the van after a few seconds, then get back in switching to the driver side. If the getting out animation has already started when you kill him, he will get out of the van, close the door and then die, so you won't get in. If you are not sure you can make it, wait for him to get back in and then shoot him when he is sitting on the driver side.
- Video: Dance Skip Tutorial
Skip without disbanding the gang
- Recruit one Grove Street gangmember (and only one), don't press any gang related key after recruiting him
- Get him to the locked van
- Try to get into the driver side of the locked van, keep trying to get in until the homie is sitting in the passenger seat and closed his door
- Now go to the trunk of the car that is parked towards the beach and headshot the homie from there, don't aim towards the party
Sometimes when you headshot the homie in the van, he will just get out, close the door and then die. It is unclear why that happens exactly. Just try the method that seems to work best for you.
OG Loc
- Follow Freddy through the alleys, if you keep close he drives faster
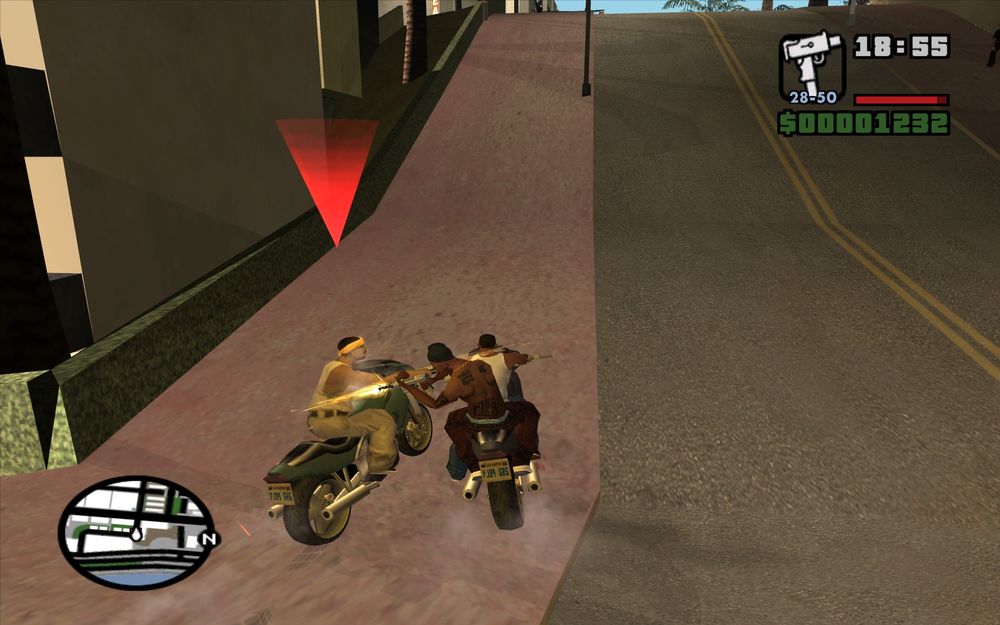
- Turn left to the quick shot spot and wait for him there, shooting your SMG as he passes to set his bike on fire
- If you fail the first spot, you can go to the backup spot
- There are different positions to wait at the quick shot spot (on the road, on the sidewalk), important is that you face the right direction and can shoot Freddy quickly
- Sometimes cars around the corner you wait get spooked and ram into you, making it harder for you to shoot Freddy
- After setting his bike on fire, start driving towards your next destination
- Unfortunately you loose your bike after the cutscene, so you'll have to find a vehicle on the road, but drive with the bike as far as you can
- The mission sets your SMG ammo to 78 once you get on the bike (so it doesn't add an amount to what you had before, it sets it to 78). If you had more than 78 ammo before, it doesn't change it. If you already had a Tec-9, it doesn't replace it.
- Pushing Freddy off his bike (which you can do when you wait at the quick shot spot) crashes the game.
Just Business
- Once you enter the building with Smoke, the game gives you a Micro-SMG (replacing any previous weapon in that slot) and adds 120 ammo to it (adding to ammo you might have had before). After the autoscroller, the game always gives you a Micro-SMG with 80 ammo (replacing any other weapon in that slot you may have picked up during the mission).
Doberman
Safe Parking
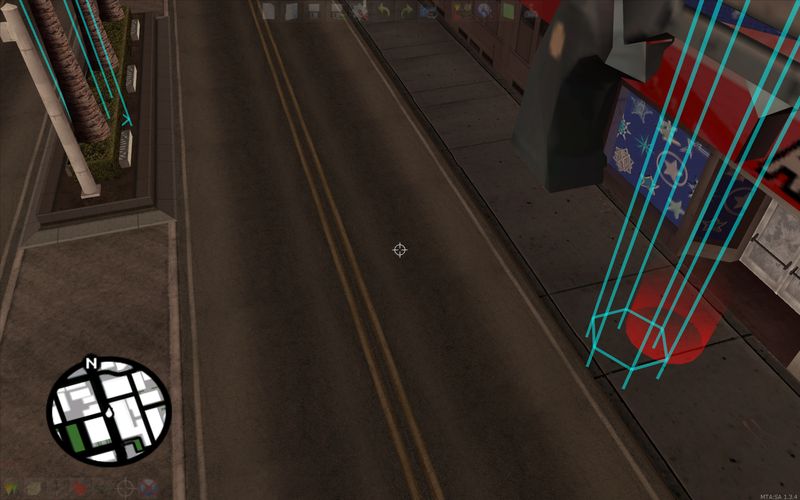
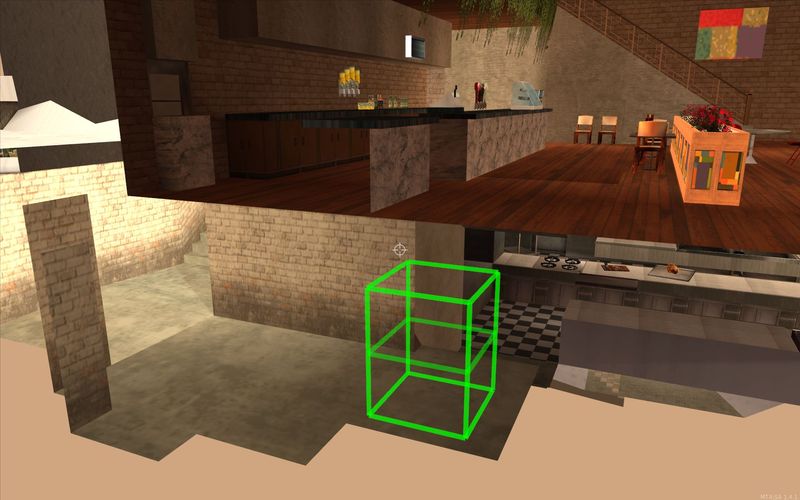
- Mission start: There is a small despawn area beside the marker (towards the road), but it should be safe to park in the half of the marker towards the door. Parking too close towards the door may be dangerous though. You can also get on the bike during the fadeout (press key as soon as the red marker disappears), which will prevent despawning (and is also a bit faster).
Burning Desire

|
This mission is affected by the Increased AI Accuracy Bug Driving a car to the house will cause the Vagos defending it to be affected by the bug. If a bike is taken however it is possible to simply ignore all the enemies and live. |
- You need to pick up the Molotovs in this mission to make the house vulnerable to fire, picking them up prior to the mission does not help.
- In the house, you have to pick up the Fire Extinguisher to trigger the cutscene with Denise after which she follows you. If you go up without there is a cutscene that tells you to get it, but even if you enter her room (you can jump over the fire), she just stands there and it doesn't trigger the cutscene after which she follows you.
- After getting the Fire Extinguisher, you can jump over the fire in her room and trigger the cutscene, but she won't follow you unless you put out the fires in her way. If you let her stay in her room and go out the front door, it still tells you to go back in and get the girl.
- However, if you manage to push her through the first fire in front of ther room, she will follow you through the other fires.
- After triggering the cutscene in Denise's room (after which she follows you), the fires disappear when you go out and back into the house. But since you still have to go back up and guide the girl out of the house, it's probably not very useful.
Safe Parking
- Mission start: You shouldn't park directly in the marker (and possibly where the police car will spawn), but if you park a few meters away, it should be fine. The despawn area isn't as big as in Grey Imports. (Forum)
Grey Imports
Safe Parking
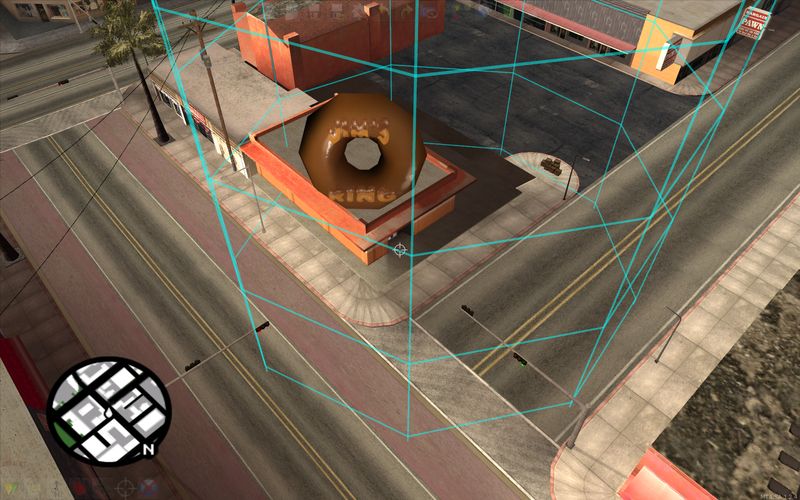
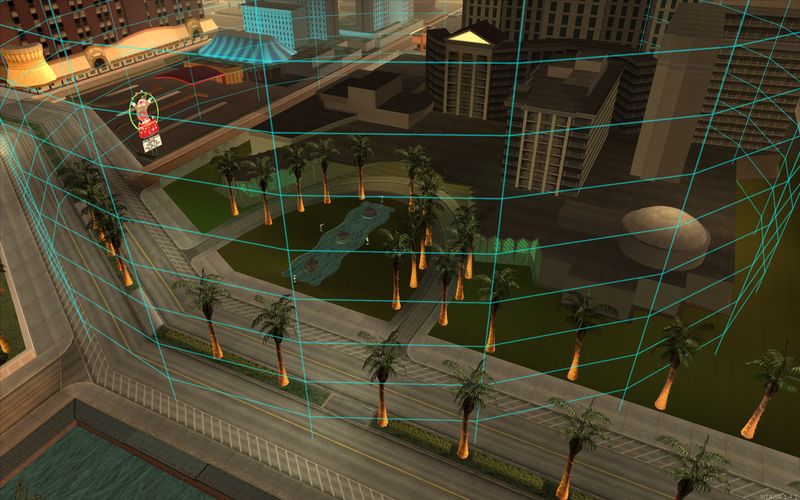
- Mission start: The despawn area is pretty big. Parking on the middle of the road to the east of the marker should be fine though (on the double-line in the center).
Home Invasion
Walking Animation
This mission has a special walking animation that makes you move slower. However, if you hold certain weapons, you don't get this slower walking. Most importantly this also affects walking speed when you carry a crate (which is the only time you would be walking anyway, since moving crouched is faster), even though CJ isn't actually holding the weapon in his hands.
Weapons that seem to work for this are weapons you can't sprint with, including: Baseball Bat, Shotgun, Combat Shotgun, Rifle, M4, AK, Sniper Rifle, Flame Thrower, Rocket Launchers
Delayed Noise-Meter
With the Shotgun in particular (and maybe other weapons like the M4 or AK, but not the Baseball Bat) there's another strange behaviour where the noise-meter doesn't fill as fast. Normally if you just run, it fills almost instantly, but while holding the shotgun (again, also when carrying a crate) you can run for about a second before the noise-meter reacts. It fills about 2/3 when you run too long and fills completely after about 0.5 seconds. Important is that you don't press the walk button at all when doing this. Changing between walking and running seems to trigger the noise-meter a lot faster. Just run normally by pressing the move forward button, let go of it after a second, then run again.
This allows you to take one of the further away crates as the last one and just run back to the door all the way. This fills the noise-meter, but you get out before the cutscene plays (it would play when you go back in, but you won't have to after the last crate). Without the delayed noise-meter, the cutscene would play before you get out if you run all the way.
Even with the delayed noise-meter while having the shotgun selected, the noise-meter seems to fill faster if it is already filled a bit, so be careful with that.
Sliding
You can slide to the crates the normal way, which saves about 1 second for each of the further away crates. You can also slide while holding a crate if you start the slide without fulling crouching. Moving while being crouched will drop the crate, so you have to do the move/sprint part of starting the slide before you are fully crouched. If you want to stop sliding, it's better to unaim than to stop moving, because aiming after the slide will drop the crate, which can be a problem when entering the door marker for which you have to stop sliding.
- Video: Comparison between different moving speeds in this mission
- Video: Demonstration of running with the shotgun
Los Sepulcros
At the start of the mission, if you recruit both gang members before Sweet closes the door of the car, the mission softlocks and you won't be able to get into the car at all. If that happens you can blow up the car and try again. To avoid this, wait until Sweet closed the door to recruit the second gangmember. Another way is to aim at Sweet for a few seconds directly after the fade (usually he will take his arms up, down, then up again, then you can stop aiming at him), which will make him walk away and getting the gangmembers and CJ in the car is enough to continue.
The Green Sabre
Enemies you kill before driving into the marker where you have to save Sweet, just respawn. The first van spawns once you killed 3 enemies, the second van once you killed 6 enemies and the car once you killed 9 enemies. The mission is completed once you killed all enemies.
Safe Parking
- Mission start: Vehicles seem to despawn when you park them in the marker. CJ can also sometimes get blocked by a vehicle and has to run around it before answering the phonecall, although it doesn't seem to affect the time, the cutscene always seems to be about 7.6 seconds long. Parking where the Greenwood spawns can prevent that from spawning though.
Badlands
Against All Odds
After leaving the Betting Shop, your Wanted Level will usually be decreased after a short time, leaving you with 3 stars. This doesn't appear to happen when you run a police officer over on the way (or something like that). You can use the two bribe stars in Blueberry to get rid of two more stars, leaving you with only one that should disappear 10 seconds after picking up the last bribe. If you don't loose a star to begin with (leaving you with the initial 4), you can wait a bit after picking up the first bribe, so that another star disappears on it's own before picking up the second bribe.
As opposed to some other missions, you can't finish the mission if you regain a wanted level after loosing it. The marker is only there if you don't have a wanted level at all.
San Fierro
Photo Opportunity
- Video: Safe spot to do the drop
Jizzy (Cutscene)
Safe Parking
- Cutscene: It appears there is not set despawn zone, so it should be safe to park anywhere reasonable.
Outrider
The Van starts driving after you get on the Sanchez the mission gives you and arrives at the destination about 4:15 later (if you destroy the roadblocks, it might take longer if it's obstructed in some way).
The enemies at the roadblocks don't attack you (even if you get really close) unless you shoot near them.
Safe Parking
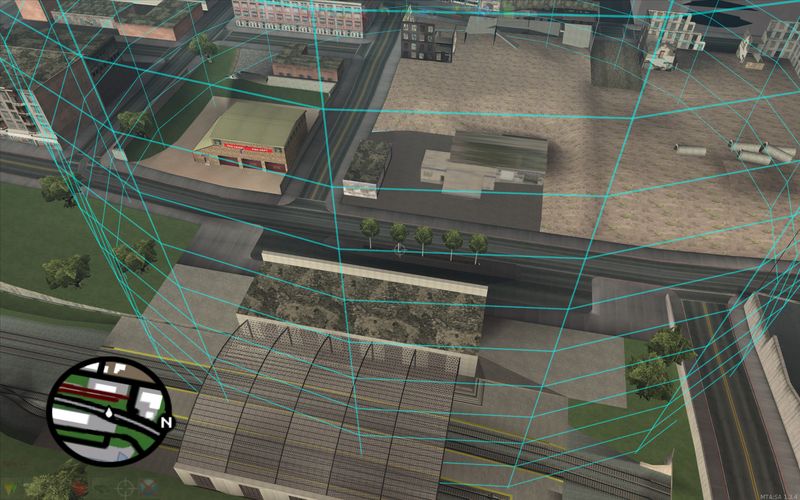
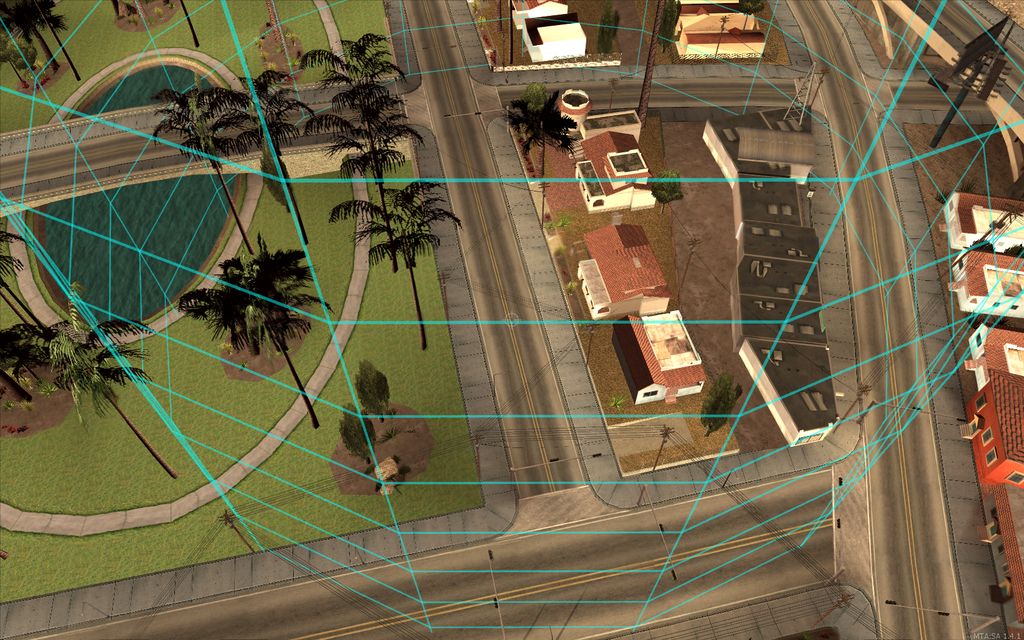
- Mission start: There is a huge despawn area when you start the mission. You can keep a vehicle is in the garage or apply the same trick as for Doberman (pressing F directly after triggering the marker, you won't actually spawn in the vehicle, but you have to start to get in during the fade).
Snail Trail
See Grand Theft Auto: San Andreas/Missions/Snail Trail
Ice Cold Killa
- Before entering the building shoot Jizzy's car with the Sniper Rifle 6 times, which will make it smoke. Then, leaving the building, you can shoot it with the Sniper one additional time to set it on fire (you can also use other weapons for that like the Silenced Pistol or an AK).
- If you destroy Jizzy's car before entering the building, it will be replaced with a Pizza Boy which he will take instead.
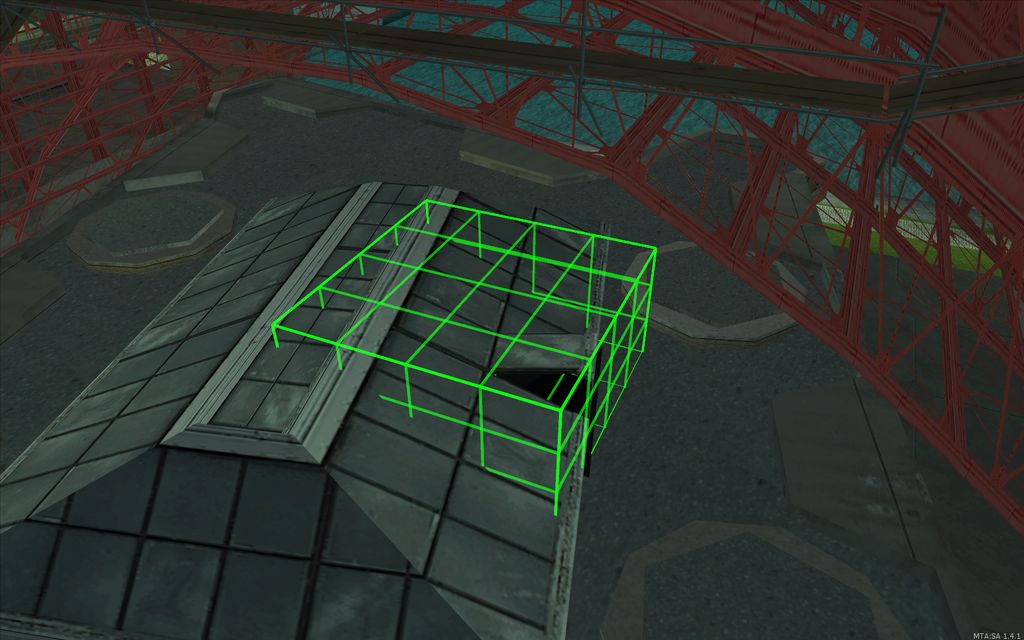
- There is a load trigger on the roof, around the skylight that you use to enter the building, which loads some stuff and then sets $ONMISSION=1. If you are trying to carry a phonecall through the mission, you have to enter that trigger and wait for it to be loaded while the phone is ringing. You can tell that it set $ONMISSION=1 by the camera jumping a bit, since the same section in the script also sets the camera behind CJ.
Safe Parking
- Mission start: The mission start doesn't seem to have a despawn area, you should be safe to just park it anywhere reasonable
- During the mission: There are despawn zones at Jizzy's club that can despawn your vehicle
Amphibious Assault

|
This mission is affected by the Increased AI Accuracy Bug Using a boat in this mission will trigger this bug in this mission, it is possible to avoid this by only swimming instead of stealing a boat |
This mission can be duped. More information..
After going into the marker near the water and spawning in the water channel between the rocks, you can just climb/jump out of there, walk over the rocks to the water and swim to the ship.
- Video: Swimming strats
- Video: Dingy strats
Safe Parking
- Mission start: The mission start doesn't seem to have a set despawn area, you should be safe to just park anywhere resonable (although it seems if you park it directly against the wall of the house it despawns, so just park it in the marker or something)
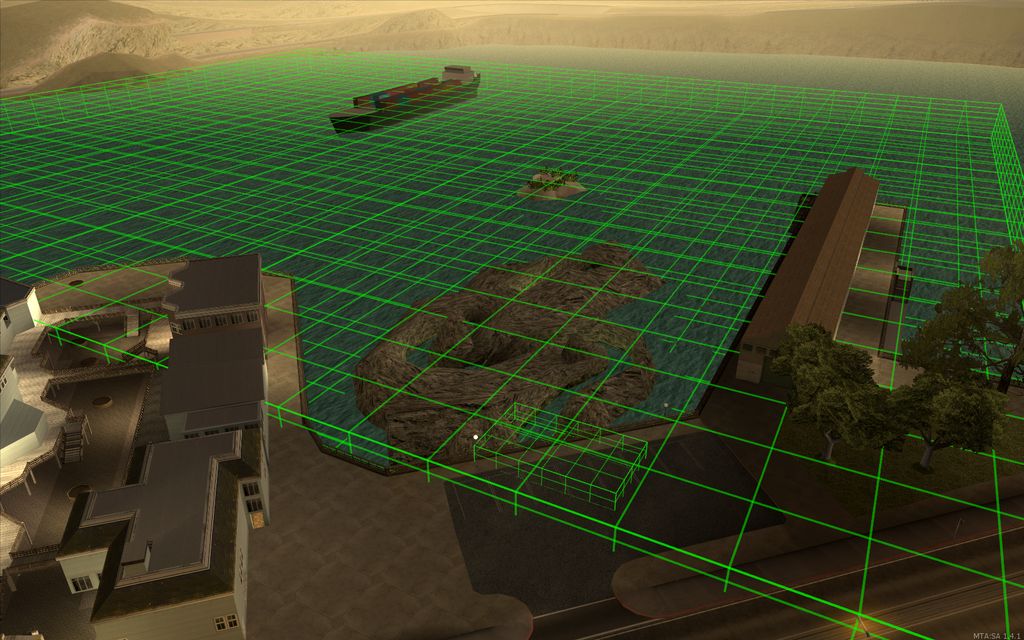
- During the mission: There is a huge area where vehicles are despawned, but there might also be other effects that make certain position unsafe for parking vehicles during all of the mission (picture with safe area needed)
Pier 69

|
This mission is affected by the Increased AI Accuracy Bug Using a car to drive to T-Bone after the Sniping section will trigger this effect. This isn't run ending, however it can add to the difficulty if T-Bone is not killed quickly. Stealing a bike instead or simply running to T-Bone is the way around this. |
- During the mission, you get a Sniper Rifle with 24 ammo (unless you already have more ammo) and a Tec9 with 300 ammo (unless you already have a weapon in the same slot with any ammo).
Safe Parking
- Mission start: If you park the bike a few meters away from the mission start marker, it should be fine (kind of on the half of the sidewalk towards the road)
- After sniping the enemies on the roof: Pier 69 has a huge despawn area, but there is a specific spot on the roof where you can park a bike so it won't despawn (picture needed)
- Video: Parking Position
Toreno's Last Flight

|
This mission is affected by the Increased AI Accuracy Bug Using a bike which is stored inside the San Fierro Garage to get to the helipad is a common way to get around this. You can also get on/off the bike in front of the helipad to reset the AI accuracy before doing the rest of the mission. |
- At the helipad, if you trigger the cutscene within 4 seconds of the guy on the helipad shooting his RPG for the first time (entering the mission area), the cutscene will be 4 seconds longer. You'll know that happened when the guy shoots another 2 rockets during the cutscene. (Video)
- The mission creates a pickup of 60 rockets and an AK with 120 ammo on the helipad, both of which aren't removed after the mission. However, the mission removes the RPG from the player at the end of the mission, so you want to pick up the 60 rockets after the mission ends in order to keep them.
Homing Rockets Strategy
You need to get Homing Rockets before the mission, then while standing where you spawn after the cutscene, you acquire the helicopter as target and shoot it down.
Normal Rockets Strategy
If you use normal rockets to shoot down the helicopter (either by having some before or taking the ones on the helipad), you can get on the parked bike quickly and drive to where the helicopter turns left towards the highway. If you are fast, you have a few seconds to shoot it there. If you miss, you can also do a backup strat from that position, if you have plenty of rockets: Rockets always seem to explode at the same distance, as long as they don't hit anything before. So if you spam them in the direction of the helicopter's path, they will eventually damage it, even if you don't hit it directly.
Normal Rockets Strategy from Helipad
You can also shoot the helicopter right from the helipad, from where you are standing after the cutscene. Aim so the rocket will just go past the building (towards the stairs), at roughly the height the helicopter will take and then shoot as soon as the helicopter "touches" the wall (a bit after it turned). (Video)
Safe Parking
- Mission start: The mission start doesn't seem to have a set despawn area, you should be safe to just park anywhere resonable. Also it doesn't seem to matter at all when you obstruct CJ for the cutscene. Whether you don't obstruct him at all, park a bike where he spawns or even a car where he is supposed to go, the cutscene seems always skipable after 4.6 seconds.
Las Venturas
Stowaway
You need a parachute to finish the mission. There are two different basic ways, either already having a parachute (e.g. from N.O.E.) or doing the intended way and killing the guy on the plane with the parachute and picking that up.
When you have a parachute, you have different ways of blowing up the plane:
- Place the satchel the mission gives you and jump out of the plane (without exploding it yourself):
- When you killed the parachute guy, you can just place the satchel anywhere (intended strats).
- When you didn't kill the parachute guy, it appears that you have to place the satchel close enough to his position for the mission to not fail when you jump out. If the parachute guy didn't move from his starting position (which he doesn't unless you get close to him), then it's usually enough to place the satchel at least at the first space between the containers on the left (image). The other enemies don't seem to matter in regards to the mission failing or not. (The correct satchel position seems to be relative to the parachute guy, because if he is near the cockpit (at the other end from where you enter it) and you place the satchel there, the mission passes when you jump out, but if you place the satchel at the same place but the parachute guy followed you to the ramp (thus far away from the cockpit), the mission fails when you jump out.)
- Use a gun to blow up the plane just before jumping out of the plane:
- Stand on the ramp just by the edge and shoot, then immediately jump off (you have to be fast jumping off after shooting)
- Slide with a gun you can shoot while sliding (e.g. AK on Hitman skill) and shoot the ramp just before sliding off
- Using explosives like exploding the satchel or shooting rockets doesn't seem to work.
Important: If you died while having a parachute and kept all your stuff because of the Blood Bowl duping setup, then the parachute won't actually open properly (despite still being equipped), even if you pick up another parachute on top of that. You can save/reload to fix the parachute.
Fender Ketchup
You have to scare the guy by driving around. The fastest way appears to be doing left handbrake turns. You need to reach a certain speed, then press the handbrake and turn left (turning right doesn't work for some reason). You can do this on the parking lot where the mission starts/ends and just do handbrake U-Turns. If you use the whole space, you just gain enough speed for it.
You can also do the same strat on the street and not do full U-Turns, but instead only turn enough so it triggers, but then keep going straight so you can retain more speed and do the next turn earlier.
Explosive Situation
Be careful not to let the Dumper explode, it will fail the mission even after you got all the Dynamite. This can easily happen when you park the Dumper too close to the Forklift that can explode because you have to hit it go get the Dynamite.
You've Had Your Chips
Climb over the fence to the south and walk into the entrance of the factory building to do the "stealth"-approach. If you walk in through the area's main entrance or shoot the car in front of the factory, additional enemies spawn inside the factory.
Once you are inside the factory, it's all about destroying the machines:
- Once 3 machines are destroyed 3 enemies spawn outside, 2 running into the factory and 1 enemy with an automatic shotgun that can be very dangerous
- Once 6 machines are destroyed a car with several enemies with SMGs spawns outside and start driving towards the factory entrance
- Once 9 machines are destroyed you are done and have to head back to the Casino
However there is a way to skip the spawning of the 3 enemies outside. If you destroy the 3rd and 4th machine at exactly the same time (probably the same frame or something) the internal counter probably isn't checked when it is at 3, but only when it is at 4, so the spawn isn't triggered (this also works when you destroy more than 2 machines at once, just make sure the 3rd machine isn't destroyed by itself). The order of the machines doesn't matter, "the 3rd machine" only refers to the number of destroyed machines.
The car is actually technicially spawned when more than 5 machines are destroyed, instead of exactly 6, so the spawning of the car can't be prevented with the same technique.
To destroy several machines at exactly the same time, explosions are probably the only way (fire a rocket between machines that are near together or plant satchel charges).
- Video: Demonstration of spawning/not spawning enemies (and also of a specific strat for this mission)
- Video: Demonstration of the spawning car
- Video: Explanation of a specific strat for this mission
- Video: Possible safer Rocket Strat for the beginning
Don Peyote
At the snake farm, you need to kill all four farmers, or else they come after you once you activate the marker at the casino, which triggers a cutscene and apparently has a chance to softlock the game.
The Meat Business
Safe Parking
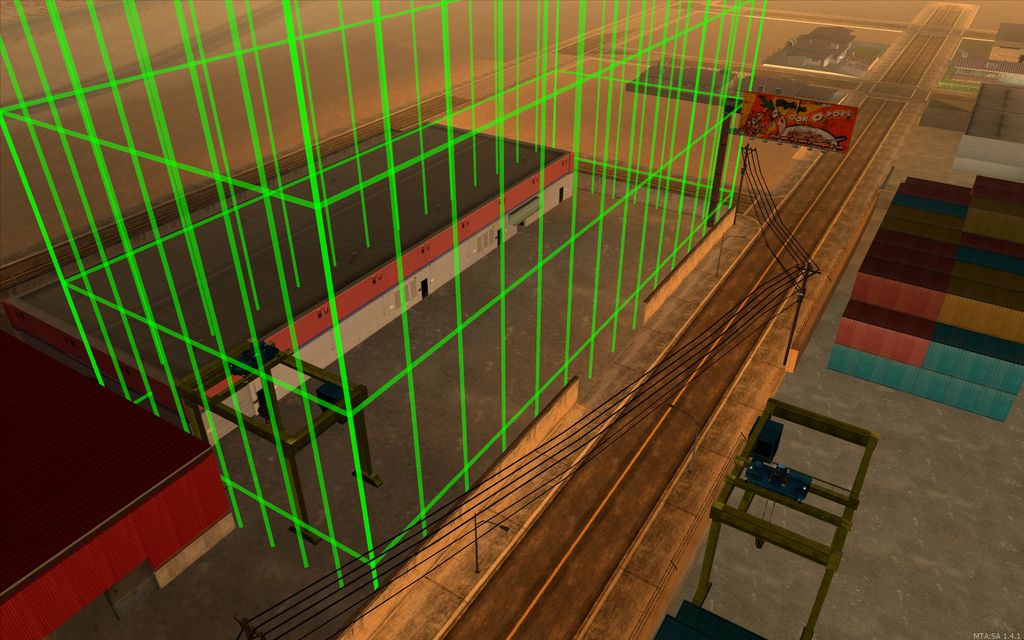
- Mission start: There is no despawn zone, however parking where Rosenberg will spawn does remove the vehicle.
- During the mission: You have to park your vehicle inside the compound of the Meat Factory in order to keep it when you get back outside. In that case, the game neatly spawns a vehicle of the same model for you. For some reason that vehicle also seems to be immune to the despawn zone at the end of the mission (although not to the removal of the vehicle by the mission script, read the next section).
- Mission end: The mission tracks what vehicle you were last in and removes that at the end of the mission. This is probably because it creates a new vehicle of the same model as you were driving outside when you leave the Meat Factory. However it keeps tracking it throughout the mission, so also on the way back. If you want to keep the vehicle you are driving, you have to switch into another "throwaway" vehicle and then trigger the mission end marker. There is also a despawn zone around the casino:
- You can park the vehicle you want to keep inside the despawn zone if it's still the same as the one from outside the Meat Factory.
- You have to park the vehicle you want to keep outside the despawn zone if you switched to it after leaving the Meat Factory (which includes not parking the vehicle inside the compound of the Meat Factory before entering the building, which means it doesn't spawn).
Madd Dogg
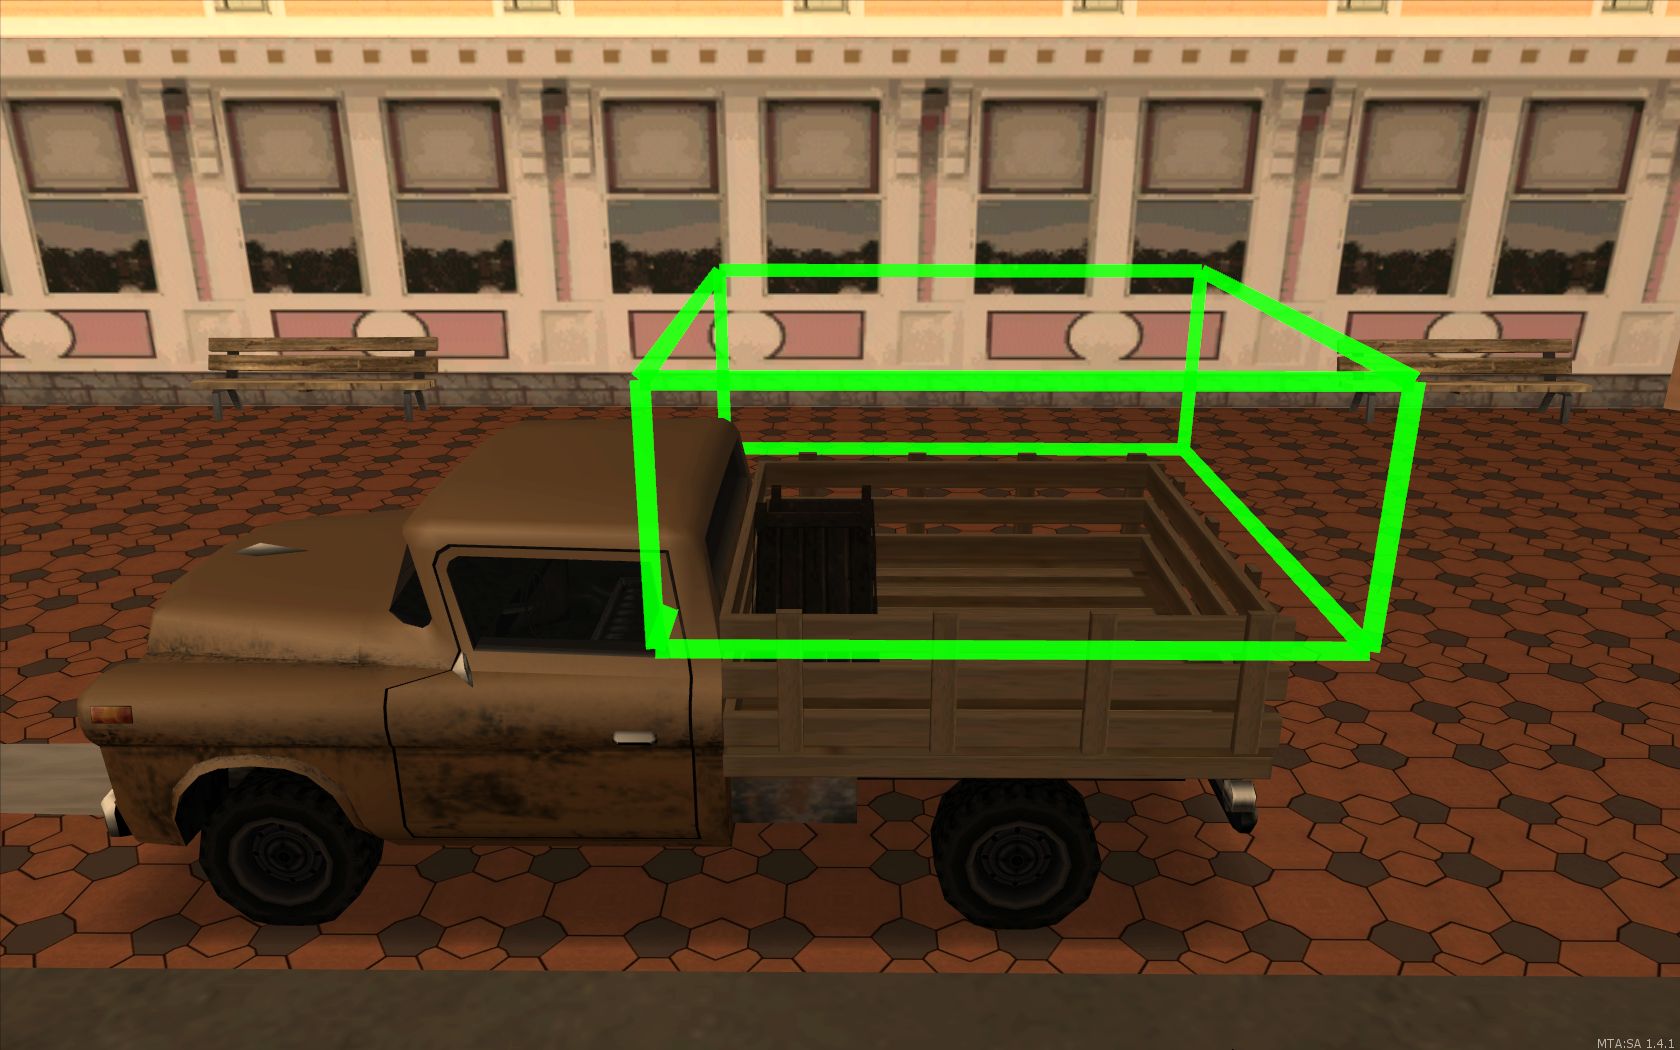
After driving the Truck into the marker and skipping the cutscene, Madd Dogg will walk around for a randomly chosen amount of time before jumping, either 16, 18, 20, 22 or 24 seconds (stored in 0xA51334 at the start of the mission). The path he takes is always the same, the randomness in the jumping position comes from the randomized time until he jumps as mentioned before. After about 10 seconds of walking around Madd Dogg will say a random line, indicating that he may jump soon.Madd Dogg has to hit a trigger relative to the Walton (truck) to survive the fall.
Misappropriation
If you fail to kill him before he escapes
Please note that these are very rough numbers. If the target gets into his heli, the chase takes about 2:00-2:30 (depending on how close you keep to him apparently) to the helipad where he lands and you can shoot him. From there it takes about 35s to landing in front of Caligula's Casino with the helicopter. So given the any% route, it takes about 3 minutes. If you manage to kill him before he escapes, it takes about 1:45 to landing in front of Caligula's Casino, so that is about 1:15 faster. If you die, it takes about 1 minute back to the mission start marker, with trip skip you get to the mission pretty fast, but you still need some time to actually kill the target (also you need to get a weapon for that).
Black Project
High Noon
Turn the car around so that you block it long enough to be able to get in the passenger side. Keep Sprint or Jump held when entering the car to kill Pulaski. This exploits the bug that keeping the door open while entering a car from the passenger side kills the driver.
Green Goo

|
This mission is affected by the Increased AI Accuracy Bug It is common to arrive at the start of the mission in a Buffalo, meaning the AIs will be very accurate with their M4s. There is however a PCJ Spawn and the end of the runway which can be used to reset the AI PRIOR to starting the mission. Because you cannot exit the Jetpack during the mission it must be done before. |
Saint Mark's Bistro
This mission gives you and equips a Pistol with 60 ammo when you spawn in the restaurant, replacing any other weapon in the same slot (Silenced Pistol or Desert Eagle).
Forelli (the guy you have to kill) has 1000 health at first, until he reaches a trigger shortly before the kitchen, where it sets Forellis health to 100 (unless it is already below 100). He doesn't get stunned by shots and wields dual Micro SMGs (Hitman skill), making him potentially dangerous. He also is immune to headshots. Sometimes he will stay just downstairs of the room you spawn in, which means he still has 1000 health, making it more difficult to kill him compared to him running to the end (unless you have a Minigun of course). (This info is partly from the mission script, so hopefully I interpreted that correctly.)When he waits and shoots you in the first room, there sometimes seems to be no way to make him move again. Based on tests, it seems to take 40 shots with the Pistol to kill him. It is unclear what makes him stay there.
Safe Parking
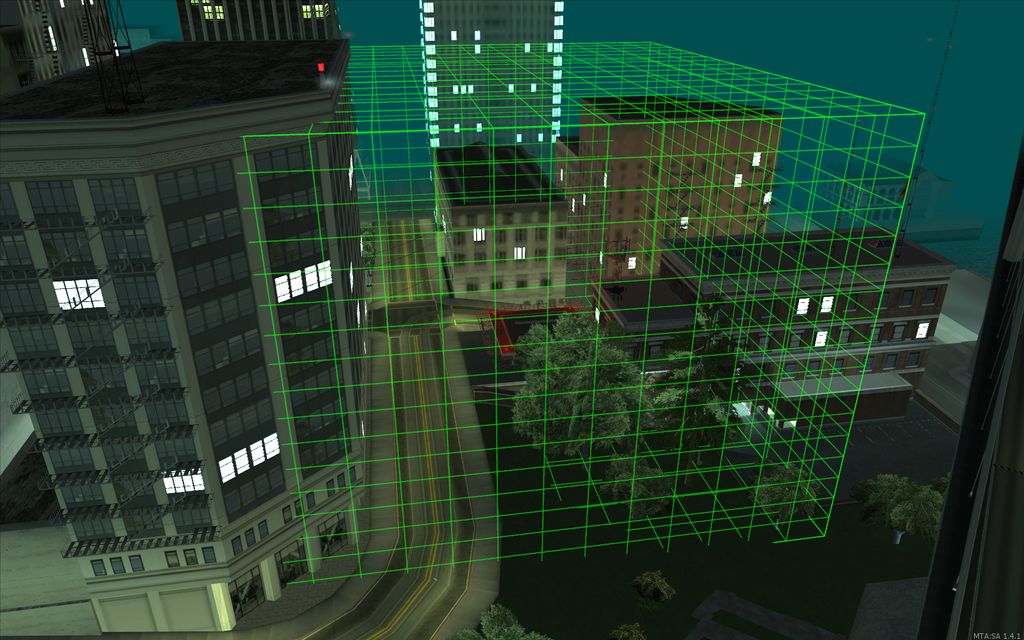
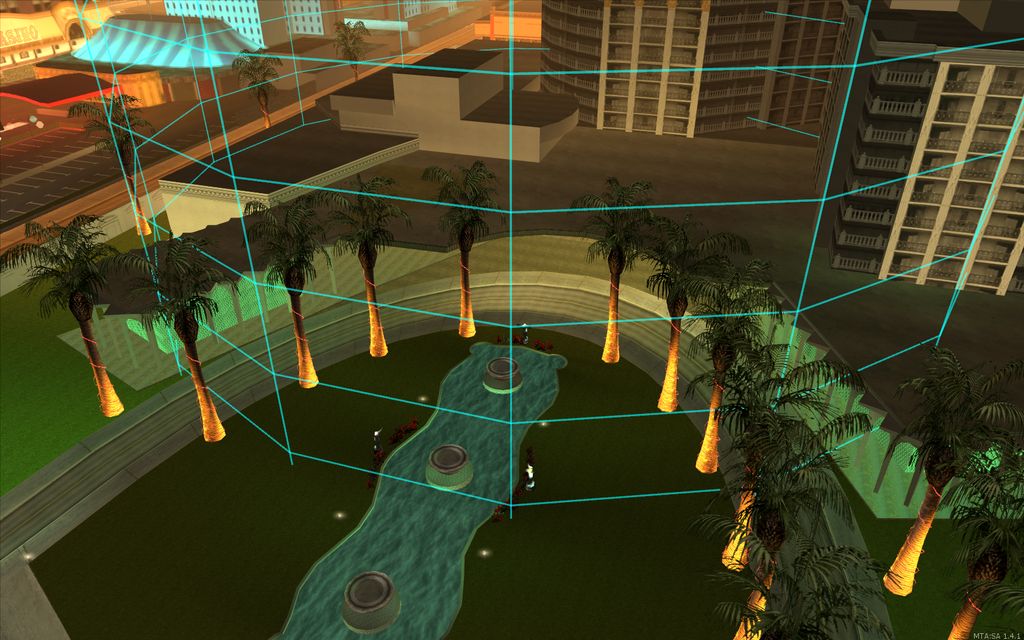
- Mission start: There is a big despawn area (radius 120 units) around the Casino that only allows parking of vehicles across the street.
A Home in the Hills

|
This mission is affected by the Increased AI Accuracy Bug Taking a car to the building will result in this bug, making the mission extremely difficult. To avoid this either steal a bike or simply run instead. |
Return to Los Santos
Vertical Bird
If you drive the boat into the back of the ship, then the enemies will have higher accuracy than when you jump out beforehand and swim in.
- Video: End of the mission
Beat Down on BDup

|
This mission is affected by the Increased AI Accuracy Bug |
Safe Parking
- Last Cutscene: There is a big despawn area for the last cutscene of the mission, however it appears that the vehicle you were last in (or are in) when you enter the first marker of the mission doesn't despawn (the marker at BDup's house). Even though there doesn't appear to be an explicit function in the mission script that prevents the despawning, it's possible that the game saves some sort of reference to the car that causes it. If you got a vehicle after the BDup cutscene you want to keep at the end of the mission, parking it outside of the despawn area should probably work.
Cut Throat Business
Safe Parking
- Mission start: This mission seems to have a huge despawn area (400 units radius), so there doesn't seem to be a practical way of keeping a vehicle.
Los Desperados
If you take the territory closest to the train station, then Grove Street gangmembers spawn at the train station, if you approach it through Grove territory. During the mission, the gangmembers required to make the marker appear can be recruited directly at the train station, instead of having to get them into the car and driving them there.
- Video: Strategy Explanation
- Video: Strategy Comparison
End of the Line
This mission has Checkpoint Technology: If you die after killing Big Smoke, you start again at the point after killing him if you restart the mission (without loading a save, like trip skip). This is a bit dangerous though (see next paragraph). If you fail the mission during the car section, you start again at the beginning of the car section.

|
This mission is affected by the Increased AI Accuracy Bug When you use Checkpoint Technology and restart the mission from the point after killing Smoke and were in a car before, getting on a bike resets the AI to normal. If you already got to the car part and have to restart the mission there, this doesn't matter because you don't get shot anymore (and are in a car anyway). |
- Video: AI Accuracy Comparison
- Video: Minigun Slide Demonstration
