Mighty Bomb Jack (NES)/normal ending
From SDA Knowledge Base
Contents
Category description
This category is the fastest way to beat the game. It uses the palace room warping to move through the pyramid as quickly as possible without taking any detours for items that are required to get the better endings. A shortcut that requires death abuse is also used after palace room 4, leading to palace room 11.
Level-by-level description
To shorten down the text some abbrevations and references will be used below. Numbers refer to the bomb numbers in the Palace room bomb sequences. The tases for the best ending and the normal ending are referred to as tasbe and tasne, respectively.
Corridor 1-1
https://vimeo.com/946751758
A straight-forward level. In theory, you don't need to collect any mighty coins (see the tasne), but it's difficult to save time in real-time and risky. The recommended route is instead spending time collecting two coins and then collect three more coins by upgrading to orange Jack. The coins will be used in level 5 and 17.
Note how the second mighty coin was collected in the linked video. If your double-tap of the A-button is not fast enough, it's faster to bump the head in the platform above than to abort the jump just before by pressing A.
Palace room 1
Palace room 2
Palace room 3
https://vimeo.com/946752026
The following route is considerably more difficult as it requires tight movement to be able to jump over the first mummy, but can be done quickly with tight execution: https://youtu.be/PS-R9qCVly0?t=88
This route is in theory slightly slower than the first one. But in a real-time attempt, individual execution will determine which one works better for each player.
Palace room 4
The palace room warp is not used here, since there is a shortcut in corridor 5.
https://vimeo.com/946752056 - Most of the time, the mummy will drop down on the right side and can then be in the way when collecting the last three bombs, depending on how fast you clear the room. The mummies' movement pattern are not understood in detail at the time of writing and no manipulation is therefore possible.
https://vimeo.com/946752034 - Alternative method that is a little over a second slower, but avoids close enemy encounters since the P-ball is collected along the way.
Corridor 5
5-1
https://vimeo.com/946751774
Upgrading to orange Jack and run through the last chest should save around half a second or so. There are alternative jump sequences near the end (by first jumping to the right). They're time-wise very similar, so it will be up to each player to test out which one works better and is faster for them.
The last enemy's spawn position depends on how fast you get to the end of the room. There is a short time window during which a mummy will spawn right around the last chest, effectively blocking the way. The only way around this is either to turn into green Jack or maneuver around it, for a time loss. If this happens frequently, climbing the room faster (or slower...) will prevent it.
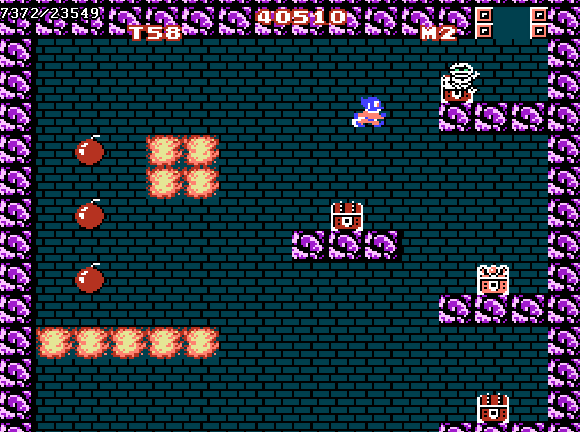
5-2
The method for opening up the shortcut in 5-5 is obscure to say the least. You need to first find the hidden sphinx in 5-2 (see the note under 1-1 regarding the first jump to break the "totem pole wing" above the chest) to open up the passage to 5-5. The passage to 5-7 then only opens on the third visit to 5-5. https://tasvideos.org/Forum/Posts/524874 contains an explanation based on code analysis on how the shortcut works.
1st passage: https://vimeo.com/946751804 - It's recommended to pick up as many bombs as possible along the way to set up for a P-ball on the second passage. Also note the jump sequence after upgrading to orange Jack to make him last until the end of the room.
2nd passage: https://vimeo.com/946751829 - By collecting enough bombs (bomb value = 20), the sphinx chest will produce a P-ball, which eliminates any enemies interfering when returning after collecting the sphinx. Since the bomb count is reset after the P-effect is over, it also makes it easier to manipulate the P-ball spawn in palace room 11.
3rd passage: https://vimeo.com/946751853 - It's important to use the same route so the same bombs are collected. Or else the P-ball spawn in palace room 11 will be impacted. There is some leeway on the bombs to collect, so it's worth remembering the most common scenarios and resulting actions.
Alt 5-2 end: https://vimeo.com/946751869 - Going the lower route at the end is a little over a tenth of a second faster, but also misses out on a mighty coin. At least in real-time, collecting the mighty coin here in 5-2 and then use it in 5-5 should normally be faster.
There are typically two enemy spawns in 5-2 that can interfere and are therefore worth taking a closer look at.
The first enemy in 5-2 spawns typically in one of the following locations (and if it doesn't, it can generally be ignored):
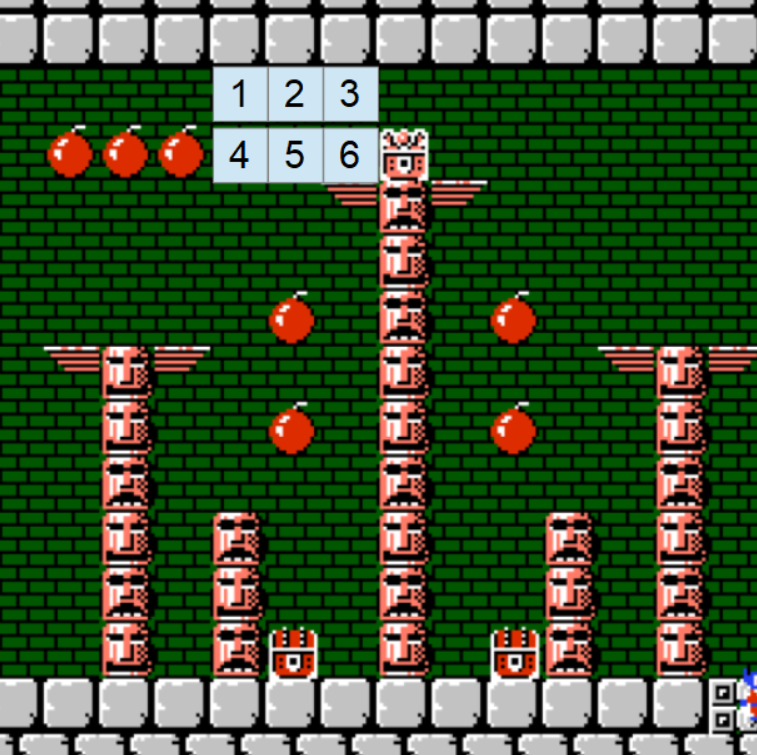
- 1 - Hold down left when running on the chest and you should pass by under the mummy
- 2 - If the enemy spawns slightly to the left, it can be cleared by holding left and down when running on the chest. It's often blocking the passage though and you need to wait for the mummy to drop down before jumping over it.
- 3 - Blocking the passage and you need to wait for the mummy to drop out of the way
- 4-6 - Easily avoided by jumping over
While the exact game mechanics of the mummies' spawn location haven't been described at the time of writing this, it seems like the faster Jack gets here, the more to the left the mummy will spawn. So if the mummy frequently blocks the way, the solution will probably (?) be to go faster.
The other enemy that can create a problem is if a mummy spawns to the right of the sphinx around here:
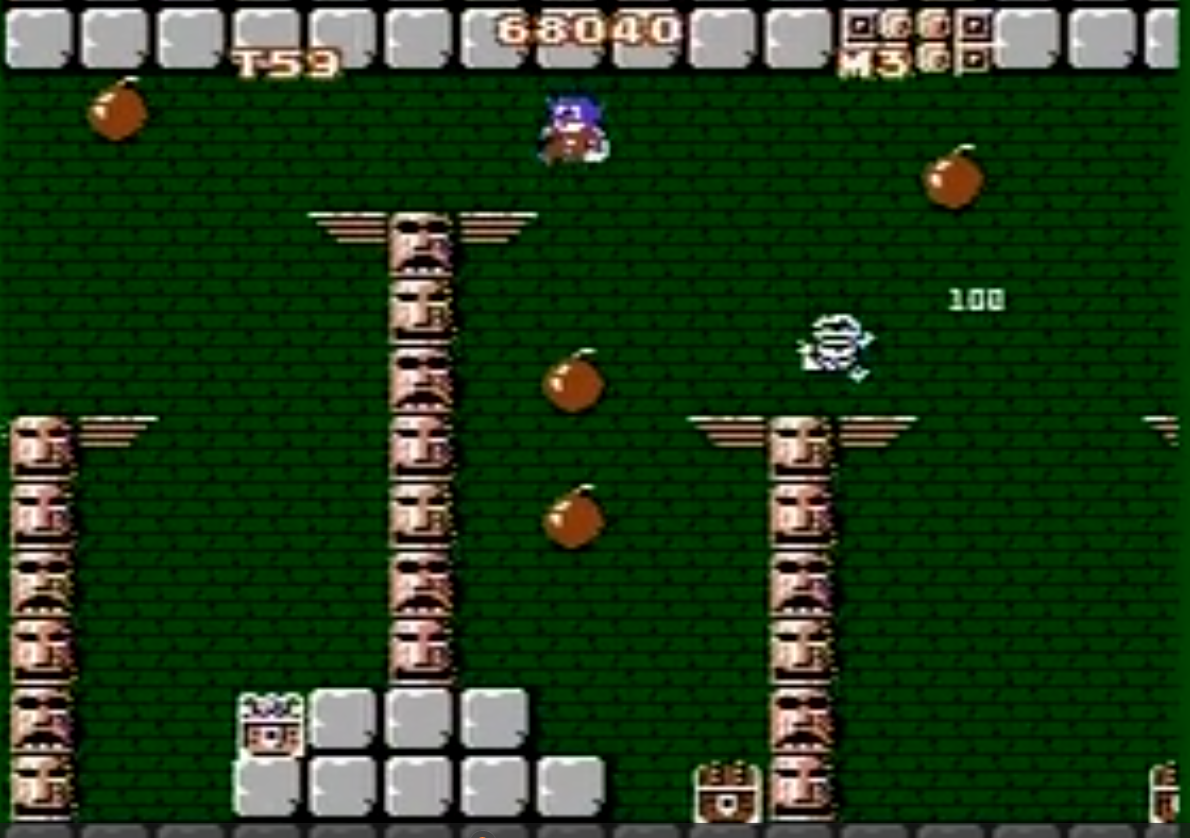
- Bat or Jellyfish - Run between the two platforms (you can use two A-presses to easier float onto the right one) to pass below the enemy
- Bird - ignore
- Skull or Lobster - Can usually/sometimes be avoided by pressing A after collecting the sphinx to float over the enemy. Depending on the mummy's spawn position/timing, this seems to not always be possible?
- Fireball - Can usually be jumped over when passing from the left to the right platform. When jumping hold down-right to avoid getting too close to the next platform.
There is an advanced enemy manipulation during the third time in 5-2. Without mistakes, this enemy manipulation can be held until the end of the game. It can positively impact PR12 for an overall time save of a bit over 0.5s. The key is to observe the enemy appearing around the sphinx:
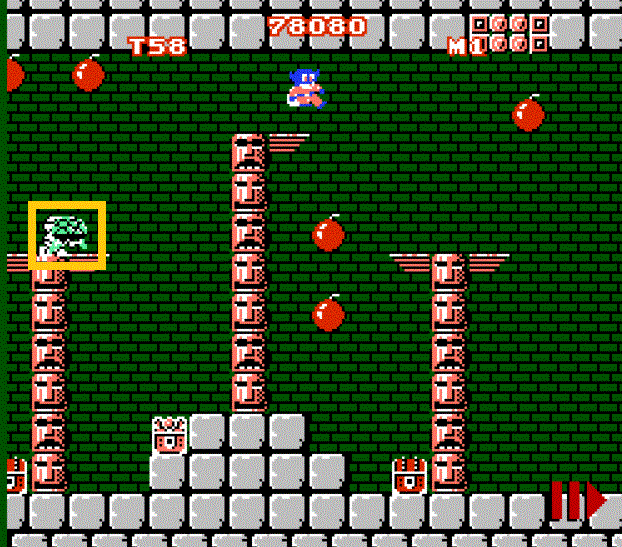
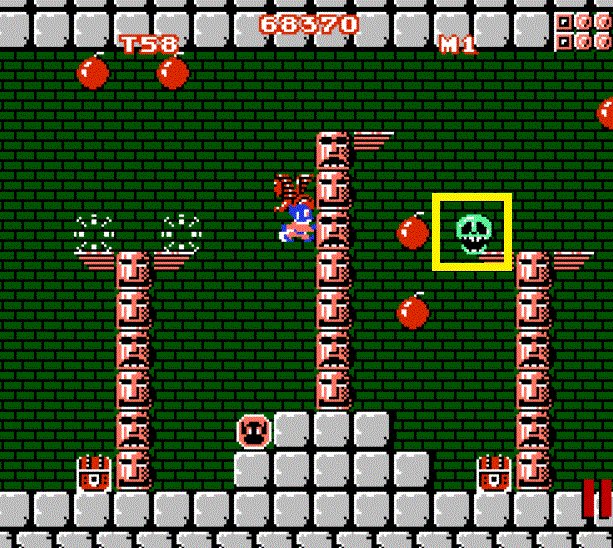
Unless playing very quickly/slowly, there should be a transformed enemy either before (right image, skull) or after (left image, jellyfish) the sphinx. See PR13 for how to use this information to manipulate the enemies in that room.
5-5
https://vimeo.com/946751890 - The bombs collected are still part of the route to manipulate the P-ball in palace room 11. If needed for setting up the P-ball in PR11, note that you can easily collect another bomb during the second jump for another bomb point.
5-7 (and 11-3)
https://vimeo.com/946751910 - Other jump sequences are possible and faster, depending on how tight the platforming can be executed. It's individual what will be fastest for each player.
Palace room 11
https://vimeo.com/946752072 - Upon entering, the bomb counter should be in the range 9-12 to spawn the P-ball in the center so it can be collected without detour. This can easily be set up by following the route shown in corridor 5 (or by tweaking it to hit the desired bomb counter value). If the bomb counter is 11 or 12 (as shown in the video), it will require a slightly higher jump to collect the P-ball than if it's 9 or 10. The time difference between these two options should be very close though, so it's more of a personal choice how one prefers to collect the P-ball.
Palace room 12
https://vimeo.com/1038311933
It's recommended to use this route together with the enemy counter observation from 5-2 to set up the enemy counter manipulation in PR13.
https://vimeo.com/946752093 (safe)
This route is both easier to execute and doesn't rely on starting to set up an enemy counter manipulation back in 5-2. With this route being slower, you will normally get information about the value of the enemy counter before leaving the room. There are four cases to consider:
- The first mummy transformed into an enemy just before Jack reached the exit (as in the linked video). The enemy counter is the SAME as the enemy type that just spawned.
- The first mummy transformed into an enemy before Jack collected the last bomb, the enemy counter is ONE MORE than the enemy type that spawned.
- The first mummy transformed into an enemy between case 1. and 2. The timing of mummy to enemy transformation is not fully understood and the enemy counter is therefore EITHER the same or one more than the enemy type that spawned. The probability of each case obviously increases the closer to the respective case the enemy transformed into an enemy.
- Jack exists before any mummy transformed into an enemy. In this case, there is unfortunately not much else to do than guess and hope for the best in palace room 13...
The first case is the ideal one since it finishes the room as fast as possible, while still providing information about the enemy counter to set up an enemy manipulation in room 13. When playing conservatively, one might consider the second case as it's easy to set up by intentionally pausing before the last jump to ensure an enemy transformation takes place and thereby avoid the uncertainty of the third and fourth case.
https://vimeo.com/946752082 (alternative, difficult)
This is another alternative solution. The last jump can be a bit tricky at first, but gets more manageable with practice. You need to wiggle back and forth mid-jump as Jack's hitbox stretches a bit outside the sprite, which allows collecting bombs #4 and #5. A pure diagonal jump won't work. This solution should be about equally fast as the first one. Individual execution skill might determine which one is faster.
Note - If you only hold right on the d-pad when the room starts, there is a roughly 50% chance to get stuck for 1 frame on the first platform. This is related to sub-values that are not known to be possible to manipulate in real-time. This is however easily avoided by holding up at the same time (or press A) when the room starts.
Palace room 13
The strategy in this room is to adjust the number of A-presses when traversing to the left side and then dropping down to the floor in order to manipulate the enemy counter. Clearing the room as quickly as possible requires that the first enemy transforms into either a bird or a skull. If lobsters start appearing, it will be very tricky to clear the room efficiently (or at all!), while the other enemy types can be dealt with, but usually requiring additional dodging. However, only the skull and bird cases will be described here:
https://vimeo.com/946752111 (bird/bat/bat) - The two "bats" on the right side can either start going left or right (each one random 50/50?). If one or both start going right, they will be in the way when collecting the four bombs in the bottom right. If they start going left (like in the linked video), they can however be ignored. While the bird's movements are predictable, it doesn't take that much variance in the execution before it can block the last jump from the right side towards the exit.
https://vimeo.com/946752131 (skull/fireball/fireball) - If not moving through the room quickly enough, the skull will be in the way when leaving the second alcove from the top of the right side. The fireballs in the lower right alcove can also be in the way, just like the "bats" in the "bird" case above. Their initial horizontal movement direction appears to be random (50/50?) and if one or both start moving right, they often end up blocking Jack. They also have a tendency to get "stuck" in the first alcove, creating another possibility for Jack's path getting blocked.
https://vimeo.com/946752144 (skull/fireball/fireball, safer and slower method) - Usually 0.5-1s slower than the routes above.
The following A-presses will set it up so the first mummy transforms into a bird or skull:
| Enemy counter at the start of the room |
A-press pattern | 3 first enemies |
| 0 | 3+1+1 | Bird/Bat/Bat |
| 1 | 5+1+1+1 | Skull/Fireball/Fireball |
| 2 | 5+1+1 | Skull/Fireball/Fireball |
| 3 | 4+1+1 | Skull/Fireball/Fireball |
| 4 | 5+1+1 | Bird/Bat/Bat |
| 5 | 4+1+1 | Bird/Bat/Bat |
As an example, 5+1+1+1 should be read as:
5x A-presses to get to the left side + 1x A-press inside the first alcove on the left side + 1x A-press in the second alcove on the left side and then finally a last A-press along the floor on the left side
It's of course possible to play around with the A-presses to manipulate more bird or skull cases, depending on personal preference.
Knowledge about the enemy counter can either be gained in PR12 or in 5-2. The comments for PR12 should be enough to explain how it's done in that room. If the enemy counter was observed all the way back in 5-2 (in order to use one of the faster solutions in PR12), the number of A-presses until PR13 needs to be strictly routed. Let's start with the case of an enemy appearing before the sphinx in 5-2. This is the number of A-presses that are used in each room before PR13 if following the route shown on this page:
| Room | A-presses | Comments |
| 5-2 | 11 | Bat, lobster, jellyfish and skull generally require an additional A-press to dodge (see comments for room 5-2) |
| 5-5 | 9 | |
| 5-7 | 7 | |
| 11-3 | 1 | |
| PR11 | 9 | |
| PR12 | 7 | The number of A-presses for the alternative solution can be adjusted manually when running across the ceiling. So any player preferring that solution will have to come up with their own schedule of A-presses. |
| Total | 44 | Mod 6 = 2 |
- The bottomline is that the enemy counter in PR13 will be +2 compared to the enemy before the sphinx in 5-2. Let's look at an example. In the (right) screenshot of section 5-2, a skull appeared. The skull corresponds to an enemy counter of 3. By applying the scheme above, the enemy counter when entering PR13 should then be 5. However, clearing the skull in 5-2 often requires an additional A-press, pushing the enemy counter back to 0 at the start of PR13. By looking in the first table, applying the A-press pattern "3+1+1" in PR13 will result in the first three enemies being bird/bat/bat.
- If the enemy appearing in 5-2 was after the sphinx (left screenshot in the 5-2 section), the enemy counter when entering PR13 will be +1 (and not +2 or +3). For example, the left screenshot in section 5-2 shows a jellyfish, which corresponds to the enemy counter being 2. The enemy counter when entering PR13 will therefore be 3. By looking in the first table, applying the A-press pattern "4+1+1" in PR13 will result in the first three enemies being skull/fireball/fireball.
It's difficult to say whether bird/bat/bat or skull/fireball/fireball is to prefer. The bird tends to interfere more than the skull. But the fireballs on the other hand tend to be more often in the way than the bats.
Palace room 14
https://vimeo.com/946752175 - Dropping down between the bombs at the start has a 5-frame window (hold left when the level starts and then left-down).
https://vimeo.com/946752161 - A few tenths slower than the solution above, but avoids squeezing through the bombs at the start.
Palace room 15
https://vimeo.com/946752192 - While being a slight detour, it's often worth collecting the P-ball to avoid any of the enemies interfering during the last jump. The tasne solution (https://youtu.be/kKwcSm-AmAw?t=293) relies on a 1-frame jump at the start of the room, but is otherwise fairly straight-forward to execute and is worth considering as the speedrun gets increasingly optimized. It should save a few tenths in real-time over the solution presented here.
Palace room 16
There are several routes that are about equally fast in real-time. Which one to choose will be a personal choice depending on the execution involved and the risk of enemy interference.
The third has the potential to result in the fastest solution, but you generally need to pause briefly inside the inner space to wait for a mummy to drop out of the way and thus canceling any the potential time gain over the other options. With #1, one usually, but not always, avoids having to deal with any transformed enemies.
Regardless of which room solution is selected, the enemy behavior in this room can be problematic. The mummies frequently clip through the floor, making them transform faster. Mummies also have a tendency to get stuck or not be consistent in their walking patterns in this room. It's not known how to control this in real-time, so this room might require a bit more "reaction execution" than most of the other rooms.
Note - If you only hold right on the d-pad when the room starts, there is a roughly 50% chance to get stuck for 1 frame on the first platform. This is related to sub-values that are not known to be possible to manipulate in real-time. This is however easily avoided by holding up at the same time (or press A) when the room starts.
Enemy counter setup for corridor 17
By manipulating the enemies in corridor 17, one can skip the mighty coin in 17-2, which is minor time save (a tenth or two). By following the routes shown on this page, the enemy counter when exiting PR13 is either 0 (if the first enemy was a bird) or 4 (if the first enemy was a skull). The rest of the game can then easily be routed with a set number of A-presses and adding additional ones to manipulate the enemy counter. Of the rooms before corridor 17, PR16 is the best suited for additional A-presses:
- If the first enemy in PR13 was a bird, the first enemy in 17-1 will be a skull. This is probably the best enemy in 17-1, so no additional A-presses are needed.
- If the first enemy in PR13 was a skull, the first enemy in 17-1 will be a lobster. The enemy counter is two behind the case above. It's recommended to add two A-presses in PR16. This can easily be done at the very start of the room, during the first hover (but can also be done elsewhere without time loss).
Corridor 17
Note that by following the route on this page, the A-press counter will loop shortly before the king's room, which impacts the enemy types spawning (in case an enemy manipulation is attempted in this section)!
17-1 (first visit)
If coming into round 17 with 2 mighty coins: https://vimeo.com/946751931. Some enemies require faster mashing to dig down to the sphinx. This can be mitigated by manipulating the enemy counter (see comments for PR16). Because of the skull's "AI", it will always disappear off-screen in this room. Manipulating the first enemy to be a skull is therefore a safe way to get enough space for getting to the sphinx.
If coming into round 17 with 3 mighty coins:https://vimeo.com/946751950 (combined with 17-2). Essentially a safer way to deal with this section, at the expense of spending time earlier in the game by not transforming to orange Jack in 5-5. Using the coin in 5-5 should save a few tenths of a second, while using the mighty coin here in 17-1 doesn't save any time.
17-2
https://vimeo.com/1038496941 - Collecting the mighty coin in 17-2 costs very little time (0.1-0.2?) and makes the king's room safer. But by using the same number of A-presses as shown in this guide, the enemies in king's room are manipulated and the mighty coin is therefore not needed.
17-1 (second visit)
https://vimeo.com/946751963 - It's theoretically slightly faster to land on the platform halfway to the exit and jump again. However, if the landing/take-off are not executed well enough, it will end up costing time.
King's room
https://vimeo.com/946751980 - The enemy counter has been manipulated to a value of 5 upon entering this room. In the linked video, this produces first a lobster and then a bird, which is an enemy combination that can easily be cleared without turning into green Jack. Please note that individual execution will impact how many A-presses can be done in this room before the first two enemies transform. So each player will have to try out themself which is the preferred enemy counter value to enter this room on.