Difference between revisions of "Lucky Luke: On the Daltons' Trail/100 %"
From SDA Knowledge Base
(→Wagon mechanics) |
(→Current Fastest Time) |
||
| Line 1: | Line 1: | ||
= Current Fastest Time = | = Current Fastest Time = | ||
| − | [http://dai.ly/ | + | [http://dai.ly/x5blyek 56:35 by wesen] |
| − | + | ||
= General advice = | = General advice = | ||
Latest revision as of 08:10, 15 February 2017
Current Fastest Time
General advice
- This guide does only contain the current knowledge, therefore you should not trust it blindly. When you have an idea for a shortcut try whether it is possible.
- The PC version is recommended because the game can be controlled a lot better and that version is faster (loading times, elevators in Level 5).
- Learn the locations of the B's in each level and add them to your level routes.
Route
- Hold "RUN" during every level except for Level 1 Boss, 2, 7, 10 and 11.
- When you have to go somewhere in platform levels jump whenever it is possible. If it is not possible run until you can jump again.
- This guide only extends the guides of the levels that actually contain B's. Make sure to also check out the Any% Guide for all techniques, tricks, etc.
Level 1: Abilene
| B | Location |
|---|---|
| 1 | Go left at the beginning, destroy the "B"-box and collect the B. Then go right and shoot the pipe. |
| 2 | After passing the guy who throws barrels from a roof you will reach a saloon. Go inside the saloon and collect the B. Then exit the saloon. |
| 3 | After reaching the first ladder in the level continue going right. Collect the B near the window, turn around and go back to the ladder. |
| 4 | The 4th B will spawn as soon as you collected the other 3 B's and used the key. It spawns inside the barn in which the key was placed. Collect it after dying and then go down the ladder and blow away the boxes. |
Level 2: Train 1
The strategy is the same as in any%. The only difference is that you collect all the B's. To do so shoot at every of the "B"-boxes in the level and collect the B's coming out of them.
Level 3: Train 2
Wagon mechanics
All of the B's are hidden in wagons with red roofs and destroyable wodden roof parts.
In order to enter these wagons you have to place dynamite on top of the wodden parts.
The contents of all the wagons that you can enter are:
- B
- B, Sheriff Star
- Sheriff Star
- Sheriff Star
- 6 Dollars, B, Life
- B
- 2 Sheriff Stars
There are also some enemies inside the wagons.
The wagons 1 to 3 are before the sub boss, the remaining ones are after the sub boss.
The B's are in two wagons in a row and are both 1 enterable wagon away from the subboss.
You can run onto the wodden parts without jumping on the following wagons: 1, 4, 5, 6, 7
In the PC version you can keep standing on the wodden part while the dynamite is exploding, you will not get damage by the explosion.
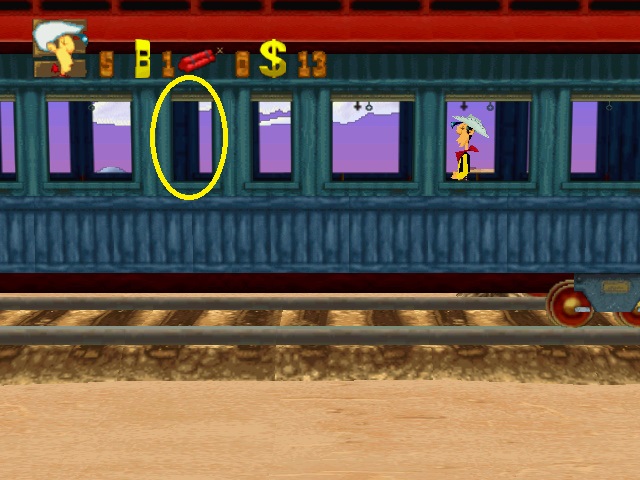
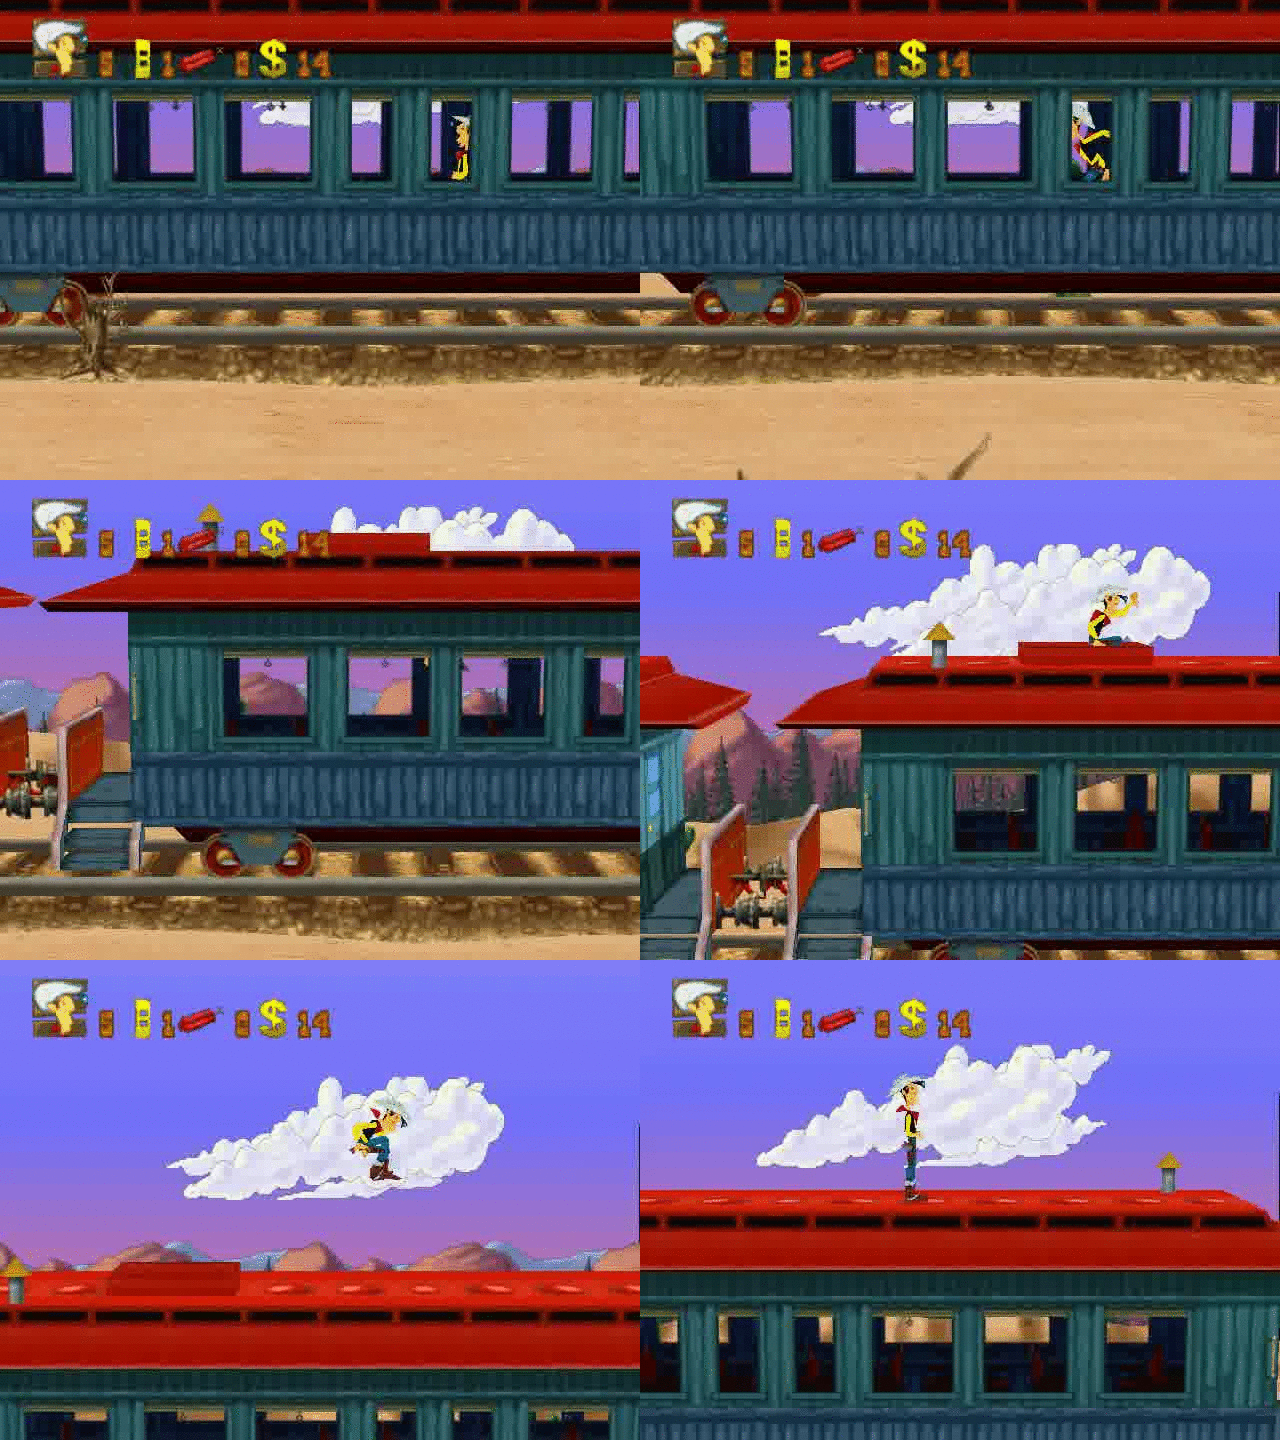
Each wagon has two small windows in a row followed by one big window near a trampoline which can be used to get out the wagon. Jump as soon as you are behind the 2nd small window to the left.
Strategy
Destroy the first "B"-box and collect the dynamite charge.
Use it to enter the first wagon and collect the B. Then exit the wagon and continue going to the right.
Destroy the "B"-box next to the wagon with a silver roof. You can often just run of the ledge to land on top of it.
Collect the dynamite charge and use it to enter the 2nd wagon.
Collect the second B and exit the wagon.
Collect the dynamite charge from the "B"-box next to the first checkpoint.
Use it to enter the second enterable wagon after the sub boss.
Collect the third B and exit the wagon.
Collect the dynamite charge from the "B"-box next to the wagon you just left.
Then use it to enter the next enterable wagon.
Collect the final B and exit the wagon.
Level 4: Pueblos
| B | Location |
|---|---|
| 1 | After collecting the 2nd orb and using the door go to the right before going up the ladder. Collect the B and go back left and up the ladder. |
| 2 | Go right just before collecting the 9th orb. Collect the B and go back left to collect the orb. |
| 3 and 4 | On your way to the sorcerer you will find two more B's. Collect both of them. |
Level 5: Mine Tunnels
| B | Location |
|---|---|
| 1 | Right after collecting the 2nd key and pulling the lever, a B will spawn in the area with the moving platforms. Jump down behind the platform next to the tunnel. Continue falling down where the arrow of Dollars is. Collect the B and land on the left/right platform below it. |
| 2 | Go back up after collecting the first B. Jump up from the last up/down platform that you used previously as soon as you are on the same height like the left/right platforms. This will trigger the extra platform above earlier making it possible to jump on it during the same cycle it spawns with. That platform was activated by the lever too, at the top of its route there will be a B. After collecting the B you can either jump onto the first or second left/right platform on the right. |
| 3 | After passing the walls which try to smash you go to the right of the elevator. Avoid the falling object and go towards the B. This will trigger it to escape to the other side of the wall. Then use the elevator to get down and go the left. Avoid the falling object, spiky pole and bat and collect the B. Then go back right, if you have enough health left jump through the spiky pole. |
| 4 | In the final moving platforms part jump from the up/down platform above the tunnel you came from to the other tunnel above. Collect the B that you triggered earlier and go to the exit door. |
Level 6: Indian Desert
| B | Location |
|---|---|
| 1 | After reaching the first whirlwind on the right side wait a moment until it flies up a bit. Then jump into it and let yourself be hovered to the whirlwind above. Fly to the stone platform on the left from the top of that whirlwind. Then collect the B and go back to the right. Just jump and hold RIGHT, then use the whirlwind to fly over the bursting dollar. |
| 2 | After collecting the 2nd totem part (red) and jumping over the hole, jump to the small platform in front of the one with the snake on it. Then run of its right edge and collect the B on the ground. Go back left and use the bones to get back onto the platform on the left. |
| 3 | After reaching the first whirlwind on the left side use it to fly on the platform on the right side. Then jump to the platform with the B and collect it. Finally go back to the left. Don't get the intentional hits because you have to collect one more B after collecting the last totem part. |
| 4 | After collecting the green totem part go back to the sorcerer. Here you have two options (both are about equally fast):
On the ground trigger the sorcerer, then use the cloud to get up to the B. Jump when you are above the sun in the background, collect the B and turn right and jump into the hole to respawn at the beginning of the level. |
Level 8: Waterfalls
| B | Location |
|---|---|
| 1 | After collecting the first gold nugget and jumping over the broken bridge you should automatically collect the B near the door. |
| 2 | Just after collecting the second gold nugget, run of the right edge of the platform, collect the B and jump over the checkpoint. |
| 3 | After collecting the third gold nugget and using the door you will see the B escaping from you. Just jump down the same area which it goes to. There will be a springboard right under it, so make sure to land on the B. Then use the springboards and branches to continue going to the right. |
| 4 | While beeing chased by the bear there will be the last B on your route. Make sure to collect it. |
Level 9: Wagons
Three of the B's are on the any% route, just make sure to collect them.
The fourth B is on a detour. To reach it don't activate the fourth lever on your way towards the checkpoint. Then collect the B at the end of the detour.
You will reach the same lever again after that, activate it this time.
Bonus Level Strategies
Press "RUN" at the result screen of the bonus levels to continue.
Bonus Level 1: Bottle Shooting
Keep shooting the barkeeper as soon as one time unit has passed in order to loose time. Don't shoot Rintincan to avoid gaining time.
Shoot bottles only when you want to adjust your total amount of Dollars.
Bonus Level 2: Arm Wrestling
It is a lot faster to win the arm wrestling match. You will win 60$ by winning, this money must be integrated in the money strategy.
Bonus Level 3: The Card Game
Select the "QUIT" option on the right side after the game is set up by pressing LEFT and then RUN.
Money strategy
In order to visit the shop only a minimum amount of times you have to collect a specific amount of Dollars in each level.
The numbers of Dollars refer to the total amount of Dollars you should have at the end of a level (including the remaining Dollars which you had at the beginning of the level).
Level 1: >= 40$ (close to 40$) => skip shop (backspace, LEFT, ENTER)
Level 2: >= 40$ (close to 40$) + 60$ (Collect 0$, Win bonus level) => buy the level password
Level 3: >= 60$ (close to 60$) => buy two lifes
Level 4: < 30$
Level 5: >= 100$ + 60$ (Win bonus level); buy the level password and exit the shop manually
Level 6: >= 100$ (close to 100$) => buy the level password
Level 7: < 30$
Level 8: as many as possible + x$ (use the bonus level to get 100$ total) => buy the level password
Level 9: as few as possible + 60$ (Win bonus level) => buy the level password + lifes if necessary
Level 10: < 30$
Level 11: < 30$

