Contra III/Game Mechanics and Glitches
From SDA Knowledge Base
Contents
Fast Weapon Switching
Contra III lets you carry a weapon on each hand. Most of the weapons in Contra III have a "cool down" time. For example with the crush gun you can fire three shots at a time and one of the shots has to disperse before the gun can fire again. If you have a crush gun on both hands, you can press the X button to switch to the crush gun on your other hand and fire three more shots while you wait for the cool down on the first three shots. Contra III has auto fire when you hold down the Y button. By holding Y and rapidly pressing X you can quickly switch between both weapons. You can do more damage with almost every combination of weapons using this technique.
Maximizing damage with the crush gun
The crush gun is the most powerful gun in the game, however it does so by creating explosions that disperse randomly. To ensure that you are doing maximum damage with this gun, you need to get as close as possible to your target without dying. Make sure you hold Y and press X as rapidly as possible to ensure that you are always firing missiles as rapidly as you can.
Note: When you have the crush gun on each hands, you may want to only fire all of your missiles in some areas of the game to avoid creating too much lag.
Maximizing damage with the peashooter
Yes, even the peashooter benefits from fast weapon switching in some stages. You do not do double damage by pressing X rapidly with the peashooter, you only do slightly more damage. The peashooter does not benefit from fast weapon switching in the top view stages 2 and 5.
Technique for holding the controller
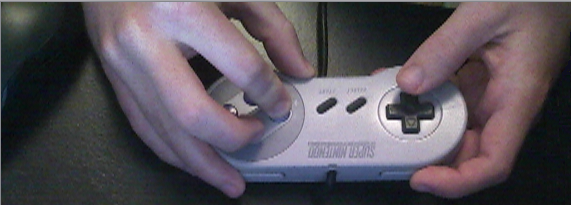
When you hold the controller you need to rest it against something. Hold down the Y button with the index finger and twitch your middle finger to mash the X button rapidly.
Diagonal Walking
In the overhead stages 2 and 5 you can move about 20% faster by moving diagonally. Be sure to adjust your angle from time to time so that you are ready to shoot at the bunkers you need to destroy before they appear on screen.

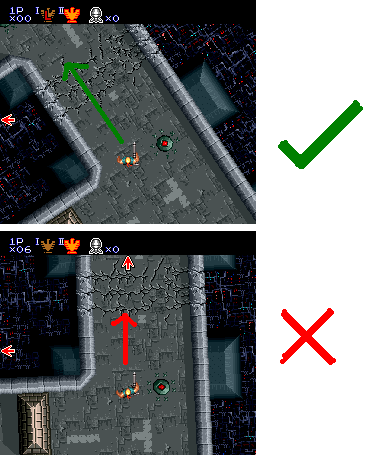
The speed boost from diagonal walking allows you to do things that you could not normally do in overhead stages. In stage 2 there is a section of the stage where the ground collapses under you and you must follow a narrow path through it. With diagonal walking you can walk through this section before the road collapses under you safely. In stage 5 there are two bridges that explode if you fire your weapons while standing on them. Diagonal walking allows you to outrun the explosion and survive.
Weapon Damage & Enemy Health
Note: These values were obtained for hard mode. The values may be different for other difficulty levels.
| Open in new window |
|---|
Character Hixboxes
The area of your character where you can get hit is actually much smaller than your character's sprite. By familiarizing yourself with this you can learn to dodge attacks that otherwise would not be possible.

The hitbox is shifted to the right of the character along the rails allowing for you to narrowly move past the jumping fireball in stage 1.
