Difference between revisions of "Amped 2/Mountains and challenges"
From SDA Knowledge Base
(→Videos unlocked by challenges) |
(→Scoring in Sponsor challenges) |
||
| Line 526: | Line 526: | ||
==Scoring in Sponsor challenges== | ==Scoring in Sponsor challenges== | ||
| − | The sponsor meter will increase the better you score. With a few exceptions (such as sponsors liking combos), it doesn't matter if the score comes from something the sponsor likes or not. The problem is more that scoring well with tricks outside the sponsor's interest will be difficult. The link between the score and the sponsor meter is illustrated below (the unit for the meter progression is not important, it was measured based on | + | The sponsor meter will increase the better you score. With a few exceptions (such as sponsors liking combos), it doesn't matter if the score comes from something the sponsor likes or not. The problem is more that scoring well with tricks outside the sponsor's interest will be difficult. The link between the score and the sponsor meter is illustrated below (the unit for the meter progression is not important, it was measured based on screenshots on a computer screen). This test was made on New Zealand sponsor 1, because that's the sponsor challenge with the biggest possible meter progression in the game for a single trick and therefore the most practical to measure on. It hasn't been investigated if there are any sponsor challenges in the game that work differently, but the assumption is that they all work the same way.<br /> |
[[File:Sponsor_meter_rate.jpg]]<br /><br /> | [[File:Sponsor_meter_rate.jpg]]<br /><br /> | ||
Latest revision as of 14:17, 9 October 2018
Contents
Challenge rankings
Completing a challenge improves your ranking. In the beginning, your ranking will improve by one, but the later challenges will drop the ranking by two (or even three for a few cases). The ranking is what unlocks new levels, so it's important for the routing (both any% and 100%).
- Otm1 = Own the mountain tricks
- Otm2 = Own the mountain snowmen
- Otm3 = Own the mountain gaps
- Otm = Own the mountain complete
- Sp = Sponsor
- PS = Photoshoot
- Pr = Pro
| Rankings | Score | Media | Otm1 | Otm2 | Otm3 | Otm | Sp1 | Sp2 | Sp3 | PS1 | PS2 | PS3 | Pr1 | Pr2 | Pr3 |
| Millicent 1 | 3 | 3 | 1 | 1 | 1 | 1 | 1 | 1 | 1 | 1 | 1 | 1 | 1 | 1 | 2 |
| Breckenridge | 3 | 3 | 1 | 1 | 1 | 1 | 1 | 1 | 1 | 1 | 1 | 1 | 1 | 1 | 2 |
| Event 1 | 7 | ||||||||||||||
| Bear Mtn. 1 | 4 | 4 | 1 | 1 | 1 | 1 | 1 | 1 | 2 | 1 | 1 | 2 | 1 | 2 | 2 |
| Mt. Hood | 4 | 4 | 1 | 1 | 1 | 1 | 1 | 1 | 2 | 1 | 1 | 2 | 1 | 2 | 2 |
| Laax 1 | 4 | 4 | 1 | 1 | 1 | 1 | 1 | 1 | 2 | 1 | 1 | 2 | 1 | 2 | 2 |
| Event 2 | 7 | ||||||||||||||
| Mt. Buller | 6 | 6 | 1 | 1 | 1 | 1 | 2 | 2 | 2 | 2 | 2 | 2 | 2 | 2 | 2 |
| New Zealand | 6 | 6 | 1 | 1 | 1 | 1 | 2 | 2 | 2 | 2 | 2 | 2 | 2 | 2 | 2 |
| Millicent | 6 | 6 | 1 | 1 | 1 | 1 | 2 | 2 | 2 | 2 | 2 | 2 | 2 | 2 | 2 |
| Event 3 | 7 | ||||||||||||||
| Bear Mtn. | 6 | 6 | 1 | 1 | 1 | 1 | 2 | 2 | 2 | 2 | 2 | 2 | 2 | 2 | 3 |
| Laax | 6 | 6 | 1 | 1 | 1 | 1 | 2 | 2 | 2 | 2 | 2 | 2 | 2 | 2 | 3 |
| Event 4 | 7 |
Since the legend challenges are only unlocked once you finish first in Event 4, which by definition puts you in first place of the ranking, they have no effect on the ranking.
Videos unlocked by challenges
Certain challenges unlock videos. This adds some menu navigation, which adds roughly half a second between challenges compared to "normal" challenges. In a segmented speedrun, you can avoid this by trying to end segments on these challenges (since the additional time appears after the save screen). The information is less useful in single segment runs, but could still be good to keep in mind.
There are three rules without exceptions:
- Once you have completed all the own the mountain goals on a level, you unlock a video.
- Pro 3 challenges always unlock a video, while Pro 1 and Pro 2 never unlock videos.
- No Legend challenges unlock any videos.
Here is a table of which sponsor and photoshoot challenges that unlock videos:
| Videos | Sponsor 1 | Sponsor 2 | Sponsor 3 | Photoshoot 1 | Photoshoot 2 | Photoshoot 3 |
| Millicent 1 | No | No | No | No | No | Yes |
| Breckenridge | No | No | No | No | No | No |
| Bear Mtn. 1 | No | No | Yes | No | No | No |
| Mt. Hood | No | Yes | Yes | No | No | No |
| Laax 1 | No | No | No | Yes | No | No |
| Mt. Buller | No | Yes | No | No | No | No |
| New Zealand | No | Yes | Yes | No | No | No |
| Millicent | No | Yes | Yes | No | No | Yes |
| Bear Mtn. | No | Yes | Yes | No | No | Yes |
| Laax | No | Yes | No | No | No | Yes |
Unlock rules
- All runs of a mountain are unlocked as soon as you have achieved one challenge (5 snowmen, 3 gaps, 3 tricks and/or the first score or first media score challenge).
- Sponsor challenges are unlocked by completing the previous sponsor challenges and the corresponding score challenge. Example: In order to unlock Sponsor 2 of a mountain, you need to have completed the second (or third) score challenge and Sponsor 1.
- Photoshoot challenges are unlocked by completing the previous photoshoot challenges and the corresponding media score challenge. Example: In order to unlock Photoshoot 2 of a mountain, you need to have completed the second (or third) media score challenge and Photoshoot 1.
- Pro challenges are unlocked by completing the corresponding event, the previous pro challenges and the corresponding sponsor and photoshoot challenges. Example: In order to unlock Pro 2 of a mountain, you need to have completed Event 2, the second (or third) sponsor and photoshoot challenges and Pro 1.
- The levels have the following unlock requirements:
- - Millicent 1 -
- - Breckenrr. 245
- - Event 1 240
- - Bear Mtn. 1 235 (+ Event 1 completed)
- - Mt. Hood 225 (+ Event 1 completed)
- - Laax 1 215 (+ Event 1 completed)
- - Event 2 205 (+ Event 1 completed)
- - Mt. Buller 180 (+ Event 2 completed)
- - New Zealand 160 (+ Event 2 completed)
- - Millicent 135 (+ Event 2 completed)
- - Event 3 110 (+ Event 2 completed)
- - Bear Mtn. 75 (+ Event 3 completed)
- - Laax 45 (+ Event 3 completed)
- - Event 4 8 (+ Event 3 completed)
- Legend challenges are unlocked by finishing 1st in Event 4.
There is an odd exception to the above rules. Breckenridge Pro 1 doesn't require Sponsor 1 to be completed. There is no apparent reason for this and looks like a programming oversight.
Score and Own the Mountain challenges (otm)
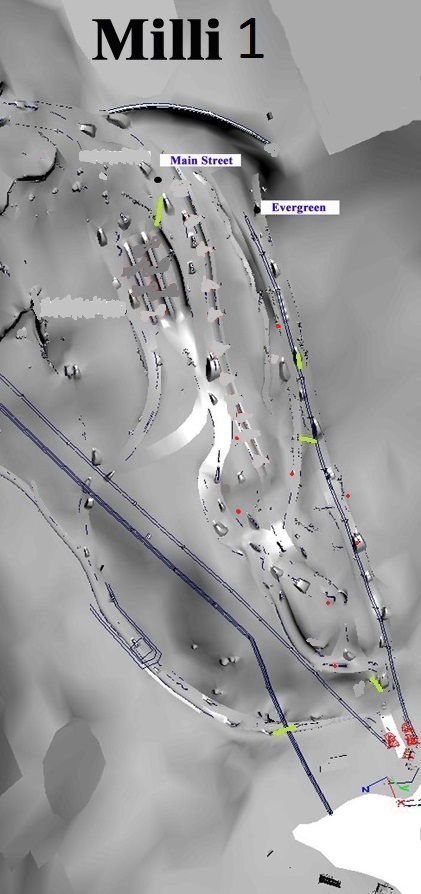
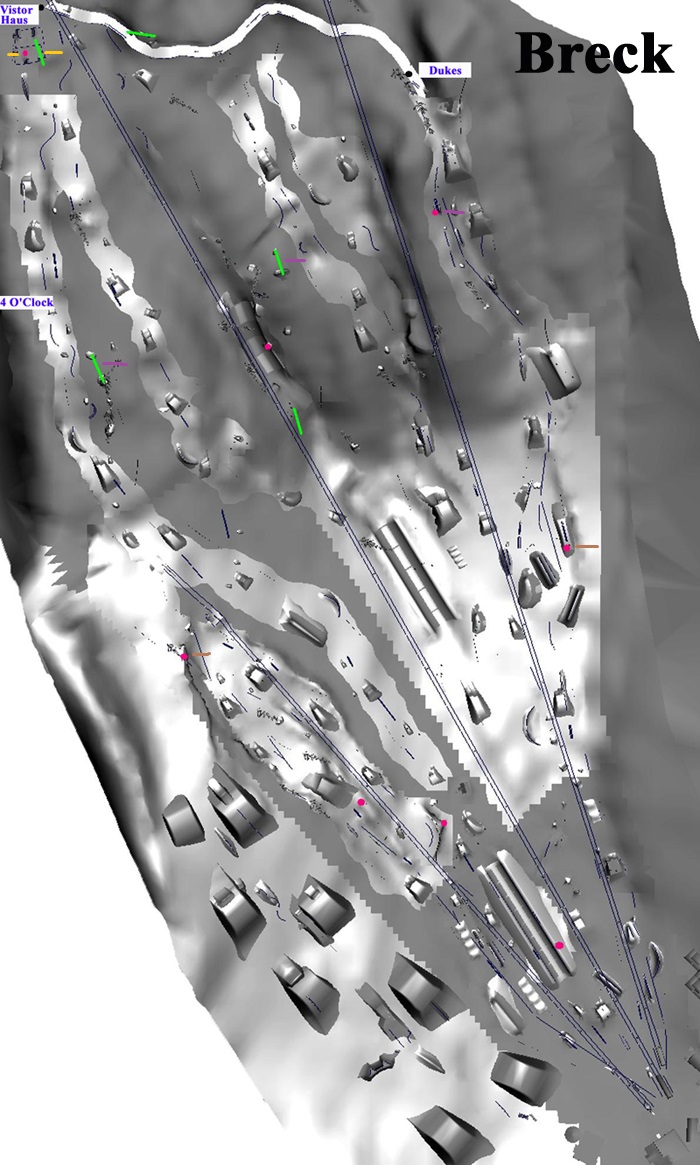
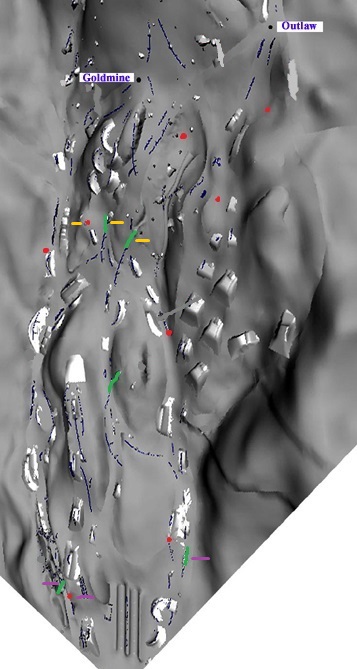
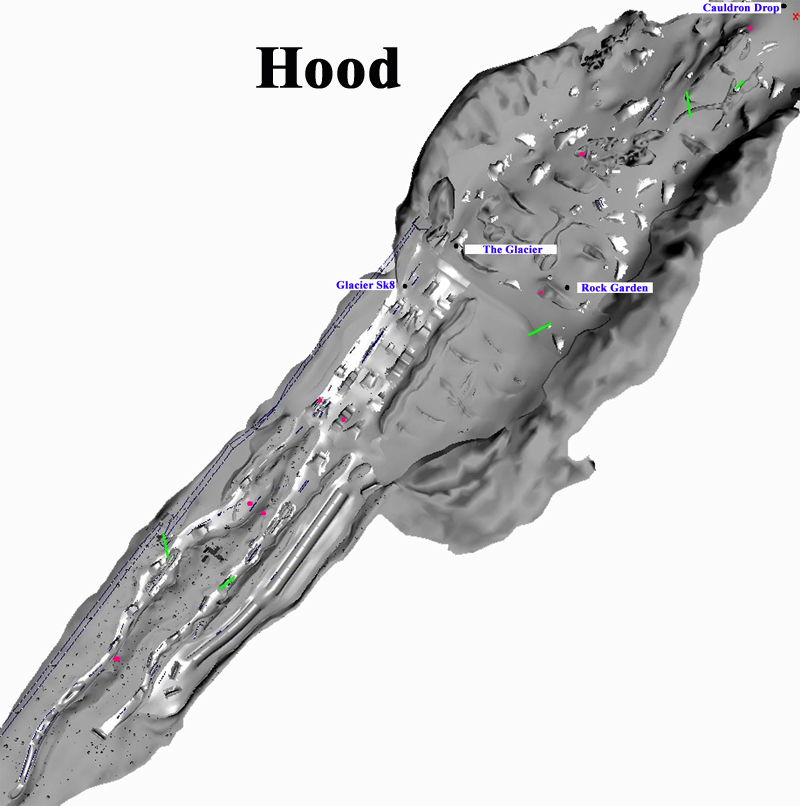
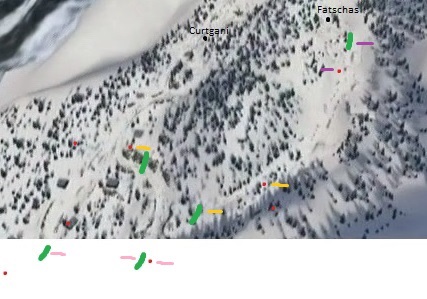
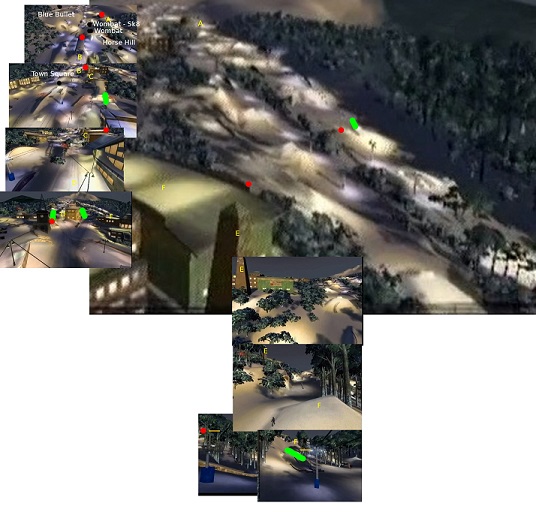
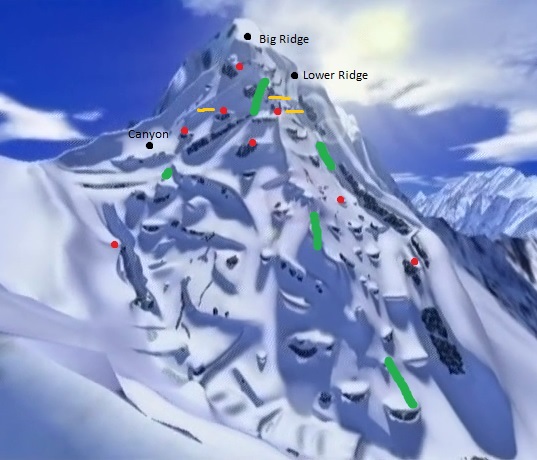
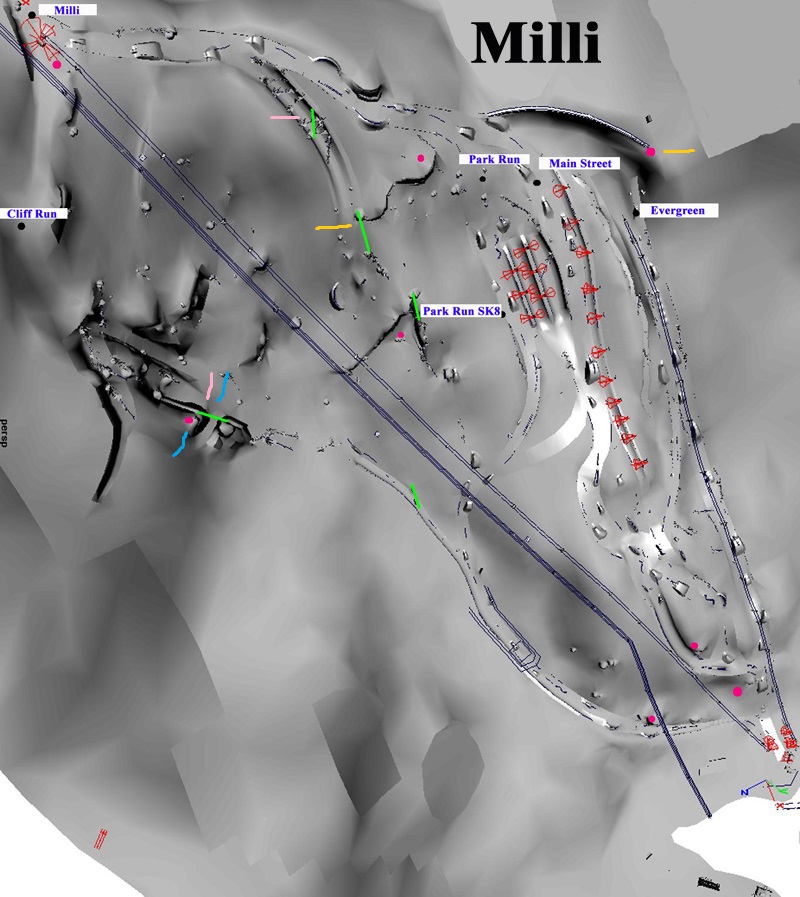
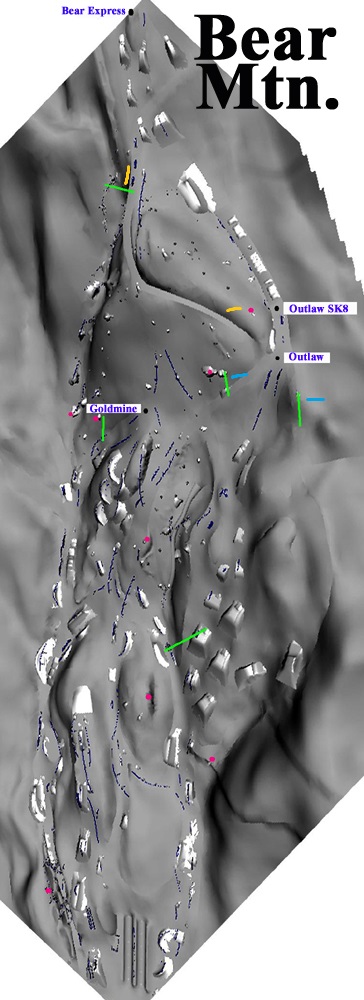
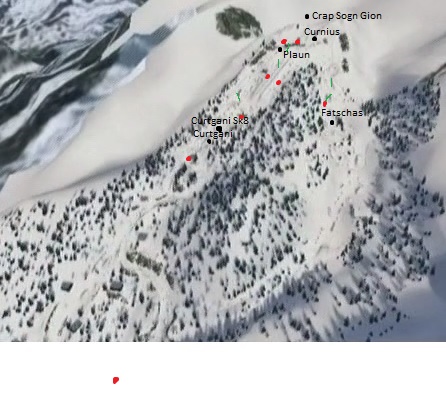
Several of these maps have been taken from http://www.ign.com/wikis/amped-2/Guide_part_5 or are modifications thereof (when the same mountain is used for 2 levels). The other maps have been generated from the "Mountain preview" in-game option and are therefore of varying quality. For all of the maps, the following apply:
- Red dots - Snowmen
- Green lines - Gaps
- Colored lines (other than green) - Same-colored lines indicate non-combinable otm content.
Millicent 1
Note that you can achieve all goals in one run on this level.
3rd score requirement: 50.000
3rd media score requirement: 30.000
Otm tricks:
- 540 spin
- 2 trick combo
- Back flip
- Boardslide
- Nose grab
There are plenty of opportunities throughout the level to do these tricks.
Backward off-axis flips also count for the flip trick.
Breckenridge
The gap at the beginning of "Four o'clock" is not possible until the jump stats have been upgraded a bit (the more, the easier it becomes). On the other hand, the three gaps to the right (when looking at the map) are easy to overshoot and soon become harder and harder to land as you gain more jump stats.
3rd score requirement: 75.000
3rd media score requirement: 40.000
Otm tricks:
- 10.000 point trick
- Front Flip with 1.000 Style points
- 5.000 point combo
- 300 point butter
- 2.500 point Railslide
There are plenty of opportunities throughout the level to do these tricks.
Forward off-axis flips also count for the flip trick. There should be no difference between "railslide" and "boardslide" (as it's referred to on Millicent 1). They both mean grinding on a grindable structure.
Bear Mtn. 1
3rd score requirement: 90.000
3rd media score requirement: 45.000
Otm tricks:
- Rodeo 360
- 7.500 point Railslide
- 15.000 point combo
- 10.000 Style points
- Double Front Flip
The double front flip needs to be planned in the route since you need a fairly big jump to achieve two rotations when you first arrive at this level. It's also a surprisingly precise trick as it's easy to get off-axis.
Mt. Hood
Note that the Cauldron Drop isn't unlocked when you first arrive here.
3rd score requirement: 130.000
3rd media score requirement: 65.000
Otm tricks:
- 3.000 point Hand Plant
- 7.500 point Noseslide
- 10.000 point 180 spin
- 5 trick combo
- Stomp 2 landings in a run
These tricks require that you go a bit more out of the way. The 10.000 point 180 spin can of course be done as a stand-alone trick, but can also be achieved if a 180 is included in a grinding combo (possibly any combo?). The stomped landings requirements (there are more in later levels) can be hard to deal with. There are several different ways of getting stomped landings and it depends on several parameters (for example the general steepness of the slope and the board stats). A good way is to look for small bumps, where you can perform one flip rotation. It's possible to get stomped landings both with straight flips and normal spins, but with the score decay setting in, the game will quickly block that possibility. Off-axis rotations are a better choice since they aren't subject to score decay. It's also possible to get stomped landings from pure grabs or from multiple rotations, but the success rate just appears to be lower for them.
Laax 1
There is sadly no way to get a view of the lower part of the mountain from this perspective.
3rd score requirement: 175.000
3rd media score requirement: 90.000
Otm tricks:
- 15.000 point Method Grab
- Late 360 Spin
- 15.000 point Corkscrew 360
- 1080 Spin
- 30.000 points without crashing
You need to complete Pro 1 on Bear 1 to unlock the Method Grab technique. "Late" tricks are done by combining different types of rotations. So if you start with a flip (straight or off-axis) and then proceed with a spin, you'll get a "late spin". Same principle applies to "late flips". Grabs are unfortunately not triggering tricks to be "late". Unless you return to this mountain with a board boosted from the later mountains, the only realistic place to achieve a 1080 is around the cliff drop half-way down. The late 360 spin can also be hard to fit in and needs to be taken into account when upgrading the board stats before coming here.
Mt. Buller
The "Mountain preview" is really terrible for this mountain, which makes it difficult to make a proper map. The information is all there though.
3rd score requirement: 180.000
3rd media score requirement: 85.000
Otm tricks:
- 5.000 Style points on a rail
- 50.000 points without crashing
- Late Flip
- 5.000 point Impossible
- 15.000 point Railslide
Impossible is a snowskate only trick (X+down).
New Zealand
3rd score requirement: 270.000
3rd media score requirement: 130.000
Otm tricks:
- 30.000 point 360 Spin
- 40.000 point combo
- 10.000 point Railslide
- 60.000 points without crashing
- Triple Back Flip
The triple back flip is problematic. Both because it requires a really high drop to allow for three rotations, but also because it's a very precise trick (easy to go a bit off-axis).
Millicent
3rd score requirement: 250.000
3rd media score requirement: 125.000
Otm tricks:
- Double Flip + Late 180 Spin
- Stomp 3 landings in a run
- 25.000 Style points
- 10.000 point Railslide
- 50.000 point combo
The double flip + late 180 requires both a big jump and some pretty boosted jump and/or spin stats for the board.
Bear Mtn.
3rd score requirement: 390.000
3rd media score requirement: 180.000
Otm tricks:
- 6.000 point Lip Trick
- 6 trick combo
- 30.000 point Railslide
- 1.000 point Butter
- 30.000 point Rodeo 360
If you start a butter and immediately interrupt it by switching stance, you will receive the butter points plus 1000 points for the "180" (this is subject to score decay, so it only works at the very start), which will guarantee the achievement of the butter trick requirement.
Laax
Together with Millicent 1, this is the only level (with present knowledge) that can be completed in a single run.
3rd score requirement: 450.000
3rd media score requirement: 225.000
Otm tricks:
- 120.000 points without crashing
- 40.000 point Flip
- 75.000 point combo
- Late 540 Spin
- Stomp 5 landings in a run
Since this is the last level, it has also some of the hardest trick requirements. The late 540 can be hard to fit in along a route. A tip is to start spinning (in a spot that allows you to do a 900), but almost immediately after starting to spin, push the stick down (or up). This will take you off-axis. Then move the stick back to horizontal and continue spinning. If done correctly, the result will be a 360 off-axis rotation and a late 540 spin.
Events
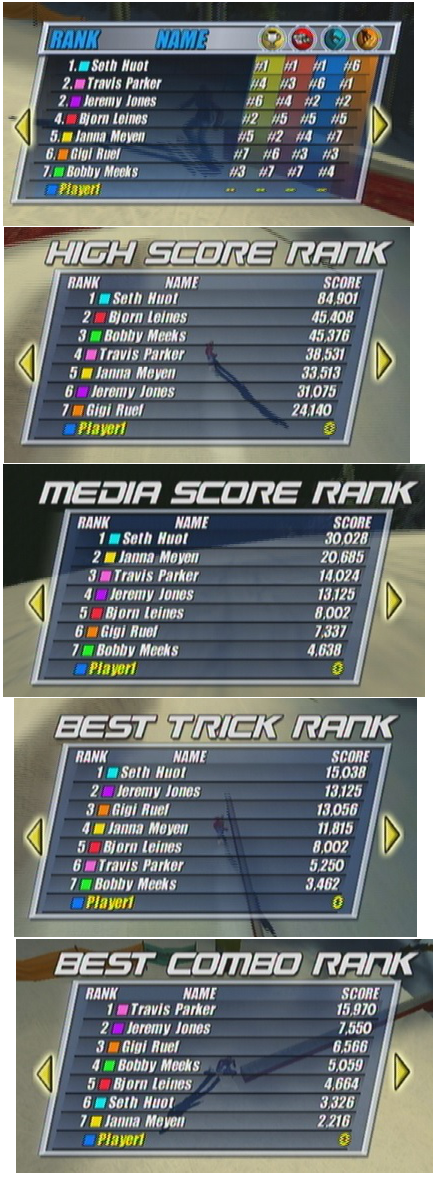
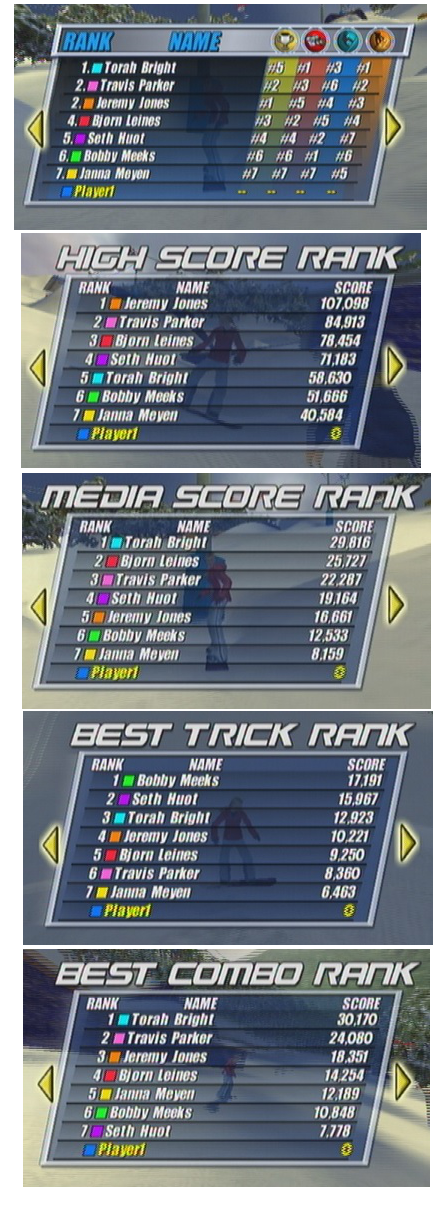
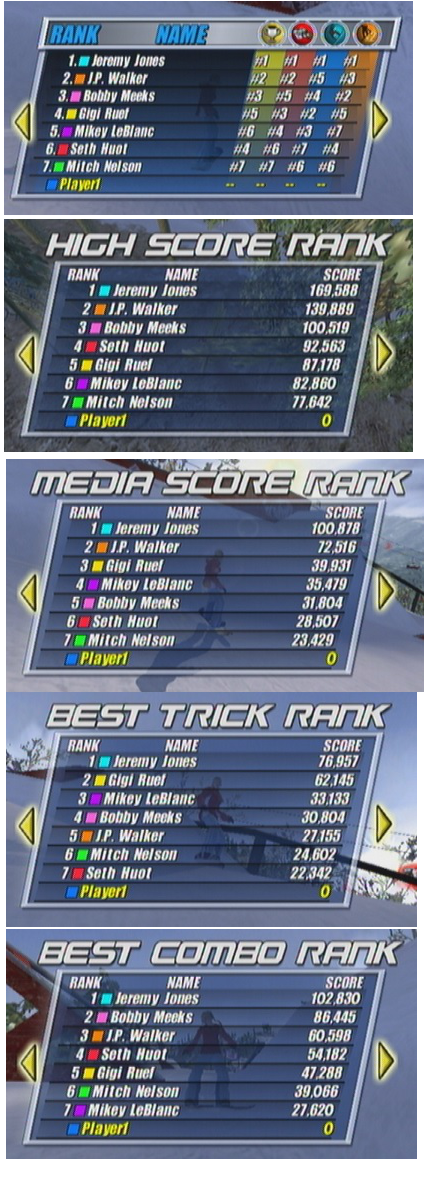
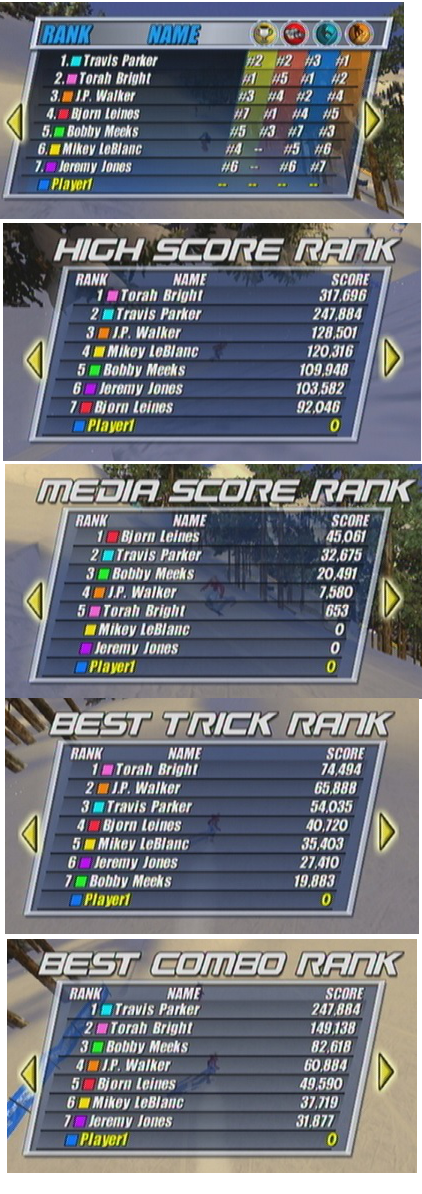
All events are 100% predictable in terms of the opponents' scores.
Event 1
Event 2
Event 3
Event 4
Scoring in Sponsor challenges
The sponsor meter will increase the better you score. With a few exceptions (such as sponsors liking combos), it doesn't matter if the score comes from something the sponsor likes or not. The problem is more that scoring well with tricks outside the sponsor's interest will be difficult. The link between the score and the sponsor meter is illustrated below (the unit for the meter progression is not important, it was measured based on screenshots on a computer screen). This test was made on New Zealand sponsor 1, because that's the sponsor challenge with the biggest possible meter progression in the game for a single trick and therefore the most practical to measure on. It hasn't been investigated if there are any sponsor challenges in the game that work differently, but the assumption is that they all work the same way.
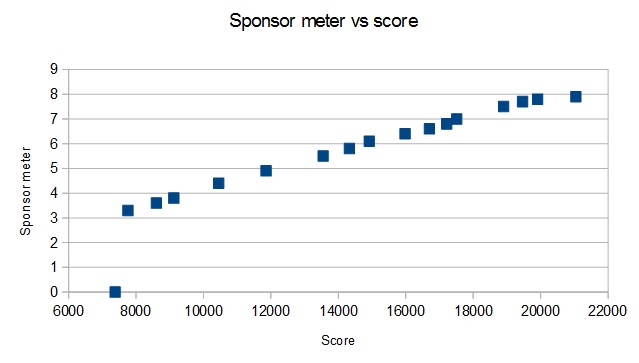
As can be seen, there is a cut-in score (different for every challenge, but in this case ~7.500), below which the sponsor will you give you the thumbs down and not reward you with any progression on the meter. There is also a cut-out score (different for every challenge, but in this case ~20.000), at which the meter progression maxes out for a single score. Between these two there is a linear dependence between the score and the meter progression. It also appears that extrapolating this linear dependence would hit origo. This indicates that doing many low-score tricks is equally rewarding as a few high-scoring tricks. In practice, it's of course almost always advantageous to score as much as possible from each trick opportunity, since each score trick occasion usually comes with a setup time. The non-linear score rate of most of the tricks also needs to be taken into account in order to find the optimal strategy for the individual sponsor challenge.
Pro challenge times
The pro challenges will fail if you complete the last trick too far ahead of the pro (none of the other tricks have this limitation, despite the game giving you warnings). It's not understood exactly how much in advance you're allowed to be, but the trigger seems to be somewhere when the pro is starting the last trick. Because of this limitation, it's important to know what the fastest possible time is. Below is a table with the currently known range. The columns marked ">" and "<" mean that the theoretical time (in seconds) is faster and slower, respectively. "?" mean that it's not possible to get ahead of the pro. The only way to test this is to complete the respective challenges many times and hope for completion times that land as close as possible on both sides of the theoretical limit. Since this is time consuming, there is a gap of several tenths of a second for most of the challenges.
Below are illustrations of how the start and end times have been defined in the table. These references are arbitrary, but have been chosen since they are easy to pick out in a video feed (although the same could be said about several other choices as well).
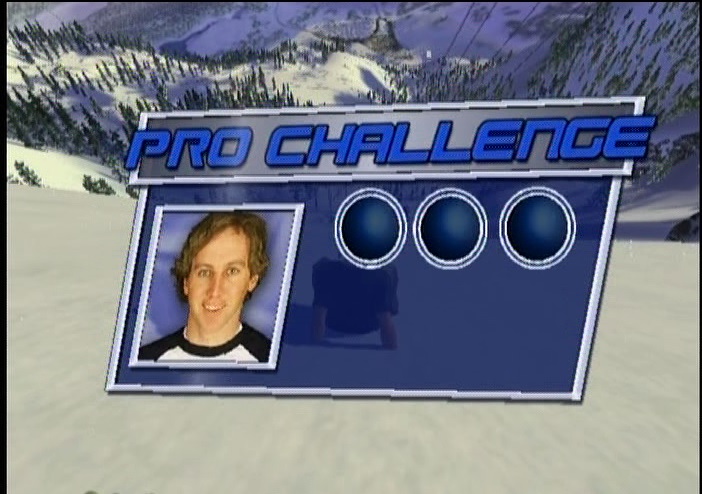
The start time has been defined as when the last menu screen first tilts one notch clockwise (it will then rotate back counter-clockwise).
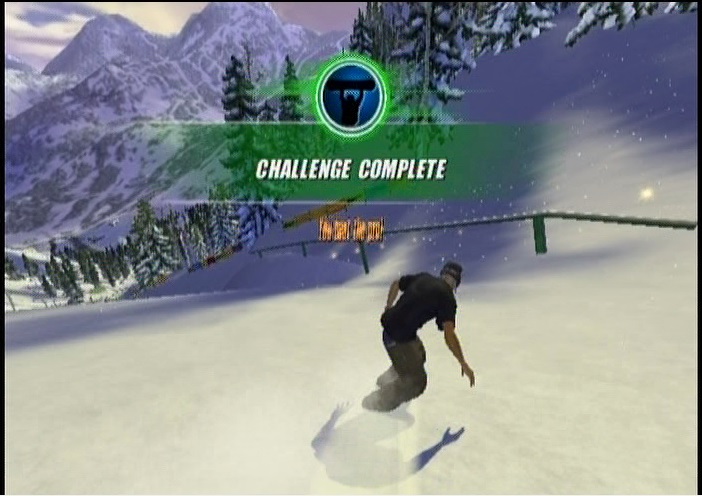
The end time has been defined as when the challenge completed/failed is shown on screen with the text size in the picture.
| Pro times (s) | 1 > | 1 < | 2 > | 2 < | 3 > | 3 < | L > | L < |
| Millicent 1 | ? | 32.2 | 48.0 | 48.6 | 81.0 | 81.4 | N/A | N/A |
| Breckenridge | ? | 40.6 | 55.6 | 55.9 | 52.7 | 53.1 | N/A | N/A |
| Bear Mtn. 1 | 49.4 | 49.6 | 81.8 | 82.3 | 41.9 | 42.0 | 96.4 | 96.8 |
| Mt. Hood | 50.7 | 50.8 | 44.2 | 44.6 | 63.2 | 63.7 | N/A | N/A |
| Laax 1 | 41.0 | 41.1 | 47.0 | 47.4 | 49.5 | 49.6 | ? | 52.4 |
| Mt. Buller | 50.7 | 50.8 | 60.2 | 60.4 | 79.0 | 79.2 | N/A | N/A |
| New Zealand | ? | 49.8 | 64.0 | 64.5 | 60.4 | 61.1 | N/A | N/A |
| Millicent | 76.2 | 76.5 | 66.2 | 66.5 | 72.8 | 73.3 | 56.2 | 56.4 |
| Bear Mtn. | 45.3 | 45.5 | 60.0 | 60.1 | 65.5 | 65.5 | N/A | N/A |
| Laax | 71.2 | 71.3 | 47.7 | 47.8 | 77.1 | 77.6 | N/A | N/A |
