MeGUI
From SDA Knowledge Base
Contents
Introduction
Those who use VirtualDub(Mod) will have to get used to the fact that MeGUI does not accept simple avi input. AviSynth scripting is required before continuing with this guide.
We will be using the H.264 video codec along with the AAC audio codec muxed inside an mp4 container.
Software and Installation
- You may need to install Microsoft .NET framework 2.0 in order for MeGUI to run.
- Download MeGUI. Install the program and run it. You should get a message saying there are updates available. Click OK and let the program download everything it needs. You can also go to Options -> Update to access the autoupdate feature.
- Close MeGUI.
- Download SDA x264 profiles for MeGUI and extract to "C:\Program Files\megui\allprofiles\x264\". These are compatible with QuickTime, Xbox 360, Playstation 3 and iPod.
- Download Nero Digital Audio. If the page is gone, download version 1.3.3.0 here. Extract the contents of the zip file to "C:\Program Files\megui\tools\neroaacenc\". It will probably have a "win32" folder; if so, copy all the contents of the win32 folder and put them in "C:\Program Files\megui\tools\neroaacenc\". If the neroaacenc folder does not exist, create it yourself.
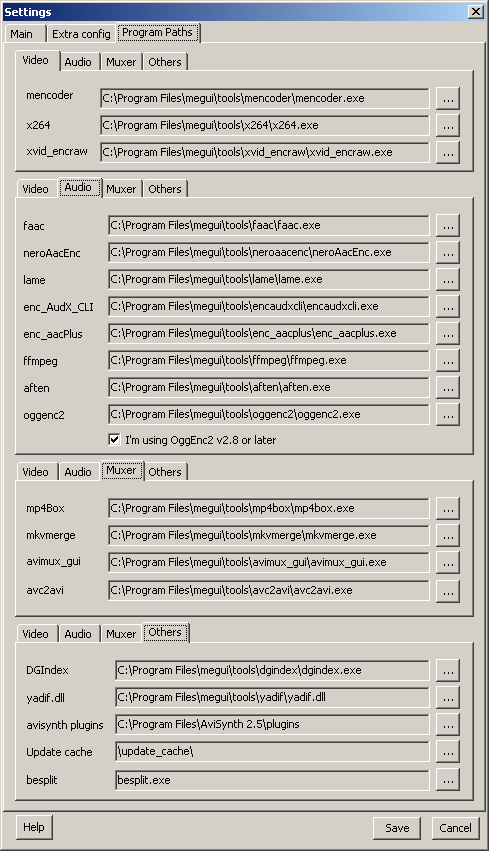
- In MeGUI, go to Options -> Settings -> Program Paths. Look for the entry with NeroAacEnc and click the browse icon to the right. Find neroaacenc.exe which should be in the "megui\tools\neroaacenc\" folder if you followed the instructions above.
- Verify that the paths for mp4box and x264 are also correct; don't worry about the rest. Save your settings.
Importing the AviSynth script
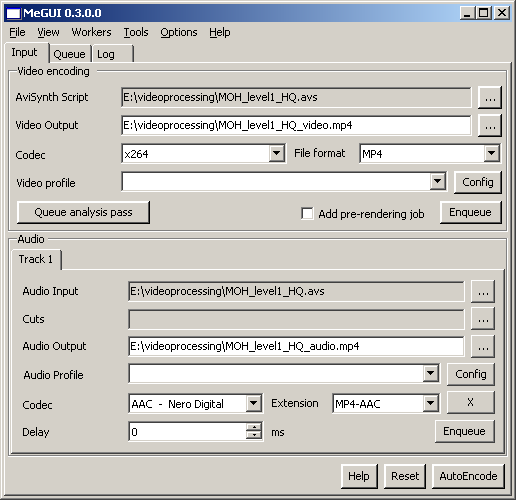
In the input tab, open the AviSynth script in both video and audio boxes. MeGUI exports your video and audio as separate files; you later combine them. You will notice that the video and audio output files have the same name... MAKE SURE THEY ARE DIFFERENT ...or you will probably end up losing your whole encode, and a whole lot of time.
Your input screen should look something like this:
Setting the video compression
Our goal is to make all of our videos compatible with QuickTime / Xbox 360 / PlayStation 3. Medium quality also features iPod compatibility. You won't have to play too much with the settings if you use the SDA profiles.
Bitrate list:
- Low quality - 128 kbps
- Medium quality - 512 kbps
- High quality - 2048 kbps
- Insane quality - 5000 kbps
- X-TREME quality - 10000 kbps
All qualities will use the SDA_QT-Xbox360-PS3_LQHQIQXQ profile, except for MQ which will use the SDA_iPod_MQ profile.
- At the input screen, click the dropdown menu for Encoder Settings and select the appropriate profile.
- Click the config button
- In the Main tab, set the bitrate according to which quality you're encoding.
- Select the Advanced tab, set the minimum quantizer to 19 for videos with 640x480 or similar/higher resolution, and 17 for lower resolution.
- Click OK and that's it!
Avoid changing any other settings, unless you know what you're doing, because you'll risk breaking compatibility.
Setting the audio compression
Bitrate list:
- Low quality - 64 kbps
- Medium quality - 64 kbps
- High quality - 128 kbps
- Insane quality - 320 kbps
- X-TREME quality - 320 kbps
Tip: Use some sense when choosing the bitrate for the audio. If your DVD recorder uses 192 kbps AC3, then there's no need to go any higher, especially when considering that AAC is a newer, more advanced codec and can account for the lossy to lossy conversion. To check the audio bitrate of your DVD recorder, look at the filename of the ac3 file DGIndex gave you.
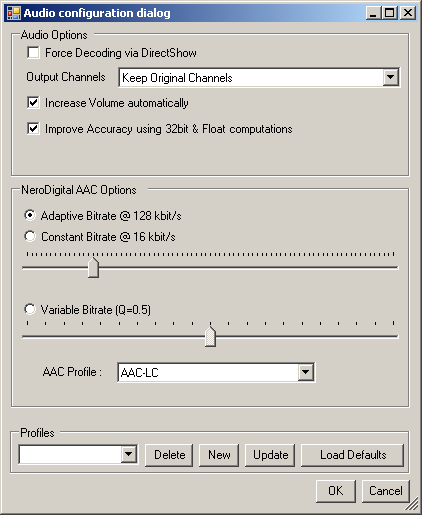
Go back to the input screen and look at the audio section. Choose AAC - Nero Digital as the codec, choose MP4-AAC as the extension, and then press the Config button. Use adaptive bitrate, and move the slider to select your bitrate. For AAC Profile, use Low Complexity (AAC-LC).
Encoding the video and audio
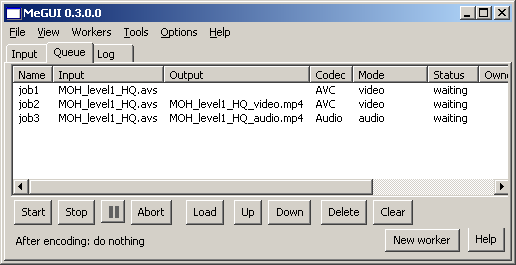
So you're back at the input screen, your configurations are all good to go. Now you just have to put those encoding jobs in the queue, so click the enqueue button for both video and audio and then click on the queue tab.
If it looks good, hit the start button. In newer versions of MeGUI, you may get some notice about "workers." Just say yes and it'll work fine.
Combining the finished video and audio files
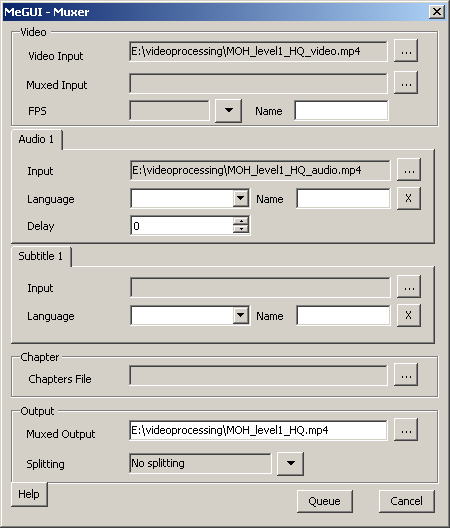
Simple enough, just go to Tools -> Muxer -> MP4 Muxer and add your video and audio files and set an output file name. Then press the queue button, go back to the queue tab and press start again.
And that's it! You should now have your final mp4 files ready for submission.
TIP: If you want to queue everything right from the get-go, you can create text documents and rename them whatever you plan on naming your intermediate files (segment_1_video.mp4, segment_3_audio.mp4, etc.), tell MeGUI to mux those together, then delete them. This basically tricks MeGUI into thinking you have the files when you don't. You can also use batch encoding.
Clearing the queue
Sometimes, when you select all the files in the queue and hit "Delete," you'll get a weird error message and you'll have to Ctrl+Alt+Del to get out of MeGUI. To avoid this, simply hit the "Clear" button.
Checking your quality
Before you encode your actual speed run, you should make sure you're doing everything right. If you encode your speed run incorrectly, it will be a waste of time for you and SDA. Read the "how to post a video quality test" topic in the Tech Support forum and follow the instructions.
Saving your settings
You can save a lot of time by saving your settings for later. Go to the video configuration window and click "New," then type in a name corresponding to whatever quality you had your settings adjusted to. Do the same thing for audio and making videos in the future will be quick and painless. To load your settings, go to the main MeGUI screen and choose an option you created from one of the profile dropdowns.
Return to the front page.
