Amarectv recording
From SDA Knowledge Base
The Preview Window
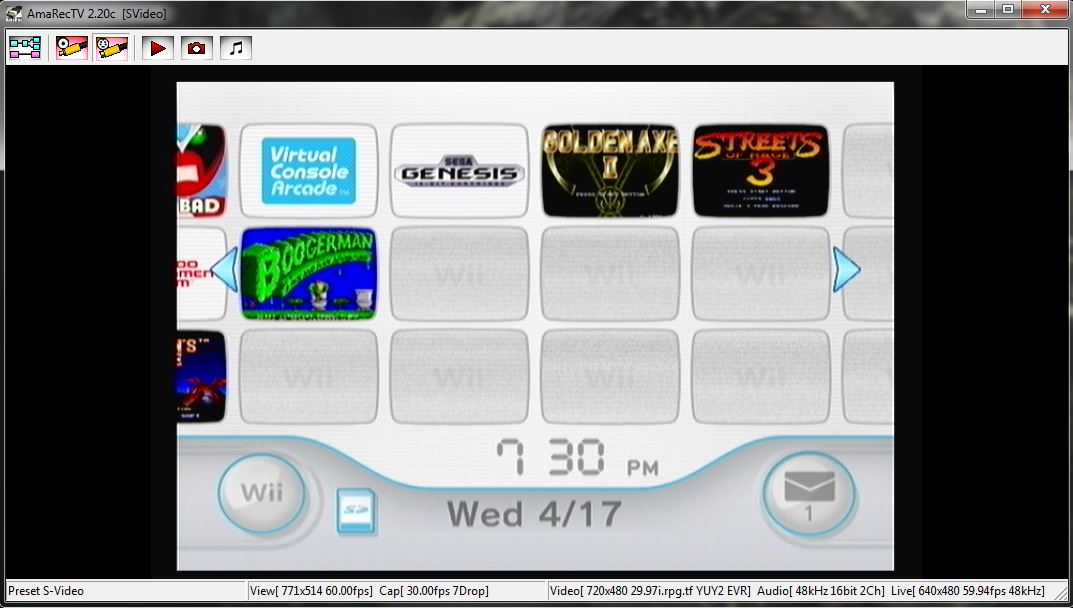
This is the main Preview window which displays the video signal coming from the selected capture device. Along the bottom of the screen are various pieces of information about each running function of AmarecTv (the window needs to be expanded for all of them to show properly). The order, and information shown, go in order:
- Preset chosen, or Graph if no presets are defined. This will change to show recording statistics (length of time, file size).
- View, which is what is seen in the actual window (resolution, framerate)
- Capture statistics (framerate, frames dropped)
- Incoming video capture (resolution, framerate, colorspace, renderer)
- Audio stream (sample rate, bit depth, number of channels)
- Live statistics (resolution, framerate, audio sample rate) which only shows up if Live is installed and enabled
These are the main control buttons on the menu bar above the Preview window.
- This is the graph function (***Editor's Note*** Just what is the graph? No idea)
- These are the buttons for any presets currently enabled
- These 3 buttons are (from left to right): start/stop recording, screenshot, mute/unmute preview audio (also affects Live audio)
Interaction is simple: either click on the button or use a hotkey.
Recording
Once configured, recording footage is as simple as pressing Z (default hotkey).
- Choose the default save file and folder for video
- Setup the capture device
- Choose the recording codecs
Once that's done, while watching the footage from the Preview Window, press the start/stop record button or Z (on your keyboard) and a two-tone sound should play (indicating that recording has started). Stop recording by pressing the same button again, and another two-tone sound will indicate that recording has stopped. After the footage is recorded, navigate to the folder specified in the general options and there will be a file similar to amarec(20130603-2330).avi

