Difference between revisions of "Beetlejuice (NES)/Any%"
From SDA Knowledge Base
m (→Room 0x1A) |
(→Room F) |
||
| (95 intermediate revisions by the same user not shown) | |||
| Line 27: | Line 27: | ||
| +25 (or more) | | +25 (or more) | ||
|250 | |250 | ||
| − | | | + | |There is a slight advantage in getting more vouchers here, since it can allow for more birdman scares to be purchased in the shop in level 2. However, the advantage isn't big enough to make any detours for. |
|- | |- | ||
|Skeleton scare (shop) | |Skeleton scare (shop) | ||
| -250 | | -250 | ||
|0 | |0 | ||
| − | | | + | |(In practice) mandatory to proceed |
|- | |- | ||
| − | | | + | |Extra life |
| +75 | | +75 | ||
|75 | |75 | ||
| | | | ||
|- | |- | ||
| − | | | + | |[[Beetlejuice_(NES)/Game_Mechanics_and_Techniques#Free_scare_at_the_cavern_monsters|Free umbrella scare]] (at the 1st cavern monster) |
| +75 | | +75 | ||
|150 | |150 | ||
| − | |||
| − | |||
| − | |||
| − | |||
| − | |||
| | | | ||
|- | |- | ||
|Defeat 1st cavern monster | |Defeat 1st cavern monster | ||
| +7x75 = 525 | | +7x75 = 525 | ||
| − | | | + | |675 |
| | | | ||
|- | |- | ||
|Free umbrella scare (at the 2nd cavern monster) | |Free umbrella scare (at the 2nd cavern monster) | ||
| +75 | | +75 | ||
| − | | | + | |750 |
| | | | ||
|- | |- | ||
|Defeat 2nd cavern monster | |Defeat 2nd cavern monster | ||
| +7x75 = 525 | | +7x75 = 525 | ||
| − | | | + | |1275 |
| | | | ||
|- | |- | ||
| − | |Buy scares option 1 (after the 2nd cavern monster) | + | |Buy scares - option 1 (after the 2nd cavern monster) |
| − | | | + | | -1x400-5x150 |
| − | | | + | |125 |
| − | |One | + | |One umbrella and five birdman scares. This is the fastest option, but also introduces a bit of risk later on (the third cavern monster, the sewer boss and the graveyard boss). Note that if you earned 50 vouchers or more during the beetle farming in the first level, you can buy a 5th birdman scare. This can be used to mitigate some of the risk for a very minor time loss (just one press of select, so only a few frames). |
|- | |- | ||
| − | |Buy scares option 2 (after the 2nd cavern monster) | + | |Buy scares - option 2 (after the 2nd cavern monster) |
| − | | - | + | | -1x500-5x150 |
| − | | | + | |25 |
| − | | | + | |One ogre and five birdman scares. This is safer than option 1 since you can use the ogre's special ability of 1-hit killing the 3rd cavern monster. It also makes the boss fight faster since the ogre has enough attacks to defeat it without having to activate a birdman scare. The downside is that it requires two [[Beetlejuice_(NES)/Game_Mechanics_and_Techniques#Shops|shop]] visits. The additional shop visit costs around 3 seconds, but 1-1.5s are then saved compared to option 1 against the third cavern monster and the sewer boss (depending on button mashing and menuing). So this is in total 1.5-2s slower than option 1. |
| + | |- | ||
| + | |Buy scares - option 3 (after the 2nd cavern monster) | ||
| + | | -1x500-1x250-3x150 | ||
| + | |75 | ||
| + | |One ogre, one skeleton and three birdman scares. Slightly safer than option 2 (easier graveyard boss fight), but at the cost a little more menuing. Half a second slower than option 2? | ||
|- | |- | ||
|} | |} | ||
| − | |||
===Potions=== | ===Potions=== | ||
| Line 84: | Line 83: | ||
|'''Comments''' | |'''Comments''' | ||
|- | |- | ||
| − | |[[Beetlejuice_(NES)/Any%25# | + | |[[Beetlejuice_(NES)/Any%25#Room_8_through_C|8]] |
| +1 | | +1 | ||
|1 | |1 | ||
|Can in theory be collected without time loss, but will in practice likely be a few frames slower. However, by delaying 15 frames, the second buzzsaw (?) can be avoided, which is a good trade-off. Collecting the potion within this delay should not be a problem in real-time. | |Can in theory be collected without time loss, but will in practice likely be a few frames slower. However, by delaying 15 frames, the second buzzsaw (?) can be avoided, which is a good trade-off. Collecting the potion within this delay should not be a problem in real-time. | ||
|- | |- | ||
| − | |[[Beetlejuice_(NES)/Any%25# | + | |[[Beetlejuice_(NES)/Any%25#Room_8_through_C|9]] |
| +1 | | +1 | ||
|2 | |2 | ||
|On the way. Another potion just to the right can be collected for a cost of ~80 frames, but is not recommended when attempting an optimized speedrun. | |On the way. Another potion just to the right can be collected for a cost of ~80 frames, but is not recommended when attempting an optimized speedrun. | ||
|- | |- | ||
| − | |[[Beetlejuice_(NES)/Any%25# | + | |[[Beetlejuice_(NES)/Any%25#Room_8_through_C|B]] |
| − | | - | + | | -2 +3 |
| − | | | + | |3 |
| − | |The potions are used in a semi-random fight with sweepers. Using 3 potions is a realistic goal for a good fight, but sometimes more will be required. It's usually possible to collect the 3 potions in the | + | |The potions are used in a semi-random fight with sweepers. Using 3 potions is a realistic goal for a good fight, but sometimes more will be required. It's usually possible to collect the 3 potions in the upper right room without time loss. |
|- | |- | ||
|[[Beetlejuice_(NES)/Any%25#Room_D_and_E|D]] | |[[Beetlejuice_(NES)/Any%25#Room_D_and_E|D]] | ||
| -1 | | -1 | ||
| − | | | + | |2 |
| | | | ||
|- | |- | ||
|[[Beetlejuice_(NES)/Any%25#Room_D_and_E|E]] | |[[Beetlejuice_(NES)/Any%25#Room_D_and_E|E]] | ||
| +3 | | +3 | ||
| − | | | + | |5 |
| | | | ||
|- | |- | ||
|[[Beetlejuice_(NES)/Any%25#Room_F|F]] | |[[Beetlejuice_(NES)/Any%25#Room_F|F]] | ||
| − | | - | + | | -2 |
|3 | |3 | ||
|It's debatable if one or two potions should be used in this fight. Partly it depends on how the art pieces move, partly personal preference. | |It's debatable if one or two potions should be used in this fight. Partly it depends on how the art pieces move, partly personal preference. | ||
|- | |- | ||
| − | |[[Beetlejuice_(NES)/Any%25# | + | |[[Beetlejuice_(NES)/Any%25#Room_0x10_through_0x12|0x10]] |
| − | | +1 | + | | -1/-2? +1 |
| − | |4 | + | |2-4? |
| − | |Beetlejuice will very often take two forced hits in this room. If that means Beetlejuice is down to his last health, the auto-scroller in the next room can be risky to get through and it might in that case be worth taking an additional third hit. | + | |Beetlejuice will very often take two forced hits in this room. If that means Beetlejuice is down to his last health, the auto-scroller in the next room can be risky to get through on the right side and it might in that case be worth taking an additional third hit (or taking the left path in 0x11). See routing video and comments for this room for suggestions on how to use potions. |
|- | |- | ||
| − | |[[Beetlejuice_(NES)/Any%25# | + | |[[Beetlejuice_(NES)/Any%25#Room_0x10_through_0x12|0x11]] |
| -1? | | -1? | ||
| − | |3 | + | |1-3? |
| − | |Throwing a potion here is far from a guarantee to avoid taking any hits. At least if the sweepers are separated, it's probably worth using a potion since there is otherwise a | + | |Throwing a potion here is far from a guarantee to avoid taking any hits. At least if the sweepers are separated, it's probably worth using a potion since there is otherwise a risk of taking two hits in this room. |
|- | |- | ||
| − | |[[Beetlejuice_(NES)/Any%25# | + | |[[Beetlejuice_(NES)/Any%25#Room_0x10_through_0x12|0x12]] |
| | | | ||
| − | |3 | + | |1-3? |
|The potion below the fly swatter is ~40 frames out of the way. Out of the optional potions not collected in the route shown on this page, this one is the least out of the way. | |The potion below the fly swatter is ~40 frames out of the way. Out of the optional potions not collected in the route shown on this page, this one is the least out of the way. | ||
|- | |- | ||
| − | |[[Beetlejuice_(NES)/Any%25# | + | |[[Beetlejuice_(NES)/Any%25#Room_0x13_through_0x17|0x14]] |
| − | | -1 | + | | -1? |
| − | |2 | + | |1-2? |
| − | |It's common to take a hit at the start of this room, which will usually mean one or more legs getting stuck around the exit and a forced second hit. By throwing a potion, the first hit can | + | |It's common to take a hit at the start of this room, which will usually mean one or more legs getting stuck around the exit and a forced second hit (and sometimes even a third hi). By throwing a potion, the first hit can sometimes be avoided and it's then less likely for any of the legs to get stuck near the exit. As a bonus, there is also a decent chance of the potion killing one of the legs and thereby create a chance for a health beetle. |
|- | |- | ||
| − | |[[Beetlejuice_(NES)/Any%25# | + | |[[Beetlejuice_(NES)/Any%25#Room_0x18_and_0x19|0x18]] |
| -1? | | -1? | ||
| − | |2 | + | |1-2? |
| − | |It's common to take two hits by the legs in this room. Using a potion can usually avoid one hit, with a rare chance of even killing the legs | + | |It's common to take two hits by the legs in this room. Using a potion can usually avoid one hit, with a rare chance of even killing the legs and getting a beetle). |
|- | |- | ||
| − | |[[Beetlejuice_(NES)/Any%25# | + | |[[Beetlejuice_(NES)/Any%25#Room_0x18_and_0x19|0x19]] |
| | | | ||
| − | |2 | + | |1-2? |
|There is an optional potion in the top right corner, which costs ~70 frames. | |There is an optional potion in the top right corner, which costs ~70 frames. | ||
|- | |- | ||
| − | |[[Beetlejuice_(NES)/Any%25# | + | |[[Beetlejuice_(NES)/Any%25#Level_5_.28Attic.2C_overhead.29|0x1D]] |
| − | | -2 | + | | -1? or -2? |
|0 | |0 | ||
| − | |Using | + | |Using one potion is risky, but a fairly significant time save (~7s). Two well thrown potions are however almost guaranteed to take out the sweepers. Saving a potion in this room could also open up for another potion use earlier on, e.g. in room 0x18, leading to another potential (minor) time save. |
|- | |- | ||
|} | |} | ||
| + | <br /> | ||
| − | ==Level 1 | + | ==Level 1== |
===Outside=== | ===Outside=== | ||
| − | https://vimeo.com/ | + | https://vimeo.com/1106918043<br /> |
| − | * | + | * An explanation of the death warp can be found here: [[Beetlejuice_(NES)/Game_Mechanics_and_Techniques#Movement_mechanics|movement mechanics]] (about "saved" position) |
| − | * The jump | + | * The death warp typically saves ~0.8-0.9s in real-time, compared to collecting the key and returning to the house door on foot (a bit depending on the execution). However, it's worth noting that the death can lead to an additional continue, which then offsets most/all of that time gain. |
| + | * The setup shown in this video consists of two full jumps and then one minor jump | ||
| + | ** The first jump doesn't pose any problem as long as you jump somewhere in front of the right side of the door | ||
| + | ** The second jump has a 2-frame window. Too early and you'll land on the beetle. Too late and the game will update the "saved" position and Beetlejuice will not re-spawn in front of the door. By observing where Beetlejuice lands after the beetle, it's fairly easy to tell if the jump was too late. | ||
| + | ** The third jump shouldn't pose any problem of triggering an update of the "saved" position. So it's mainly about jumping as tight as possible to collect the key and then fall in the pit as fast as possible. | ||
===House=== | ===House=== | ||
| − | Since the [[Beetlejuice_(NES)/Game_Mechanics_and_Techniques#Cloud_elevators|cloud elevators]] run on a fixed timer that starts when entering the house, the route can be adjusted to the possible cycles. Each cloud cycle is ~3s and the difference between an "early" and a "late" cycle is around half of that. The fastest way to get through the first section of the house is on a "late" 5-cycle cloud elevator:<br /> | + | Since the [[Beetlejuice_(NES)/Game_Mechanics_and_Techniques#Cloud_elevators|cloud elevators]] run on a fixed timer that starts when entering the house, the route can be adjusted to the possible cycles. Each cloud cycle is ~3s and the difference between an "early" and a "late" cycle is around half of that (an "early" cycle means jumping off the third and last cloud elevator while it's still ascending, while a "late" cycle is jumping off it after it's started descending). The fastest way to get through the first section of the house is on a "late" 5-cycle cloud elevator. However, this requires very tight execution (and probably favorable RNG of the lights on the bottom floor). It's more reliable to aim for an "early" 6-cycle:<br /> |
| − | https://vimeo.com/ | + | https://vimeo.com/1106918050 (not displayed well due to sprite flickering)<br /> |
| − | * | + | * Depending on the timing of the [[Beetlejuice_(NES)/Game_Mechanics_and_Techniques#Lights|lights]], it's not always possible to run through the two rightmost lights on the bottom floor. In that case, you can damage-boost through the last light by jumping and taking a hit against the torch before the light. |
| − | * | + | [[File:Torch_damage_boost.gif|200px]] |
| − | * | + | * Note that the weight falling down when flipping the first exit switch needs to disappear off-screen before the second switch can be flipped. |
| − | * | + | * It's important to keep track of which [[Beetlejuice_(NES)/Game_Mechanics_and_Techniques#Flowers|invincibility flower(s)]] that are collected and when: |
| + | ** The best case is to get both the lower and the upper flower (like in the linked video). All enemies and lights (after flipping the first switch) can be ignored. | ||
| + | ** Getting invincibility AFTER flipping the first switch, but not getting the upper flower requires some attention when exiting the house. You need to jump or drop while triggering the exit to avoid the "bouncing urn" (see below for more details). | ||
| + | ** If you collect the lower flower BEFORE the first switch is flipped, the invincibility will wear off right before crossing the exit door. Getting through without time loss then depends on good RNG of not colliding with the "bouncing smiley". It's also worth mentioning that the "urn" the "bouncing smiley" jumps out from is also an insta-death obstacle that can be hit if you're too fast after flipping the first of the two exit switches. | ||
| + | ** It's possible to get through the house without invincibility without time loss, but it requires even more favorable RNG from the lights and enemies and tighter execution in a few spots. | ||
<br /> | <br /> | ||
| − | + | The mechanics of the exit might not be evident from a glance and are worth studying a bit more in detail. The exit is triggered by Beetlejuice touching its hitbox (no need to press up or other input). The following is an illustration (not pixel-perfect) of the exit's hitbox with respect to Beetlejuice's shoe soles (y) and his centerline (x):<br /> | |
| − | + | [[File:Exit_hitbox.PNG|200px]]<br /> | |
| − | + | If Beetlejuice has flower invincibility, he can just run into the hitbox from the right without issues. But running into the exit without invincibility will stop Beetlejuice at the rightmost pixel of the hitbox and he is almost guaranteed to be killed by the smiley. However, if Beetlejuice is in the air, he will not stop his movement, but will still trigger the exit. There are a few ways to achieve this: | |
| − | + | # Make a small jump before the hitbox | |
| − | + | # Drop through the floor and let the momentum have Beetlejuice trigger the exit | |
| − | + | # Make a big jump both flipping the second switch and then land inside the door's hitbox, while being outside the smiley's hitbox | |
| − | + | '1' and '3' work when the smiley is around the urn. '2' works when the smiley is above the platform. By exploiting the hitbox in this way, the last part of the house can often, but not always, be cleared without time loss. | |
| − | + | ||
| − | + | ||
| − | + | ||
| − | + | ||
| − | + | ||
| − | + | ||
| − | + | ||
| − | + | ||
| − | + | ||
| − | + | ||
===Village=== | ===Village=== | ||
| − | https://vimeo.com/ | + | https://vimeo.com/1106918056<br /> |
* 25 vouchers will be missing to buy a skeleton scare in the shop. The only reasonable way to get them is to stomp on [[Beetlejuice_(NES)/Game_Mechanics_and_Techniques#Beetles_.28side_view_levels.29|beetles]]. Either three red ones (worth 10 each) or (preferably) one of the three more valuable types (worth 25, 50 or 75). | * 25 vouchers will be missing to buy a skeleton scare in the shop. The only reasonable way to get them is to stomp on [[Beetlejuice_(NES)/Game_Mechanics_and_Techniques#Beetles_.28side_view_levels.29|beetles]]. Either three red ones (worth 10 each) or (preferably) one of the three more valuable types (worth 25, 50 or 75). | ||
| − | * Note Beetlejuice's position when waiting for beetles to spawn. When standing in this position, beetles spawning from the left hole | + | * Note Beetlejuice's position when waiting for beetles to spawn. When standing in this position, beetles spawning from the left hole either spawn at Beetlejuice's feet or can relatively quickly be chased down. Beetles spawning from the right hole will quickly de-spawn if they jump right, but be in reach if jumping to the left, towards Beetlejuice. Another advantage of not staying further to the right is to not trigger the scorpion. |
| + | * All the inputs in the shop for buying the skeleton scare can be [[Beetlejuice_(NES)/Game_Mechanics_and_Techniques#Buffered_inputs|buffered]]. | ||
| + | * Beetlejuice exits the [[Beetlejuice_(NES)/Game_Mechanics_and_Techniques#Shops|shop]] with the same x-position he entered it on and there is only one set of scares available in this shop | ||
| + | * It's possible to skip the first beehive/cloud elevator by dropping down to the platform below and then quickly jump up and to the right when the screen has scrolled down sufficiently. This is not faster though. The second beehive must however be destroyed or else Beetlejuice won't be able to open the boss door. | ||
| + | |||
| + | ===1st boss=== | ||
| + | https://vimeo.com/1106918063<br /> | ||
| + | * There is a very real risk of a "double KO", which then doesn't count in Beetlejuice's favor. It can therefore be a good habit to run away from the boss after attacking the third time to potentially avoid getting hit by a last-moment spray puff. | ||
* The [[Beetlejuice_(NES)/Game_Mechanics_and_Techniques#1st_boss_.28Level_1.29|boss]] is not consistent in a speedrun and requires good RNG. With only three scare attacks to deal with the boss, there is no alternative to playing aggressively. There are still a few different possibilities on how to approach the fight: | * The [[Beetlejuice_(NES)/Game_Mechanics_and_Techniques#1st_boss_.28Level_1.29|boss]] is not consistent in a speedrun and requires good RNG. With only three scare attacks to deal with the boss, there is no alternative to playing aggressively. There are still a few different possibilities on how to approach the fight: | ||
| − | # Run right as the fight starts and attack once when in front of the right side of the fireplace. Then quickly stop to halt the x-momentum. Short jump to the right (anticipating jumping over a potential attack from the boss) and then two more quick scare attacks. | + | # Run to the right, jump and then attack once mid-air, adjust the jump to ensure landing in front of the boss and to some extent dodge a possible boss attack. (shown in the linked video) |
| − | + | # Run right as the fight starts and attack once when in front of the right side of the fireplace. Then quickly stop to halt the x-momentum. Short jump to the right (anticipating jumping over a potential attack from the boss) and then two more quick scare attacks. | |
# Ignore what the boss does and try to do three consecutive attacks without any jumps | # Ignore what the boss does and try to do three consecutive attacks without any jumps | ||
<br /> | <br /> | ||
| − | '1' and '2' are | + | '1' and '2' are seemingly quite similar, but real-time experience appears to favor '1' in terms of success rate. In practice, a significant number of patterns will however be difficult to deal with either method, so RNG definitely plays a role in this fight. '3' is a few tenths of a second faster, but also the riskiest of the three with a significantly lower success rate. |
<br /><br /> | <br /><br /> | ||
| − | ==Level 2 | + | ==Level 2== |
| − | https://vimeo.com/ | + | ===Storm drains=== |
| − | * | + | https://vimeo.com/1106918077<br /> |
| + | * It's faster to take the first two (intentional) deaths by falling off-screen than getting killed by the octopus | ||
| + | * At the second death, it's slightly faster to let the screen scroll up (like shown in the linked video), than to drop down off-screen as early as possible. The difference is only a few frames though. | ||
* Note the [[Beetlejuice_(NES)/Game_Mechanics_and_Techniques#Free_scare_at_the_cavern_monsters|free umbrella scare]] at the first two cavern monsters | * Note the [[Beetlejuice_(NES)/Game_Mechanics_and_Techniques#Free_scare_at_the_cavern_monsters|free umbrella scare]] at the first two cavern monsters | ||
| − | * The [[Beetlejuice_(NES)/Game_Mechanics_and_Techniques#Cavern_monsters|cavern monsters']] attacks are random. More often than not, they will hit Beetlejuice during the fight. The further away Beetlejuice stands, the smaller portion of the attacks will hit Beetlejuice. Another mitigation is to take an intentional death by falling off-screen. The deaths of course cost time, but also ensure consistent fights. | + | * The [[Beetlejuice_(NES)/Game_Mechanics_and_Techniques#Cavern_monsters|cavern monsters']] attacks are random. More often than not, they will hit Beetlejuice during the fight. The further away Beetlejuice stands, the smaller portion of the attacks will hit Beetlejuice. Another mitigation is to take an intentional death by falling off-screen. The deaths of course cost time (~2s), but also ensure consistent fights by providing invincibility. |
| − | * See the [[Beetlejuice_(NES)/Any%25#Vouchers|voucher section]] for a discussion about the purchases in the shop. This is the last shop visit, so vouchers are irrelevant from this point onwards | + | * The "intended" route after the first cavern monster is to continue up to the top of the level and then descend down to the second cavern monster. Manipulating the window position so Beetlejuice can jump directly right towards the second monster is a shortcut worth 5 or so seconds and was found by 'bartaan'. |
| + | * Dropping down in front of the frog (instead of jumping over it) after the 1st cavern monster fight is a bit tight and requires the following: | ||
| + | ** Not getting hit by the cavern monster or the frog | ||
| + | ** Defeat the cavern monster in "average" time. Too fast and Beetlejuice will hit the spider on the ledge below. Too slow and Beetlejuice will hit the frog when dropping down. | ||
| + | ** When jumping up to the platform with the frog and the cavern monster, there is a risk the [[Beetlejuice_(NES)/Game_Mechanics_and_Techniques#Flies.2FFrogs.2FGolden_beetles.2FOctopus.2FScorpions_.28side_view.29|frog]] repeatedly de- and re-spawns when disappearing off-screen. This will interfere with the frog movements and it becomes difficult to predict where the frog will be when getting back and dropping down to the ledge with the spider. | ||
| + | ** Trigger the cavern monster fight before jumping over it, or else you will have to wait for the free umbrella scare when landing | ||
| + | * See the [[Beetlejuice_(NES)/Any%25#Vouchers|voucher section]] for a discussion about the purchases in the shop. In this shop, there are 2 sets of inventory on the left x-pixels of the door and 2 other sets on the right. It's the ones on the left that are needed (the ones on the right don't have birdman scares). The inventory sets alternate every x-pixel. So enter the shop, buy the scares from that inventory set. Exit, and either continue to the right or move 1 pixel and enter the shop again to buy the remaining scare(s). The following table shows the x-pixels of interest: | ||
| + | {| class="wikitable" | ||
| + | |'''x-pixel ($3BE)''' | ||
| + | |'''Image left''' | ||
| + | |'''Image right''' | ||
| + | |'''Shop inventory''' | ||
| + | |'''Comments''' | ||
| + | |- | ||
| + | |0xA7 | ||
| + | |[[File:x167.png]] | ||
| + | |[[File:0xA7_right.gif]] | ||
| + | | - | ||
| + | |Not in front of the shop | ||
| + | |- | ||
| + | |0xA8 | ||
| + | |[[File:x168.png]] | ||
| + | |[[File:0xA8_right.gif]] | ||
| + | |[[File:Inventory1left.png]] | ||
| + | | | ||
| + | |- | ||
| + | |0xA9 | ||
| + | |[[File:x169.png]] | ||
| + | |[[File:0xA9_right.gif]] | ||
| + | |[[File:Inventory2left.png]] | ||
| + | | | ||
| + | |- | ||
| + | |0xAA | ||
| + | |[[File:x170.png]] | ||
| + | |[[File:0xAA_right.gif]] | ||
| + | |[[File:Inventory1left.png]] | ||
| + | | | ||
| + | |- | ||
| + | |0xAB | ||
| + | |[[File:x171.png]] | ||
| + | |[[File:0xAB_right.gif]] | ||
| + | |[[File:Inventory2left.png]] | ||
| + | | | ||
| + | |- | ||
| + | |0xAC | ||
| + | |[[File:x172.png]] | ||
| + | |[[File:0xAC_right.gif]] | ||
| + | |[[File:Inventory1left.png]] | ||
| + | | | ||
| + | |- | ||
| + | |0xAD | ||
| + | |[[File:x173.png]] | ||
| + | |[[File:0xAD_right.gif]] | ||
| + | |[[File:Inventory1right.png]] | ||
| + | |From this position and to the right, the shop doesn't have any birdman scares | ||
| + | |- | ||
| + | |} | ||
| + | * This is the last shop visit, so vouchers are irrelevant from this point onwards | ||
* It's a 50% chance to jump through the [[Beetlejuice_(NES)/Game_Mechanics_and_Techniques#Octopus|octopus]], not possible to control in real-time. However, remember to keep holding A during the knockback, to buffer the next jump. | * It's a 50% chance to jump through the [[Beetlejuice_(NES)/Game_Mechanics_and_Techniques#Octopus|octopus]], not possible to control in real-time. However, remember to keep holding A during the knockback, to buffer the next jump. | ||
| − | * Note the | + | * Note that a little bit of time can be saved by setting up the inventory to the "two-headed man" after activating the umbrella scare. Setting it up this way allows buffering the next scare activation ("up+A" to activate the birdman). |
| + | * The linked video goes for "option 1" when purchasing scares in the shop, which introduces a risk against the 3rd cavern monster. A way to mitigate the risk of getting hit by the 3rd cavern monster is to let the screen scroll far enough that you can start attacking it during the jump. With sufficient mashing, the cavern monster can be killed before attacking. | ||
| + | * Even if you get hit by the 3rd cavern monster, it's worth continuing the fight by activating a birdman scare. Hopefully, you can take out the monster with one additional attack and then use the remaining attack and two more from another birdman scare against the boss. A time loss, but not a reset. | ||
| + | * Shop options 2 and 3 eliminate the risk against the 3rd cavern monster by using the ogre's special ability of 1-hit defeating the 3rd cavern monster, but they're slower than option 1 | ||
* It's possible to skip the cavern monster fights by not allowing the screen to scroll far enough. However, the boss door will not be open if not all three cavern monsters have been defeated. | * It's possible to skip the cavern monster fights by not allowing the screen to scroll far enough. However, the boss door will not be open if not all three cavern monsters have been defeated. | ||
| − | |||
| − | |||
| − | == | + | ===2nd boss=== |
| − | https://vimeo.com/ | + | https://vimeo.com/1106918089<br /> |
| − | * | + | * Similar to the first boss, the same three methods can be used to fight the boss in this level. However, the third method (running straight at it) seems to rarely ever work. The sub-routine for the [[Beetlejuice_(NES)/Game_Mechanics_and_Techniques#2nd_boss_.28Level_2.29|boss]] results in a higher chance of an attack than the first boss, so it's unlikely to get a fight without the boss attacking. |
| + | * Like the first boss, the best case scenario is a 3-attack fight. | ||
<br /> | <br /> | ||
| − | ==Level 3 | + | ==Level 3 (both overhead levels grouped together)== |
The room numbers refer to RAM-address $55. | The room numbers refer to RAM-address $55. | ||
| − | ===Room | + | ===Room 8 through C=== |
| − | https://vimeo.com/ | + | https://vimeo.com/1106918104<br /> |
| − | * [[Beetlejuice_(NES)/Game_Mechanics_and_Techniques#Spiders|Spider]] damage can sometimes be avoided | + | [[File:8_Beetlejuice.gif|100px]]8 [[File:9_Beetlejuice.gif|100px]]9 [[File:A_Beetlejuice.gif|100px]]A [[File:B_Beetlejuice.gif|100px]]B [[File:C_Beetlejuice.gif|100px]]C<br /> |
| − | * There is an optional potion to the right of the one on the way, but it requires a detour of ~80 frames and is not recommended to grab | + | |
| + | * To avoid getting hit by the second buzzsaw in room 8, a minimum of a 16-frame delay is required. Since a death from roughly the middle of the screen in the overhead sections costs ~160 frames (more if it also triggers a continue), the estimated time loss from taking a hit is around one second, seen as an average. It's therefore well worth waiting to briefly avoid the damage and the potion can then also be collected without time loss as a bonus. | ||
| + | * [[Beetlejuice_(NES)/Game_Mechanics_and_Techniques#Spiders|Spider]] damage can sometimes be avoided and it's often worth doing so in these rooms. Taking hits early on risks resulting in a death, while not dying can often be rewarded in the coming rooms with restoring health from beetles from defeated enemies. | ||
| + | * There is an optional potion to the right of the one on the way in room 9, but it requires a detour of ~80 frames and is not recommended to grab | ||
<br /> | <br /> | ||
| − | + | The sweeper fight in room B is one of the critical points in a speedrun. While the [[Beetlejuice_(NES)/Game_Mechanics_and_Techniques#Sweepers|sweepers']] and [[Beetlejuice_(NES)/Game_Mechanics_and_Techniques#Potions|potions']] movements depend on RNG, they can be manipulated to a certain extent. The steps outlined below and demonstrated in the link are in no way guaranteed to work, but do exploit the game mechanics and have been developed to improve the chances of a successful 2-potion fight. | |
| − | + | # Most of the time, one of the sweepers will home in on Beetlejuice from atop the sofa group (like shown here). In that case, try to dodge and hope for the best. It's also possible to throw a potion and try to run through the sweeper during its damage frames, but this is not guaranteed to work. If Beetlejuice does end up taking a hit, the sweepers will move away from him, resulting in a time loss of usually a few seconds. | |
| − | The sweeper fight in room B is one of the critical points in a speedrun. While the [[Beetlejuice_(NES)/Game_Mechanics_and_Techniques#Sweepers|sweepers']] and [[Beetlejuice_(NES)/Game_Mechanics_and_Techniques#Potions|potions']] movements depend on RNG, they can be manipulated to a certain extent. The steps outlined below and demonstrated in the link are in no way guaranteed to work, but do exploit the | + | # Wait at the top of the narrow corridor to bait the two sweepers below to follow Beetlejuice. The third sweeper will at this point hopefully be stuck in the lower left corner of the room to the right. The chances of this being the case increases if Beetlejuice isn't positioned too far above the corridor. There is again an element of RNG here, which makes this step non-consistent and there is always a risk of one of the sweepers getting stuck in the room below or the sweeper to the right escaping pre-maturely and start chasing you. |
| − | # Most of the time, one of the sweepers will home in on Beetlejuice from atop the sofa group (like shown here). In that case, | + | # If Beetlejuice took a hit when trying to run past the sweeper in the first step, it can be worth throwing a potion in the lower room to try and inflict some damage while waiting for the sweepers to move towards the narrow corridor to the upper-left room. |
| − | + | # When one (or hopefully both) of the lower sweepers start to come up through the narrow corridor, move to the upper left corner of the table and time a potion throw to inflict damage, but also making sure to not get it (or else the sweepers will likely disperse into the lower room again and/or the sweeper on the right will retreat back to the right room - both events very time-consuming to fix). Throwing a potion from this position will likely have the scare moving around in the upper left room and continue to inflict damage to all three sweepers. However, some potion trajectories will end up in the right room. | |
| − | # Wait at the top of narrow corridor to bait the two sweepers below to follow Beetlejuice. The third sweeper will at this point hopefully be stuck in the lower left corner of the room to the right. The chances of this being the case increases if Beetlejuice isn't positioned too far above the corridor. There is again an element of RNG here, which makes this step non-consistent and there is always a risk of one of the sweepers getting stuck in the room below or the sweeper to the right escaping | + | # Move to the right above the table and get past the sweeper that should now be coming from the right, preferably without getting hit (but that's mainly RNG), and move into the right room. If taking a hit seems unavoidable, it should at least be done so to avoid the sweeper returning back into the right room. |
| − | # | + | # Collect the three potions in the right room and wait for the sweepers to approach. Align Beetlejuice's vertical position with the corridor to bait the sweepers to enter the corridor. |
| − | + | # When the sweepers are about to enter the right room, throw a potion from the position shown in the linked video. All potion scare trajectories thrown from around here (hug the right wall) will stay inside the right room. Most other trajectories when throwing from other positions will also stay in the right room, at least for a while. In the choice between taking a hit and throwing a potion from the wrong position, the latter is almost always better. Getting hit before all sweepers are well inside the right room is usually very costly. | |
| − | + | # If necessary, throw additional potions and dodge as required to avoid hits. | |
| − | # | + | <br /> |
| − | # Move to the right | + | |
| − | # | + | It's of course possible to start throwing potions earlier than in the method above and take out the sweepers faster. This will in the end be a personal choice, but a few advantages of the approach outlined above: |
| − | # When the | + | * The less potions thrown in this room means more potions available to use in other rooms |
| + | * Throwing a potion from the top-left corner of the table seems to work well. If a potion was thrown in the lower room, it's possible that it's still active and prevents the next potion to be thrown. | ||
| + | * By throwing first a potion in the lower room and then in the upper-left room, at least one of the sweepers will often die in the upper-left room. With the 75% chance of dropping a health beetle, this will mean health beetles are often blocked from spawning in the right room. By following the method outlined above, the three sweepers will often be defeated in the right room, leaving more opportunities to get one or more health beetles. | ||
<br /> | <br /> | ||
===Room D and E=== | ===Room D and E=== | ||
| − | [ | + | https://vimeo.com/1106918134<br /> |
| − | The strategy in room D is to throw a potion to deal with the two art pieces on the left side of the room and then take care of the art piece on the right side with the hammer. Since the | + | [[File:D_Beetlejuice.gif|100px]]D [[File:E_Beetlejuice.gif|100px]]E<br /> |
| + | |||
| + | The strategy in room D is to throw a potion to deal with the two [[Beetlejuice_(NES)/Game_Mechanics_and_Techniques#Delia.27s_art_pieces|art pieces]] on the left side of the room and then take care of the art piece on the right side with the hammer. Since the art pieces move randomly, there is no consistent way to do this. Often, you'll end up having to chase one or both of the left pieces and finish the work with the hammer. By studying possible potion trajectories, one can control that the potion stays on the left side though. There seems to be at least a few options for this: | ||
# As shown in the linked video, move up to the hammer, turn left and throw a potion. Not all positions have been tested, but this general area seems to give very reliable results with the potion scares staying on the left side. | # As shown in the linked video, move up to the hammer, turn left and throw a potion. Not all positions have been tested, but this general area seems to give very reliable results with the potion scares staying on the left side. | ||
# Throw a potion vertically from around the lower left corner of the carpet. Not all trajectories in this area have been investigated, but this seems like a consistent way to get the potion scare to stay on the left side. See the following screenshot for the general position:<br />[[File:Potion_throw2_roomD.png|300px]] | # Throw a potion vertically from around the lower left corner of the carpet. Not all trajectories in this area have been investigated, but this seems like a consistent way to get the potion scare to stay on the left side. See the following screenshot for the general position:<br />[[File:Potion_throw2_roomD.png|300px]] | ||
| − | # As you enter the room, walk straight up (no sideways movement) and throw a potion from y-position 0xF1-0xEA. | + | # As you enter the room, walk straight up (no sideways movement) and throw a potion from y-position 0xF1-0xEA. |
| − | + | Options '1' and '2' (shown in the linked video) are fairly similar. A quick test of 20 throws with each option was done from save states on a Powerpak (all of them different ones). 7/20 throws with method 1 took care of both art pieces, while 10/20 throws with method 2 were successful. By only comparing 20 throws for each method, it might be misleading to jump to too far-reaching conclusions regarding which method is best. Generally speaking, option 1 seems to cover more area on the left side, while most trajectories with option 2 move close to the NW/SE diagonal. Deciding on the throw depending on the art pieces initial movements could therefore be worth considering. '3' has the (slight) advantage of being thrown as early as possible when entering the room. However, there are quite a few trajectories not staying on the left side and the success rate will most likely therefore be lower than '1' and '2'.<br /><br /> | |
| − | + | ||
| − | + | ||
| − | + | ||
| − | + | ||
| − | + | ||
| − | + | ||
| − | + | ||
| − | + | ||
| − | + | ||
| − | + | ||
| − | + | ||
| − | + | ||
| − | + | ||
| − | + | ||
| − | + | ||
| − | + | ||
| − | + | ||
| − | + | ||
| − | + | ||
| − | + | ||
| − | + | ||
| − | + | ||
| − | + | ||
| − | + | ||
| − | + | ||
| − | + | ||
| − | + | ||
| − | + | ||
| − | + | ||
| − | + | ||
| − | + | ||
| − | + | ||
| − | + | ||
| − | + | ||
| − | + | ||
| − | + | ||
| − | + | ||
| − | + | ||
| − | + | ||
| − | + | ||
| − | + | ||
| − | + | ||
| − | + | ||
| − | + | ||
| − | + | ||
| − | + | ||
| − | + | ||
| − | + | ||
| − | + | ||
| − | + | ||
| − | + | ||
| − | + | ||
| − | + | ||
| − | + | ||
| − | + | ||
| − | + | ||
| − | + | ||
| − | + | ||
| − | + | ||
| − | + | ||
A strategy that can make sense is to take an intentional hit to freeze the art pieces in place for a short time. If this is done before throwing the potion, it could even influence whether to go for option '1' or '2'.<br /><br /> | A strategy that can make sense is to take an intentional hit to freeze the art pieces in place for a short time. If this is done before throwing the potion, it could even influence whether to go for option '1' or '2'.<br /><br /> | ||
The right path through room E is 16 frames slower than the left path. However, this is easily compensated by the three potions on the way. | The right path through room E is 16 frames slower than the left path. However, this is easily compensated by the three potions on the way. | ||
| − | |||
===Room F=== | ===Room F=== | ||
| − | + | https://vimeo.com/1106918146<br /> | |
| − | * Throwing | + | * Throwing the first potion from the position in the linked video will ensure the potion scare stays in the lower left corner (at least most of the time) |
| − | * The two first [[Beetlejuice_(NES)/Game_Mechanics_and_Techniques#Delia.27s_art_pieces|art pieces']] health (starting at 4) should be decimated by quite a bit from the hammer and the potion scare. | + | * An alternative to throwing the hammer vertically (as shown in the linked video) is to throw it horizontally, e.g. above the chair to the left of the table. This can be a good option in case one of the pieces moves to the area above the table. |
| − | [[File: | + | * If the second potion escapes the upper area, the upper art piece isn't going to be defeated. It should therefore be a priority to throw the potion from a position that ensures it doesn't escape. The recommended location is to hug the left wall and throw it from around the same position as in the linked movie. Several consecutive y-positions around here produce potion trajectories that all stay in the upper room. |
| − | * | + | * The two first [[Beetlejuice_(NES)/Game_Mechanics_and_Techniques#Delia.27s_art_pieces|art pieces']] health (starting at 4) should be decimated by quite a bit from the hammer and the potion scare. While this is the fastest way to dispatch of the two lower art pieces, it's also a risky strategy (1/3 - 1/2 chance???). A few things to consider when returning back down after collecting the key in case they don't seem to be defeated: |
| + | ** From time to time, an art piece gets trapped in the left corridor (leading to Saturn). Other than wasting time chasing after it, there isn't much to be done in this case. Fortunately, it's not too common though. | ||
| + | ** If one of the art pieces moves up to the area above the table, either re-collect the hammer and throw horizontally above the table (left image) or throw a potion to the left from e.g. the top-right corner of the table (right image). The potion will not stay here, but often long enough to inflict one or two damage (especially if it moves down left and then comes back before it exhausts). Throwing the potion is the faster option, but re-throwing the hammer usually deals more damage and is therefore more consistent. | ||
| + | [[File:Backup_Hammer_throw_F.gif|150px]] [[File:Backup_Potion_throw_F.gif|150px]] | ||
| + | |||
| + | * A safer and ~6s slower way to clear this room is the following method: | ||
| + | # Throw the first potion the same as in the linked video | ||
| + | # Manually take care of the two lower art pieces with the hammer | ||
| + | # Take a hit from the upper piece when collecting the key and throw the hammer. The by far most common result is that the hammer will destroy the piece before it can move out of the way. | ||
<br /> | <br /> | ||
| − | + | ===Room 0x10 through 0x12=== | |
| − | ===Room 0x10 | + | https://vimeo.com/1106918110<br /> |
| − | [ | + | [[File:10_Beetlejuice.gif|100px]]10 [[File:11_Beetlejuice.gif|100px]]11 [[File:12_Beetlejuice.gif|100px]]12<br /> |
| + | |||
| + | * If you don't use any potions in room 0x10, the typical case is that you take two damage (one on the way to the key and then another one when making your way to the exit). | ||
| + | * If you throw a potion, like in the linked video, the typical case is to run through one footballer's legs during its damage frames, but then take damage against the second pair of legs. Assuming the potion scare stays in the lower room, the first legs will then most of the time take one more hit (occasionally two, like in the linked video). If the legs taking damage earlier is still in the room below, it should therefore only have one hit point left. It's therefore worth throwing a second potion when returning after collecting the key to defeat those legs and a likely health beetle. In summary, two (sometimes only one) potions will often result in a net zero damage in this room. | ||
| + | * Based on the two points above, it's worth considering using potions in this room, especially if you enter it with 0 hit points (but with 1 hit point can also be worth it) to avoid entering 0x11 with two hit points | ||
| + | * The right path in room 0x11 is 80 frames (1.3s) faster than the left path. However, Beetlejuice will quite often take a hit along the right path, even when using a potion. The left path is safer since it only has one enemy along the way, but still not guaranteed to pass without taking damage. In case you get to the end of room 0x10 with only one hit point left and no enemies to take another damage on, it's worth considering moving on and then take the left path in room 0x11. | ||
* The relative x-pixel Beetlejuice enters a portal on will also be the one he exits on, so move diagonally (and not just vertically) to adjust to the most favorable x-position. | * The relative x-pixel Beetlejuice enters a portal on will also be the one he exits on, so move diagonally (and not just vertically) to adjust to the most favorable x-position. | ||
| − | * If you're one potion short, the one below the fly swatter is the least "off-route" of the ones not collected in the route shown on this page. | + | * If you're one potion short, the one below the fly swatter in 0x12 is the least "off-route" of the ones not collected in the route shown on this page. |
<br /> | <br /> | ||
| − | ===Room 0x13 | + | ===Room 0x13 through 0x17=== |
| − | + | https://vimeo.com/1106918121<br /> | |
| − | + | [[File:13_Beetlejuice.gif|100px]]13 [[File:14_Beetlejuice.gif|100px]]14 [[File:15_Beetlejuice.gif|100px]]15 [[File:16_Beetlejuice.gif|100px]]16 [[File:17_Beetlejuice.gif|100px]]17<br /> | |
| − | + | ||
| − | + | ||
| − | + | ||
| − | <br /> | + | |
| − | + | Room 0x13 is one of the most critical rooms in a speedrun. There is no known method for consistently clearing the flies quickly. Taking advantage of the [[Beetlejuice_(NES)/Game_Mechanics_and_Techniques#Flies|flies' movement mechanics]] can however improve the success rate. | |
| + | # Walk roughly to the end of the initial narrow corridor when entering the room | ||
| + | # If you don't get hit at the start (or the flies aren't aligned for a vertical throw with the swatter), throw the swatter to the right. However, if you are getting hit by a fly, see if the other flies are aligned for a vertical throw right at the start (strat first suggested by 'golden1ink'). Keep in mind that the flies are immobilized longer the fewer flies that are left in the room. So if you get hit right at the start, there isn't much time to chase down the immobilized flies with the swatter. | ||
| + | # Walk to the right without stopping and Beetlejuice will avoid both the door and the saw. | ||
| + | # Catch and immediately re-throw the swatter horizontally once (to avoid the swatter getting off-screen) | ||
| + | # Catch and immediately re-throw the swatter vertically | ||
| + | # Move around in a circular motion while avoiding the door and saw (the saw won't reach Beetlejuice when he's hugging the walls) | ||
| + | # If Beetlejuice gets hit by a fly, use the flies' immobility time to either "drag" more flies to the where the swatter moves or even consider collecting and re-throwing the swatter if a direct hit seems possible | ||
| + | # When there is only one fly left, consider slowly moving towards the exit. If the last fly isn't defeated quickly enough, this will however trap Beetlejuice between the closed door and the door to Saturn. So this is a risky strat only recommended when trying to go for a low time and resets are acceptable. | ||
| + | * The swatter can't hit flies when it's off-screen. The method above aims to minimize the swatter's time off-screen. | ||
| + | * There are other possible ways to throw the swatter than what's described here. The flies move around randomly and it doesn't seem like any part of the screen would be better than others. There are however a few ideas behind throwing the swatter like in the linked video: | ||
| + | ** You have a bit of room to "drag" immobilized flies in front of the swatter. Especially horizontally, but to some extent also vertically. | ||
| + | ** It stays on-screen the whole time | ||
| + | ** The swatter can be of use in room 0x1A if it's re-collected here in room 0x13. Throwing it in this way sometimes makes it possible to re-collect it without a big detour or wait. | ||
| + | * If hit by the buzzsaw, Beetlejuice will not be able to collide with any flies during the invincibility period and the flies aren't immobilized either | ||
| + | * When throwing the potion as shown in room 0x14, there is roughly a 1/4 chance the potion will bounce off the obstacles so it stays on the left side. This gives a good opportunity to take out one of the footballer's legs and a chance for a health beetle. It can be difficult to avoid damage against the legs before entering the portal though, in which case they will scatter and are unlikely to take full damage from the potion. | ||
| + | * One or more legs have a tendency to end up near the exit if Beetlejuice is hit at the start. So two hits (or even three) are quite normal in this room when not using any potions. Using a potion allows Beetlejuice to not get hit at the start more frequently, but far from consistently. | ||
<br /> | <br /> | ||
| − | ===Room 0x18 | + | ===Room 0x18 and 0x19=== |
| − | [ | + | https://vimeo.com/1106918128<br /> |
| − | Room 0x18 is another highly random room. While the [[Beetlejuice_(NES)/Game_Mechanics_and_Techniques#Mouse|mouse's movement mechanics]] are stiff, they're also completely random. The only knowledge that can be used to slightly improve the chances of catching the mouse is that the time between each direction change is the same. | + | [[File:18_Beetlejuice.gif|100px]]18 [[File:19_Beetlejuice.gif|100px]]19<br /> |
| + | |||
| + | * Room 0x18 is another highly random room. While the [[Beetlejuice_(NES)/Game_Mechanics_and_Techniques#Mouse|mouse's movement mechanics]] are stiff, they're also completely random. The only knowledge that can be used to slightly improve the chances of catching the mouse is that the time between each direction change is the same. | ||
| + | * If you have any potions to spare when entering 0x18, it's sometimes possible to avoid a hit from the footballer's legs at the start and rarely the potion scare will completely defeat the legs. | ||
| + | * If you re-collected the swatter in room 0x13, it should be thrown before chasing after the mouse. Below are three possible options for where to throw the swatter: | ||
| + | # Throw it vertically as soon as you enter the room. The disadvantage with this option is that will often interfere when you want to scare away Delia (instead of releasing the mouse in front of Delia, you can end up collecting the swatter). | ||
| + | # Throw it vertically one tile to the right of the entrance. Throwing it from this position will prevent it from interfering with scaring away Delia. Re-collecting the swatter will always cost a little bit of time though. | ||
| + | # Throw it horizontally a little below Delia. Quite similar to the previous method in that it won't interfere with scaring Delia, but it will cost a little more time to get in position to throw it. | ||
| + | [[File:Swatter_18.gif|250px]]<br /> | ||
<br /> | <br /> | ||
===Room 0x1A=== | ===Room 0x1A=== | ||
| − | + | https://vimeo.com/1106918093<br /> | |
| − | * One can expect typically three hits in this room from colliding with flies. | + | * One can expect typically two-three hits in this room from colliding with flies. |
| − | * Keep in mind the portal mechanics to adjust the x-position as required (see | + | * Keep in mind the portal mechanics to adjust the x-position as required (see note above under room 0x10) |
| − | * There is an interesting alternative strat in this room discovered by 'Bassguy'. It consists of re-collecting the swatter in room 0x13 after the last fly is destroyed and then throw it in the long horizontal corridor here in room 0x1A. It will then hit flies that are one screen off, thanks to a (probable) [[Beetlejuice_(NES)/Game_Mechanics_and_Techniques#Flaw_in_the_flies.27_hit_detection_.28overhead_sections.29|bug in the code of the flies' hit detection]]. This trick is demonstrated in | + | * There is an interesting alternative strat in this room discovered by 'Bassguy'. It consists of re-collecting the swatter in room 0x13 after the last fly is destroyed and then throw it in the long horizontal corridor here in room 0x1A. It will then hit flies that are one screen off, thanks to a (probable) [[Beetlejuice_(NES)/Game_Mechanics_and_Techniques#Flaw_in_the_flies.27_hit_detection_.28overhead_sections.29|bug in the code of the flies' hit detection]]. This trick is demonstrated in https://vimeo.com/811727457. If we assume the average number of hits from flies without the swatter is 3 and the average number of times Beetlejuice hits a fly with the swatter strat is 1, the time save in average is ~2s. So if re-grabbing the swatter in room 0x13 (and 0x18!) isn't too much out of the way, it's worth considering this alternative strat. |
| + | * The linked video collects the key at the end before the glasses, while the opposite would have been slightly faster based on distance traveled. However, first going for the glasses will result in getting hit by the buzzsaw (assuming no delays elsewhere in this room). Even when another hit can be afforded here without taking a death, it's recommended to still avoid it by collecting the key first. The additional HP will be of better use in the upcoming overhead section (or as a back-up in the graveyard). | ||
<br /> | <br /> | ||
| − | ==Level | + | ==Level 4== |
| − | === | + | ===Graveyard part 1=== |
| − | + | https://vimeo.com/1107520413<br /> | |
* The inputs are buffered during the cutscene after 3-3, so just hold down any button to skip the map screen on the first possible frame | * The inputs are buffered during the cutscene after 3-3, so just hold down any button to skip the map screen on the first possible frame | ||
* The big jump after the moving cloud is a 2-frame jump | * The big jump after the moving cloud is a 2-frame jump | ||
| − | * By holding "up" during the last jump, you will enter the | + | * By holding "up" during the last jump to the tower, you will enter the door without having to stand in front of it and wait for the screen to scroll up |
| − | + | ||
===Tower=== | ===Tower=== | ||
| − | + | https://vimeo.com/1107520463<br /> | |
| − | * | + | * The routes through the first section of the graveyard and the tower can be difficult to get consistent. https://vimeo.com/1107082569 demonstrates a much safer route. Other than being a bit slower, it also relies on getting a flower inside the tower: |
| − | + | ** The outside is around 4s slower (1.5s from taking longer to navigate the first part and 2.5s from missing the 2-frame jump mentioned above) | |
| + | ** The tower is around 1s slower | ||
| − | + | ===Graveyard part 2=== | |
| + | https://vimeo.com/1107520443<br /> | ||
| + | * The shop visible at around 1:08 contains birdman scares. At this point, you're guaranteed to have enough vourchers to buy at least one. This is not required for the route and will lead to a pretty significant time loss (5+s?), but can still be worth keeping in mind for more casual or marathon speedruns. There appears to only be one other shop in this level that has birdman scares. It's located below the shop just mentioned, near the bottom of the level. This one is very out of the way and not recommended for any type of speedrun. | ||
| − | If Beetlejuice already has one hit | + | ===3rd boss=== |
| + | https://vimeo.com/1106918186<br /> | ||
| + | * The ideal boss fight is done in 2 jumps/4 attacks. The inputs are quite precise though, so even when the boss doesn't cast magic, it can be tricky to do consistently. There are a few ways to mitigate this. One is to go for option 3 in the shop in level 2 (= buy a skeleton scare). This will give you 7 attacks in total. You can also continue using up birdman scares for more attack opportunities, as long as you have one birdman scare left for the last level (but very preferably two). | ||
| + | * If Beetlejuice already has one or two hit points at the end of this level, it will lead to minor time losses in the next level (or even 2+s if an unintentional death is taken). As a mitigation, an option is to take a hit at the end of the boss fight to reset the hit points. This is very risky if you have exhausted all attacks of a scare though, risking a "double KO" instead. | ||
| + | <br /> | ||
| − | + | ==Level 5 (Attic, overhead)== | |
| − | <br /> | + | https://vimeo.com/1106918190<br /> |
| + | * Use diagonal movement to set up the x-position before entering portals. This will both save pixels throughout the level, but also help avoid the Saturn door chasing Beetlejuice. | ||
| + | * When exiting the portal to the room with the sweepers, the y-position will always be the same. This can be used to easier control the [[Beetlejuice_(NES)/Game_Mechanics_and_Techniques#Potions|potion trajectories]]. The x-position is still a variable, as well as the throw direction. By entering the portal vertically, Beetlejuice will exit it facing down, while he will face left if the portal was entered diagonally (regardless of if it was diagonal left or right). The sweepers can't move past the locked door, so the best case is when the potion scare stays in the lower room. The graph below shows the result of a test of how many potion scare trajectories stay inside the lower room for the different x-positions Beetlejuice can exit the portal on and for the different throwing directions, while keeping the y-position at 0x49.<br /> | ||
| + | [[File:Potion trajectories Attic2.PNG]]<br /><br /> | ||
| − | + | For reference, this is the leftmost x-position (0xA2) Beetlejuice can exit the portal on:<br /> | |
| − | + | [[File:0xA2.PNG]]<br /><br /> | |
| − | + | ||
| − | <br /><br /> | + | |
| − | + | As can be seen in the graph, most trajectories from down-facing throws stay in the lower room, but not all. However, when facing left, all trajectories stay in the lower room (except for two from the far right side of the portal, which are anyways out of the way and shouldn't be used). Note that Beetlejuice can't exit this portal facing right, but the right throw direction is still interesting to consider. Most of the time, the sweepers will be on the right side of the room, so throwing a potion directly in their direction could have the benefit of reaching them slightly earlier and thereby increase the average number of hits, compared to throwing the potions to the left or down. This throw direction was therefore included in the test, but the results are not very good. Many trajectories leave the lower room, making the right-facing throws less attractive. Maybe a wider search, including different y-values would provide better results? | |
| − | + | * Assuming the potion scare stays in the same room as the sweepers, there seems to be a roughly 1/4 chance to take out both sweepers in one throw (difficult to estimate theoretically, so based on limited testing). Throwing a second potion is almost guaranteed to take out the sweepers (again, assuming the second one also stays in the lower room with the sweepers). See the [[Beetlejuice_(NES)/Any%25#Potions|potion management]] section for some additional comments about the available options. | |
| − | + | * By holding B+Up while inside the portal, Beetlejuice will buffer a potion throw in the direction he exited the portal and then immediately re-enter the portal. However, the potion throw will then be from y-position 0x48 and not 0x49! At least some trajectories from left-facing throws will now leave the lower room, so it's not recommended to buffer both the throw and the re-entering of the portal (at least not without fully testing the different outcomes from throws from the new y-position). | |
| − | * | + | * Buffering the potion throw generally doesn't have any downsides, except in one case. If one (or both) sweeper is sort of stuck in the lower left corner, it will probably not be hit by the potion right at the start. It's recommended in this case to wait for the sweeper(s) to start moving towards Beetlejuice and the portal before throwing the potion. This should ensure getting an early hit. |
| − | * Before leaving this level, remember to take a look at the number of | + | * Before leaving this level, remember to take a look at the number of lives remaining, as it has an impact on the number of death abuses available in the last level. (remaining lives are only shown when in the menu during the last level) |
<br /> | <br /> | ||
| − | ==Level | + | ==Level 6 (Afterlife)== |
| − | + | https://vimeo.com/1106918198<br /> | |
| − | This demonstrates the currently known fastest route in terms of order to collect tickets and death abuses. However, for the last death abuse (to collect ticket #5) to save time, it can't trigger a continue or get any knockbacks against the frogs above the "rail magnet" (?) on the right side. There doesn't appear to currently be a consistent setup for getting past the frogs without taking any hits. | + | * If the screen scrolls too much vertically when collecting ticket #4 (the first one collected in the linked video), there is a risk of bumping into the golden beetle next to it on the way to ticket #3. To avoid this risk, one can drop down from the platform below (with the octopus) and then continue right from there. It's slightly slower than immediately moving to the right, but it's better than risking to bump into the golden beetle. |
| − | + | * This demonstrates the currently known fastest route in terms of order to collect tickets and death abuses. However, for the last death abuse (to collect ticket #5) to save time, it can't trigger a continue or get any knockbacks against the frogs above the "rail magnet" (?) on the right side. There doesn't appear to currently be a consistent setup for getting past the [[Beetlejuice_(NES)/Game_Mechanics_and_Techniques#Flies.2FFrogs.2FGolden_beetles.2FOctopus.2FScorpions_.28side_view.29|frogs]] without taking any hits. | |
| − | The following video demonstrates grabbing ticket #5 without death abuse, | + | * The following video demonstrates grabbing ticket #5 without death abuse, https://vimeo.com/1106918215. It's around a second slower than the death abuse route, but becomes about the same if a continue or knockback is included in the death abuse route. |
| + | * It's worth preparing for the possibility of arriving here with only one birdman scare. The following route is ~4s slower than the fastest route (assuming no continues are triggered): https://vimeo.com/1106918227. | ||
| + | * Having no birdman scares in this level will result in a much slower completion that is only of interest as a last resort in a marathon or no-reset run | ||
| + | * It has been confirmed through code analysis that all tickets need to be collected in order to exit (the game checks that $85 equals 0x3F, corresponding to all tickets collected, or else the door won't open) | ||
| + | * The jump to the exit after the death abuse for ticket #5 can be buffered by holding down A before re-spawning | ||
Latest revision as of 14:54, 5 August 2025
Contents
Inventory management
Items in the inventory carry over between levels. There are different alternatives for how to manage the vouchers (for buying scares in the side view levels) and potions (for defeating enemies in some of the rooms in the overhead levels). It's therefore worth some additional discussion to go through the considerations behind the one shown in the route described on this page.
Vouchers
| Name | Vouchers | Accumulated | Comments |
| Key (outside the house) | +75 | 75 | |
| Book (house) | +75 | 150 | |
| Fly in the clouds (village) | +75 | 225 | |
| Beetle | +25 (or more) | 250 | There is a slight advantage in getting more vouchers here, since it can allow for more birdman scares to be purchased in the shop in level 2. However, the advantage isn't big enough to make any detours for. |
| Skeleton scare (shop) | -250 | 0 | (In practice) mandatory to proceed |
| Extra life | +75 | 75 | |
| Free umbrella scare (at the 1st cavern monster) | +75 | 150 | |
| Defeat 1st cavern monster | +7x75 = 525 | 675 | |
| Free umbrella scare (at the 2nd cavern monster) | +75 | 750 | |
| Defeat 2nd cavern monster | +7x75 = 525 | 1275 | |
| Buy scares - option 1 (after the 2nd cavern monster) | -1x400-5x150 | 125 | One umbrella and five birdman scares. This is the fastest option, but also introduces a bit of risk later on (the third cavern monster, the sewer boss and the graveyard boss). Note that if you earned 50 vouchers or more during the beetle farming in the first level, you can buy a 5th birdman scare. This can be used to mitigate some of the risk for a very minor time loss (just one press of select, so only a few frames). |
| Buy scares - option 2 (after the 2nd cavern monster) | -1x500-5x150 | 25 | One ogre and five birdman scares. This is safer than option 1 since you can use the ogre's special ability of 1-hit killing the 3rd cavern monster. It also makes the boss fight faster since the ogre has enough attacks to defeat it without having to activate a birdman scare. The downside is that it requires two shop visits. The additional shop visit costs around 3 seconds, but 1-1.5s are then saved compared to option 1 against the third cavern monster and the sewer boss (depending on button mashing and menuing). So this is in total 1.5-2s slower than option 1. |
| Buy scares - option 3 (after the 2nd cavern monster) | -1x500-1x250-3x150 | 75 | One ogre, one skeleton and three birdman scares. Slightly safer than option 2 (easier graveyard boss fight), but at the cost a little more menuing. Half a second slower than option 2? |
Potions
| Room # (see $55) | Potions | Accumulated | Comments |
| 8 | +1 | 1 | Can in theory be collected without time loss, but will in practice likely be a few frames slower. However, by delaying 15 frames, the second buzzsaw (?) can be avoided, which is a good trade-off. Collecting the potion within this delay should not be a problem in real-time. |
| 9 | +1 | 2 | On the way. Another potion just to the right can be collected for a cost of ~80 frames, but is not recommended when attempting an optimized speedrun. |
| B | -2 +3 | 3 | The potions are used in a semi-random fight with sweepers. Using 3 potions is a realistic goal for a good fight, but sometimes more will be required. It's usually possible to collect the 3 potions in the upper right room without time loss. |
| D | -1 | 2 | |
| E | +3 | 5 | |
| F | -2 | 3 | It's debatable if one or two potions should be used in this fight. Partly it depends on how the art pieces move, partly personal preference. |
| 0x10 | -1/-2? +1 | 2-4? | Beetlejuice will very often take two forced hits in this room. If that means Beetlejuice is down to his last health, the auto-scroller in the next room can be risky to get through on the right side and it might in that case be worth taking an additional third hit (or taking the left path in 0x11). See routing video and comments for this room for suggestions on how to use potions. |
| 0x11 | -1? | 1-3? | Throwing a potion here is far from a guarantee to avoid taking any hits. At least if the sweepers are separated, it's probably worth using a potion since there is otherwise a risk of taking two hits in this room. |
| 0x12 | 1-3? | The potion below the fly swatter is ~40 frames out of the way. Out of the optional potions not collected in the route shown on this page, this one is the least out of the way. | |
| 0x14 | -1? | 1-2? | It's common to take a hit at the start of this room, which will usually mean one or more legs getting stuck around the exit and a forced second hit (and sometimes even a third hi). By throwing a potion, the first hit can sometimes be avoided and it's then less likely for any of the legs to get stuck near the exit. As a bonus, there is also a decent chance of the potion killing one of the legs and thereby create a chance for a health beetle. |
| 0x18 | -1? | 1-2? | It's common to take two hits by the legs in this room. Using a potion can usually avoid one hit, with a rare chance of even killing the legs and getting a beetle). |
| 0x19 | 1-2? | There is an optional potion in the top right corner, which costs ~70 frames. | |
| 0x1D | -1? or -2? | 0 | Using one potion is risky, but a fairly significant time save (~7s). Two well thrown potions are however almost guaranteed to take out the sweepers. Saving a potion in this room could also open up for another potion use earlier on, e.g. in room 0x18, leading to another potential (minor) time save. |
Level 1
Outside
- An explanation of the death warp can be found here: movement mechanics (about "saved" position)
- The death warp typically saves ~0.8-0.9s in real-time, compared to collecting the key and returning to the house door on foot (a bit depending on the execution). However, it's worth noting that the death can lead to an additional continue, which then offsets most/all of that time gain.
- The setup shown in this video consists of two full jumps and then one minor jump
- The first jump doesn't pose any problem as long as you jump somewhere in front of the right side of the door
- The second jump has a 2-frame window. Too early and you'll land on the beetle. Too late and the game will update the "saved" position and Beetlejuice will not re-spawn in front of the door. By observing where Beetlejuice lands after the beetle, it's fairly easy to tell if the jump was too late.
- The third jump shouldn't pose any problem of triggering an update of the "saved" position. So it's mainly about jumping as tight as possible to collect the key and then fall in the pit as fast as possible.
House
Since the cloud elevators run on a fixed timer that starts when entering the house, the route can be adjusted to the possible cycles. Each cloud cycle is ~3s and the difference between an "early" and a "late" cycle is around half of that (an "early" cycle means jumping off the third and last cloud elevator while it's still ascending, while a "late" cycle is jumping off it after it's started descending). The fastest way to get through the first section of the house is on a "late" 5-cycle cloud elevator. However, this requires very tight execution (and probably favorable RNG of the lights on the bottom floor). It's more reliable to aim for an "early" 6-cycle:
https://vimeo.com/1106918050 (not displayed well due to sprite flickering)
- Depending on the timing of the lights, it's not always possible to run through the two rightmost lights on the bottom floor. In that case, you can damage-boost through the last light by jumping and taking a hit against the torch before the light.

- Note that the weight falling down when flipping the first exit switch needs to disappear off-screen before the second switch can be flipped.
- It's important to keep track of which invincibility flower(s) that are collected and when:
- The best case is to get both the lower and the upper flower (like in the linked video). All enemies and lights (after flipping the first switch) can be ignored.
- Getting invincibility AFTER flipping the first switch, but not getting the upper flower requires some attention when exiting the house. You need to jump or drop while triggering the exit to avoid the "bouncing urn" (see below for more details).
- If you collect the lower flower BEFORE the first switch is flipped, the invincibility will wear off right before crossing the exit door. Getting through without time loss then depends on good RNG of not colliding with the "bouncing smiley". It's also worth mentioning that the "urn" the "bouncing smiley" jumps out from is also an insta-death obstacle that can be hit if you're too fast after flipping the first of the two exit switches.
- It's possible to get through the house without invincibility without time loss, but it requires even more favorable RNG from the lights and enemies and tighter execution in a few spots.
The mechanics of the exit might not be evident from a glance and are worth studying a bit more in detail. The exit is triggered by Beetlejuice touching its hitbox (no need to press up or other input). The following is an illustration (not pixel-perfect) of the exit's hitbox with respect to Beetlejuice's shoe soles (y) and his centerline (x):

If Beetlejuice has flower invincibility, he can just run into the hitbox from the right without issues. But running into the exit without invincibility will stop Beetlejuice at the rightmost pixel of the hitbox and he is almost guaranteed to be killed by the smiley. However, if Beetlejuice is in the air, he will not stop his movement, but will still trigger the exit. There are a few ways to achieve this:
- Make a small jump before the hitbox
- Drop through the floor and let the momentum have Beetlejuice trigger the exit
- Make a big jump both flipping the second switch and then land inside the door's hitbox, while being outside the smiley's hitbox
'1' and '3' work when the smiley is around the urn. '2' works when the smiley is above the platform. By exploiting the hitbox in this way, the last part of the house can often, but not always, be cleared without time loss.
Village
- 25 vouchers will be missing to buy a skeleton scare in the shop. The only reasonable way to get them is to stomp on beetles. Either three red ones (worth 10 each) or (preferably) one of the three more valuable types (worth 25, 50 or 75).
- Note Beetlejuice's position when waiting for beetles to spawn. When standing in this position, beetles spawning from the left hole either spawn at Beetlejuice's feet or can relatively quickly be chased down. Beetles spawning from the right hole will quickly de-spawn if they jump right, but be in reach if jumping to the left, towards Beetlejuice. Another advantage of not staying further to the right is to not trigger the scorpion.
- All the inputs in the shop for buying the skeleton scare can be buffered.
- Beetlejuice exits the shop with the same x-position he entered it on and there is only one set of scares available in this shop
- It's possible to skip the first beehive/cloud elevator by dropping down to the platform below and then quickly jump up and to the right when the screen has scrolled down sufficiently. This is not faster though. The second beehive must however be destroyed or else Beetlejuice won't be able to open the boss door.
1st boss
- There is a very real risk of a "double KO", which then doesn't count in Beetlejuice's favor. It can therefore be a good habit to run away from the boss after attacking the third time to potentially avoid getting hit by a last-moment spray puff.
- The boss is not consistent in a speedrun and requires good RNG. With only three scare attacks to deal with the boss, there is no alternative to playing aggressively. There are still a few different possibilities on how to approach the fight:
- Run to the right, jump and then attack once mid-air, adjust the jump to ensure landing in front of the boss and to some extent dodge a possible boss attack. (shown in the linked video)
- Run right as the fight starts and attack once when in front of the right side of the fireplace. Then quickly stop to halt the x-momentum. Short jump to the right (anticipating jumping over a potential attack from the boss) and then two more quick scare attacks.
- Ignore what the boss does and try to do three consecutive attacks without any jumps
'1' and '2' are seemingly quite similar, but real-time experience appears to favor '1' in terms of success rate. In practice, a significant number of patterns will however be difficult to deal with either method, so RNG definitely plays a role in this fight. '3' is a few tenths of a second faster, but also the riskiest of the three with a significantly lower success rate.
Level 2
Storm drains
- It's faster to take the first two (intentional) deaths by falling off-screen than getting killed by the octopus
- At the second death, it's slightly faster to let the screen scroll up (like shown in the linked video), than to drop down off-screen as early as possible. The difference is only a few frames though.
- Note the free umbrella scare at the first two cavern monsters
- The cavern monsters' attacks are random. More often than not, they will hit Beetlejuice during the fight. The further away Beetlejuice stands, the smaller portion of the attacks will hit Beetlejuice. Another mitigation is to take an intentional death by falling off-screen. The deaths of course cost time (~2s), but also ensure consistent fights by providing invincibility.
- The "intended" route after the first cavern monster is to continue up to the top of the level and then descend down to the second cavern monster. Manipulating the window position so Beetlejuice can jump directly right towards the second monster is a shortcut worth 5 or so seconds and was found by 'bartaan'.
- Dropping down in front of the frog (instead of jumping over it) after the 1st cavern monster fight is a bit tight and requires the following:
- Not getting hit by the cavern monster or the frog
- Defeat the cavern monster in "average" time. Too fast and Beetlejuice will hit the spider on the ledge below. Too slow and Beetlejuice will hit the frog when dropping down.
- When jumping up to the platform with the frog and the cavern monster, there is a risk the frog repeatedly de- and re-spawns when disappearing off-screen. This will interfere with the frog movements and it becomes difficult to predict where the frog will be when getting back and dropping down to the ledge with the spider.
- Trigger the cavern monster fight before jumping over it, or else you will have to wait for the free umbrella scare when landing
- See the voucher section for a discussion about the purchases in the shop. In this shop, there are 2 sets of inventory on the left x-pixels of the door and 2 other sets on the right. It's the ones on the left that are needed (the ones on the right don't have birdman scares). The inventory sets alternate every x-pixel. So enter the shop, buy the scares from that inventory set. Exit, and either continue to the right or move 1 pixel and enter the shop again to buy the remaining scare(s). The following table shows the x-pixels of interest:
| x-pixel ($3BE) | Image left | Image right | Shop inventory | Comments |
| 0xA7 | 
|

|
- | Not in front of the shop |
| 0xA8 | 
|

|
||
| 0xA9 | 
|

|
||
| 0xAA | 
|

|
||
| 0xAB | 
|

|
||
| 0xAC | 
|

|
||
| 0xAD | 
|

|
From this position and to the right, the shop doesn't have any birdman scares |
- This is the last shop visit, so vouchers are irrelevant from this point onwards
- It's a 50% chance to jump through the octopus, not possible to control in real-time. However, remember to keep holding A during the knockback, to buffer the next jump.
- Note that a little bit of time can be saved by setting up the inventory to the "two-headed man" after activating the umbrella scare. Setting it up this way allows buffering the next scare activation ("up+A" to activate the birdman).
- The linked video goes for "option 1" when purchasing scares in the shop, which introduces a risk against the 3rd cavern monster. A way to mitigate the risk of getting hit by the 3rd cavern monster is to let the screen scroll far enough that you can start attacking it during the jump. With sufficient mashing, the cavern monster can be killed before attacking.
- Even if you get hit by the 3rd cavern monster, it's worth continuing the fight by activating a birdman scare. Hopefully, you can take out the monster with one additional attack and then use the remaining attack and two more from another birdman scare against the boss. A time loss, but not a reset.
- Shop options 2 and 3 eliminate the risk against the 3rd cavern monster by using the ogre's special ability of 1-hit defeating the 3rd cavern monster, but they're slower than option 1
- It's possible to skip the cavern monster fights by not allowing the screen to scroll far enough. However, the boss door will not be open if not all three cavern monsters have been defeated.
2nd boss
- Similar to the first boss, the same three methods can be used to fight the boss in this level. However, the third method (running straight at it) seems to rarely ever work. The sub-routine for the boss results in a higher chance of an attack than the first boss, so it's unlikely to get a fight without the boss attacking.
- Like the first boss, the best case scenario is a 3-attack fight.
Level 3 (both overhead levels grouped together)
The room numbers refer to RAM-address $55.
Room 8 through C
https://vimeo.com/1106918104
 8
8  9
9  A
A  B
B  C
C
- To avoid getting hit by the second buzzsaw in room 8, a minimum of a 16-frame delay is required. Since a death from roughly the middle of the screen in the overhead sections costs ~160 frames (more if it also triggers a continue), the estimated time loss from taking a hit is around one second, seen as an average. It's therefore well worth waiting to briefly avoid the damage and the potion can then also be collected without time loss as a bonus.
- Spider damage can sometimes be avoided and it's often worth doing so in these rooms. Taking hits early on risks resulting in a death, while not dying can often be rewarded in the coming rooms with restoring health from beetles from defeated enemies.
- There is an optional potion to the right of the one on the way in room 9, but it requires a detour of ~80 frames and is not recommended to grab
The sweeper fight in room B is one of the critical points in a speedrun. While the sweepers' and potions' movements depend on RNG, they can be manipulated to a certain extent. The steps outlined below and demonstrated in the link are in no way guaranteed to work, but do exploit the game mechanics and have been developed to improve the chances of a successful 2-potion fight.
- Most of the time, one of the sweepers will home in on Beetlejuice from atop the sofa group (like shown here). In that case, try to dodge and hope for the best. It's also possible to throw a potion and try to run through the sweeper during its damage frames, but this is not guaranteed to work. If Beetlejuice does end up taking a hit, the sweepers will move away from him, resulting in a time loss of usually a few seconds.
- Wait at the top of the narrow corridor to bait the two sweepers below to follow Beetlejuice. The third sweeper will at this point hopefully be stuck in the lower left corner of the room to the right. The chances of this being the case increases if Beetlejuice isn't positioned too far above the corridor. There is again an element of RNG here, which makes this step non-consistent and there is always a risk of one of the sweepers getting stuck in the room below or the sweeper to the right escaping pre-maturely and start chasing you.
- If Beetlejuice took a hit when trying to run past the sweeper in the first step, it can be worth throwing a potion in the lower room to try and inflict some damage while waiting for the sweepers to move towards the narrow corridor to the upper-left room.
- When one (or hopefully both) of the lower sweepers start to come up through the narrow corridor, move to the upper left corner of the table and time a potion throw to inflict damage, but also making sure to not get it (or else the sweepers will likely disperse into the lower room again and/or the sweeper on the right will retreat back to the right room - both events very time-consuming to fix). Throwing a potion from this position will likely have the scare moving around in the upper left room and continue to inflict damage to all three sweepers. However, some potion trajectories will end up in the right room.
- Move to the right above the table and get past the sweeper that should now be coming from the right, preferably without getting hit (but that's mainly RNG), and move into the right room. If taking a hit seems unavoidable, it should at least be done so to avoid the sweeper returning back into the right room.
- Collect the three potions in the right room and wait for the sweepers to approach. Align Beetlejuice's vertical position with the corridor to bait the sweepers to enter the corridor.
- When the sweepers are about to enter the right room, throw a potion from the position shown in the linked video. All potion scare trajectories thrown from around here (hug the right wall) will stay inside the right room. Most other trajectories when throwing from other positions will also stay in the right room, at least for a while. In the choice between taking a hit and throwing a potion from the wrong position, the latter is almost always better. Getting hit before all sweepers are well inside the right room is usually very costly.
- If necessary, throw additional potions and dodge as required to avoid hits.
It's of course possible to start throwing potions earlier than in the method above and take out the sweepers faster. This will in the end be a personal choice, but a few advantages of the approach outlined above:
- The less potions thrown in this room means more potions available to use in other rooms
- Throwing a potion from the top-left corner of the table seems to work well. If a potion was thrown in the lower room, it's possible that it's still active and prevents the next potion to be thrown.
- By throwing first a potion in the lower room and then in the upper-left room, at least one of the sweepers will often die in the upper-left room. With the 75% chance of dropping a health beetle, this will mean health beetles are often blocked from spawning in the right room. By following the method outlined above, the three sweepers will often be defeated in the right room, leaving more opportunities to get one or more health beetles.
Room D and E
https://vimeo.com/1106918134
 D
D  E
E
The strategy in room D is to throw a potion to deal with the two art pieces on the left side of the room and then take care of the art piece on the right side with the hammer. Since the art pieces move randomly, there is no consistent way to do this. Often, you'll end up having to chase one or both of the left pieces and finish the work with the hammer. By studying possible potion trajectories, one can control that the potion stays on the left side though. There seems to be at least a few options for this:
- As shown in the linked video, move up to the hammer, turn left and throw a potion. Not all positions have been tested, but this general area seems to give very reliable results with the potion scares staying on the left side.
- Throw a potion vertically from around the lower left corner of the carpet. Not all trajectories in this area have been investigated, but this seems like a consistent way to get the potion scare to stay on the left side. See the following screenshot for the general position:
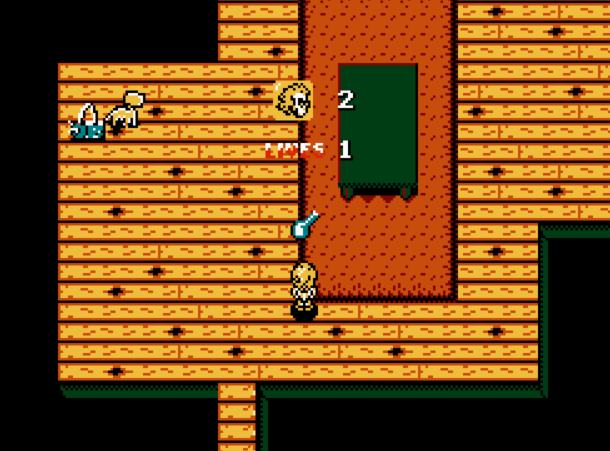
- As you enter the room, walk straight up (no sideways movement) and throw a potion from y-position 0xF1-0xEA.

Options '1' and '2' (shown in the linked video) are fairly similar. A quick test of 20 throws with each option was done from save states on a Powerpak (all of them different ones). 7/20 throws with method 1 took care of both art pieces, while 10/20 throws with method 2 were successful. By only comparing 20 throws for each method, it might be misleading to jump to too far-reaching conclusions regarding which method is best. Generally speaking, option 1 seems to cover more area on the left side, while most trajectories with option 2 move close to the NW/SE diagonal. Deciding on the throw depending on the art pieces initial movements could therefore be worth considering. '3' has the (slight) advantage of being thrown as early as possible when entering the room. However, there are quite a few trajectories not staying on the left side and the success rate will most likely therefore be lower than '1' and '2'.
A strategy that can make sense is to take an intentional hit to freeze the art pieces in place for a short time. If this is done before throwing the potion, it could even influence whether to go for option '1' or '2'.
The right path through room E is 16 frames slower than the left path. However, this is easily compensated by the three potions on the way.
Room F
- Throwing the first potion from the position in the linked video will ensure the potion scare stays in the lower left corner (at least most of the time)
- An alternative to throwing the hammer vertically (as shown in the linked video) is to throw it horizontally, e.g. above the chair to the left of the table. This can be a good option in case one of the pieces moves to the area above the table.
- If the second potion escapes the upper area, the upper art piece isn't going to be defeated. It should therefore be a priority to throw the potion from a position that ensures it doesn't escape. The recommended location is to hug the left wall and throw it from around the same position as in the linked movie. Several consecutive y-positions around here produce potion trajectories that all stay in the upper room.
- The two first art pieces' health (starting at 4) should be decimated by quite a bit from the hammer and the potion scare. While this is the fastest way to dispatch of the two lower art pieces, it's also a risky strategy (1/3 - 1/2 chance???). A few things to consider when returning back down after collecting the key in case they don't seem to be defeated:
- From time to time, an art piece gets trapped in the left corridor (leading to Saturn). Other than wasting time chasing after it, there isn't much to be done in this case. Fortunately, it's not too common though.
- If one of the art pieces moves up to the area above the table, either re-collect the hammer and throw horizontally above the table (left image) or throw a potion to the left from e.g. the top-right corner of the table (right image). The potion will not stay here, but often long enough to inflict one or two damage (especially if it moves down left and then comes back before it exhausts). Throwing the potion is the faster option, but re-throwing the hammer usually deals more damage and is therefore more consistent.


- A safer and ~6s slower way to clear this room is the following method:
- Throw the first potion the same as in the linked video
- Manually take care of the two lower art pieces with the hammer
- Take a hit from the upper piece when collecting the key and throw the hammer. The by far most common result is that the hammer will destroy the piece before it can move out of the way.
Room 0x10 through 0x12
https://vimeo.com/1106918110
 10
10  11
11  12
12
- If you don't use any potions in room 0x10, the typical case is that you take two damage (one on the way to the key and then another one when making your way to the exit).
- If you throw a potion, like in the linked video, the typical case is to run through one footballer's legs during its damage frames, but then take damage against the second pair of legs. Assuming the potion scare stays in the lower room, the first legs will then most of the time take one more hit (occasionally two, like in the linked video). If the legs taking damage earlier is still in the room below, it should therefore only have one hit point left. It's therefore worth throwing a second potion when returning after collecting the key to defeat those legs and a likely health beetle. In summary, two (sometimes only one) potions will often result in a net zero damage in this room.
- Based on the two points above, it's worth considering using potions in this room, especially if you enter it with 0 hit points (but with 1 hit point can also be worth it) to avoid entering 0x11 with two hit points
- The right path in room 0x11 is 80 frames (1.3s) faster than the left path. However, Beetlejuice will quite often take a hit along the right path, even when using a potion. The left path is safer since it only has one enemy along the way, but still not guaranteed to pass without taking damage. In case you get to the end of room 0x10 with only one hit point left and no enemies to take another damage on, it's worth considering moving on and then take the left path in room 0x11.
- The relative x-pixel Beetlejuice enters a portal on will also be the one he exits on, so move diagonally (and not just vertically) to adjust to the most favorable x-position.
- If you're one potion short, the one below the fly swatter in 0x12 is the least "off-route" of the ones not collected in the route shown on this page.
Room 0x13 through 0x17
https://vimeo.com/1106918121
 13
13  14
14  15
15  16
16  17
17
Room 0x13 is one of the most critical rooms in a speedrun. There is no known method for consistently clearing the flies quickly. Taking advantage of the flies' movement mechanics can however improve the success rate.
- Walk roughly to the end of the initial narrow corridor when entering the room
- If you don't get hit at the start (or the flies aren't aligned for a vertical throw with the swatter), throw the swatter to the right. However, if you are getting hit by a fly, see if the other flies are aligned for a vertical throw right at the start (strat first suggested by 'golden1ink'). Keep in mind that the flies are immobilized longer the fewer flies that are left in the room. So if you get hit right at the start, there isn't much time to chase down the immobilized flies with the swatter.
- Walk to the right without stopping and Beetlejuice will avoid both the door and the saw.
- Catch and immediately re-throw the swatter horizontally once (to avoid the swatter getting off-screen)
- Catch and immediately re-throw the swatter vertically
- Move around in a circular motion while avoiding the door and saw (the saw won't reach Beetlejuice when he's hugging the walls)
- If Beetlejuice gets hit by a fly, use the flies' immobility time to either "drag" more flies to the where the swatter moves or even consider collecting and re-throwing the swatter if a direct hit seems possible
- When there is only one fly left, consider slowly moving towards the exit. If the last fly isn't defeated quickly enough, this will however trap Beetlejuice between the closed door and the door to Saturn. So this is a risky strat only recommended when trying to go for a low time and resets are acceptable.
- The swatter can't hit flies when it's off-screen. The method above aims to minimize the swatter's time off-screen.
- There are other possible ways to throw the swatter than what's described here. The flies move around randomly and it doesn't seem like any part of the screen would be better than others. There are however a few ideas behind throwing the swatter like in the linked video:
- You have a bit of room to "drag" immobilized flies in front of the swatter. Especially horizontally, but to some extent also vertically.
- It stays on-screen the whole time
- The swatter can be of use in room 0x1A if it's re-collected here in room 0x13. Throwing it in this way sometimes makes it possible to re-collect it without a big detour or wait.
- If hit by the buzzsaw, Beetlejuice will not be able to collide with any flies during the invincibility period and the flies aren't immobilized either
- When throwing the potion as shown in room 0x14, there is roughly a 1/4 chance the potion will bounce off the obstacles so it stays on the left side. This gives a good opportunity to take out one of the footballer's legs and a chance for a health beetle. It can be difficult to avoid damage against the legs before entering the portal though, in which case they will scatter and are unlikely to take full damage from the potion.
- One or more legs have a tendency to end up near the exit if Beetlejuice is hit at the start. So two hits (or even three) are quite normal in this room when not using any potions. Using a potion allows Beetlejuice to not get hit at the start more frequently, but far from consistently.
Room 0x18 and 0x19
https://vimeo.com/1106918128
 18
18  19
19
- Room 0x18 is another highly random room. While the mouse's movement mechanics are stiff, they're also completely random. The only knowledge that can be used to slightly improve the chances of catching the mouse is that the time between each direction change is the same.
- If you have any potions to spare when entering 0x18, it's sometimes possible to avoid a hit from the footballer's legs at the start and rarely the potion scare will completely defeat the legs.
- If you re-collected the swatter in room 0x13, it should be thrown before chasing after the mouse. Below are three possible options for where to throw the swatter:
- Throw it vertically as soon as you enter the room. The disadvantage with this option is that will often interfere when you want to scare away Delia (instead of releasing the mouse in front of Delia, you can end up collecting the swatter).
- Throw it vertically one tile to the right of the entrance. Throwing it from this position will prevent it from interfering with scaring away Delia. Re-collecting the swatter will always cost a little bit of time though.
- Throw it horizontally a little below Delia. Quite similar to the previous method in that it won't interfere with scaring Delia, but it will cost a little more time to get in position to throw it.

Room 0x1A
- One can expect typically two-three hits in this room from colliding with flies.
- Keep in mind the portal mechanics to adjust the x-position as required (see note above under room 0x10)
- There is an interesting alternative strat in this room discovered by 'Bassguy'. It consists of re-collecting the swatter in room 0x13 after the last fly is destroyed and then throw it in the long horizontal corridor here in room 0x1A. It will then hit flies that are one screen off, thanks to a (probable) bug in the code of the flies' hit detection. This trick is demonstrated in https://vimeo.com/811727457. If we assume the average number of hits from flies without the swatter is 3 and the average number of times Beetlejuice hits a fly with the swatter strat is 1, the time save in average is ~2s. So if re-grabbing the swatter in room 0x13 (and 0x18!) isn't too much out of the way, it's worth considering this alternative strat.
- The linked video collects the key at the end before the glasses, while the opposite would have been slightly faster based on distance traveled. However, first going for the glasses will result in getting hit by the buzzsaw (assuming no delays elsewhere in this room). Even when another hit can be afforded here without taking a death, it's recommended to still avoid it by collecting the key first. The additional HP will be of better use in the upcoming overhead section (or as a back-up in the graveyard).
Level 4
Graveyard part 1
- The inputs are buffered during the cutscene after 3-3, so just hold down any button to skip the map screen on the first possible frame
- The big jump after the moving cloud is a 2-frame jump
- By holding "up" during the last jump to the tower, you will enter the door without having to stand in front of it and wait for the screen to scroll up
Tower
- The routes through the first section of the graveyard and the tower can be difficult to get consistent. https://vimeo.com/1107082569 demonstrates a much safer route. Other than being a bit slower, it also relies on getting a flower inside the tower:
- The outside is around 4s slower (1.5s from taking longer to navigate the first part and 2.5s from missing the 2-frame jump mentioned above)
- The tower is around 1s slower
Graveyard part 2
- The shop visible at around 1:08 contains birdman scares. At this point, you're guaranteed to have enough vourchers to buy at least one. This is not required for the route and will lead to a pretty significant time loss (5+s?), but can still be worth keeping in mind for more casual or marathon speedruns. There appears to only be one other shop in this level that has birdman scares. It's located below the shop just mentioned, near the bottom of the level. This one is very out of the way and not recommended for any type of speedrun.
3rd boss
- The ideal boss fight is done in 2 jumps/4 attacks. The inputs are quite precise though, so even when the boss doesn't cast magic, it can be tricky to do consistently. There are a few ways to mitigate this. One is to go for option 3 in the shop in level 2 (= buy a skeleton scare). This will give you 7 attacks in total. You can also continue using up birdman scares for more attack opportunities, as long as you have one birdman scare left for the last level (but very preferably two).
- If Beetlejuice already has one or two hit points at the end of this level, it will lead to minor time losses in the next level (or even 2+s if an unintentional death is taken). As a mitigation, an option is to take a hit at the end of the boss fight to reset the hit points. This is very risky if you have exhausted all attacks of a scare though, risking a "double KO" instead.
Level 5 (Attic, overhead)
- Use diagonal movement to set up the x-position before entering portals. This will both save pixels throughout the level, but also help avoid the Saturn door chasing Beetlejuice.
- When exiting the portal to the room with the sweepers, the y-position will always be the same. This can be used to easier control the potion trajectories. The x-position is still a variable, as well as the throw direction. By entering the portal vertically, Beetlejuice will exit it facing down, while he will face left if the portal was entered diagonally (regardless of if it was diagonal left or right). The sweepers can't move past the locked door, so the best case is when the potion scare stays in the lower room. The graph below shows the result of a test of how many potion scare trajectories stay inside the lower room for the different x-positions Beetlejuice can exit the portal on and for the different throwing directions, while keeping the y-position at 0x49.

For reference, this is the leftmost x-position (0xA2) Beetlejuice can exit the portal on:

As can be seen in the graph, most trajectories from down-facing throws stay in the lower room, but not all. However, when facing left, all trajectories stay in the lower room (except for two from the far right side of the portal, which are anyways out of the way and shouldn't be used). Note that Beetlejuice can't exit this portal facing right, but the right throw direction is still interesting to consider. Most of the time, the sweepers will be on the right side of the room, so throwing a potion directly in their direction could have the benefit of reaching them slightly earlier and thereby increase the average number of hits, compared to throwing the potions to the left or down. This throw direction was therefore included in the test, but the results are not very good. Many trajectories leave the lower room, making the right-facing throws less attractive. Maybe a wider search, including different y-values would provide better results?
- Assuming the potion scare stays in the same room as the sweepers, there seems to be a roughly 1/4 chance to take out both sweepers in one throw (difficult to estimate theoretically, so based on limited testing). Throwing a second potion is almost guaranteed to take out the sweepers (again, assuming the second one also stays in the lower room with the sweepers). See the potion management section for some additional comments about the available options.
- By holding B+Up while inside the portal, Beetlejuice will buffer a potion throw in the direction he exited the portal and then immediately re-enter the portal. However, the potion throw will then be from y-position 0x48 and not 0x49! At least some trajectories from left-facing throws will now leave the lower room, so it's not recommended to buffer both the throw and the re-entering of the portal (at least not without fully testing the different outcomes from throws from the new y-position).
- Buffering the potion throw generally doesn't have any downsides, except in one case. If one (or both) sweeper is sort of stuck in the lower left corner, it will probably not be hit by the potion right at the start. It's recommended in this case to wait for the sweeper(s) to start moving towards Beetlejuice and the portal before throwing the potion. This should ensure getting an early hit.
- Before leaving this level, remember to take a look at the number of lives remaining, as it has an impact on the number of death abuses available in the last level. (remaining lives are only shown when in the menu during the last level)
Level 6 (Afterlife)
- If the screen scrolls too much vertically when collecting ticket #4 (the first one collected in the linked video), there is a risk of bumping into the golden beetle next to it on the way to ticket #3. To avoid this risk, one can drop down from the platform below (with the octopus) and then continue right from there. It's slightly slower than immediately moving to the right, but it's better than risking to bump into the golden beetle.
- This demonstrates the currently known fastest route in terms of order to collect tickets and death abuses. However, for the last death abuse (to collect ticket #5) to save time, it can't trigger a continue or get any knockbacks against the frogs above the "rail magnet" (?) on the right side. There doesn't appear to currently be a consistent setup for getting past the frogs without taking any hits.
- The following video demonstrates grabbing ticket #5 without death abuse, https://vimeo.com/1106918215. It's around a second slower than the death abuse route, but becomes about the same if a continue or knockback is included in the death abuse route.
- It's worth preparing for the possibility of arriving here with only one birdman scare. The following route is ~4s slower than the fastest route (assuming no continues are triggered): https://vimeo.com/1106918227.
- Having no birdman scares in this level will result in a much slower completion that is only of interest as a last resort in a marathon or no-reset run
- It has been confirmed through code analysis that all tickets need to be collected in order to exit (the game checks that $85 equals 0x3F, corresponding to all tickets collected, or else the door won't open)
- The jump to the exit after the death abuse for ticket #5 can be buffered by holding down A before re-spawning