Difference between revisions of "Sonic the Hedgehog 2/Sonic"
From SDA Knowledge Base
(→Sky Chase) |
m (→Forewords) |
||
| (33 intermediate revisions by 3 users not shown) | |||
| Line 1: | Line 1: | ||
{{sda run|http://speeddemosarchive.com/Sonic2.html#norm}} | {{sda run|http://speeddemosarchive.com/Sonic2.html#norm}} | ||
| − | == | + | == Forewords == |
| − | [http://www. | + | The current fastest known time is [https://youtu.be/Z-q8d3xyIS0 14:58 by mike89]. Sonic 2 has a rich speedrunning history with lots of people contributing with strats, glitches and routes. What is presented here are not necessarily the fastest routes known, but rather what is typically thought of as reasonable in a single-segment speedrun. |
| + | |||
| + | All acts here have an accompanying video that serves as examples of the routes described. These videos were made using Gens11 and all GMV's are available for download [https://www.dropbox.com/s/e1wj783fnkkv2dw/S2%20vids.7z here] if there's a certain set of inputs you're interested in. If you are more interested in the fastest possible strats, for example for IL's, it's recommended to check out [http://www.youtube.com/playlist?list=PLzO4NtvTGZiEGRqRjRb6N3FBtt9bLNtGR TeeNTee314's] and [http://www.youtube.com/playlist?list=PLB1B30A5902E6F1AA Wersterlobe's] individual level runs. | ||
| + | |||
| + | If you download the GMV's, a recommendation is to check out the [http://tasvideos.org/forum/viewtopic.php?t=8827 Gens version on TASvideos] which allows you to check solids, hitboxes, angles, what's happening offscreen etc. | ||
Unless otherwise stated, you should start each stage with a 6 tap spindash. | Unless otherwise stated, you should start each stage with a 6 tap spindash. | ||
| − | == Emerald Hill 1 == | + | == Rules and Timing == |
| + | This game uses the ingame-timer as the method of timing the run. It starts in Emerald Hill 1 and ends during the fadeout as your roll out of the Death Egg. If you don't feel like adding all the times together yourself you can use a program such as [https://www.dropbox.com/s/k5knwujwvdfvxpx/ShitSplit04a.zip ShitSplit] made by setz. In the instance of a death you simply add that time as you would a stage. If you respawn at a star post after dying or going to a special stage you add the delta between the death and the star post spawn time (i.e. you die at 1:00 and respawn at 0:50 by the star post, then add 10 seconds). | ||
| + | |||
| + | Any use of level select/debug mode functions are prohibited and runs should not be done with these enabled. Since the timer doesn't increment when frame advance is used, this will void the run even if accidental. Do note that this also means that a run where you game over without continues is lost. | ||
| + | |||
| + | Since the timer is framebased, 50Hz is fine to use competitively. It is however also slower in real time and gives an unfair advantage, so 60Hz is preferred. | ||
| + | |||
| + | == [https://www.youtube.com/watch?v=TgeDiuemh5o Emerald Hill 1] == | ||
Pretty simple stage, just follow the run above. | Pretty simple stage, just follow the run above. | ||
*After collecting the speed shoes, you want to start your roll just as you go through the third ring on the ramp. Ideally you want to land on the left hand side of the invincibility box up ahead, which means you can just hold right for the remainder of the stage. If you hit the right hand side of the invincibility, you're too high and will miss the 10 ring box up ahead unless you hold back a little to adjust. | *After collecting the speed shoes, you want to start your roll just as you go through the third ring on the ramp. Ideally you want to land on the left hand side of the invincibility box up ahead, which means you can just hold right for the remainder of the stage. If you hit the right hand side of the invincibility, you're too high and will miss the 10 ring box up ahead unless you hold back a little to adjust. | ||
| Line 12: | Line 23: | ||
This method almost always gets 0:20, but if all your spindashes are good and you get this jump over the first yellow spring then 0:19 is very possible. | This method almost always gets 0:20, but if all your spindashes are good and you get this jump over the first yellow spring then 0:19 is very possible. | ||
| − | == Emerald Hill 2 == | + | == [https://www.youtube.com/watch?v=dvGRPi2RrNQ Emerald Hill 2] == |
Again, relatively straightforward, make sure to hold down as you cross the bridge at the start. | Again, relatively straightforward, make sure to hold down as you cross the bridge at the start. | ||
*The ideal case is, after the speed shoes, to do a full jump on one of the following two frames, such that you pass by the right hand side of the moving platform in this gap (use the pink flower in the background as reference): | *The ideal case is, after the speed shoes, to do a full jump on one of the following two frames, such that you pass by the right hand side of the moving platform in this gap (use the pink flower in the background as reference): | ||
| Line 20: | Line 31: | ||
Typical run here is 0:38, but 0:37 is possible with very clean execution. | Typical run here is 0:38, but 0:37 is possible with very clean execution. | ||
| − | == Chemical Plant 1 == | + | == [https://www.youtube.com/watch?v=BFZ-3cXy5bM Chemical Plant 1] == |
*Start with a 3 tap spindash and jump. | *Start with a 3 tap spindash and jump. | ||
*Make sure you jump at some point so you're running through the first loop, as you want to activate the [[Sonic_the_Hedgehog_game_mechanics_and_glitches#Speed_cap|speed cap]] when jumping over the spring. | *Make sure you jump at some point so you're running through the first loop, as you want to activate the [[Sonic_the_Hedgehog_game_mechanics_and_glitches#Speed_cap|speed cap]] when jumping over the spring. | ||
| Line 27: | Line 38: | ||
This typically gets 0:23, but by using sinewave jumps and hitting the ceiling at the end, 0:22 is possible. It's also possible to beat the block cycle with very aggressive play at the start of the stage and get 0:20, but it's very difficult and not considered worth attempting at this time. | This typically gets 0:23, but by using sinewave jumps and hitting the ceiling at the end, 0:22 is possible. It's also possible to beat the block cycle with very aggressive play at the start of the stage and get 0:20, but it's very difficult and not considered worth attempting at this time. | ||
| − | == Chemical Plant 2 == | + | == [https://www.youtube.com/watch?v=XZJu5DV0nmQ Chemical Plant 2] == |
*Start with a 3 tap spindash and just hold right. You should bounce off the enemy, hit a wall and take off down the slope, and just as you're about to land Tails should jump. | *Start with a 3 tap spindash and just hold right. You should bounce off the enemy, hit a wall and take off down the slope, and just as you're about to land Tails should jump. | ||
*You should see three cross-ramps as you go down this slope - jump anywhere between the second and third ramps you see, then jump off as you approach the top of the vertical slope such that you land in the gap where the door is. If done correctly, the door should open. Make sure to stand on the ramp on the left of the door to activate the [[Sonic_the_Hedgehog_game_mechanics_and_glitches#Path_switchers|path switcher]] that lets you go to the bottom path ahead. | *You should see three cross-ramps as you go down this slope - jump anywhere between the second and third ramps you see, then jump off as you approach the top of the vertical slope such that you land in the gap where the door is. If done correctly, the door should open. Make sure to stand on the ramp on the left of the door to activate the [[Sonic_the_Hedgehog_game_mechanics_and_glitches#Path_switchers|path switcher]] that lets you go to the bottom path ahead. | ||
| Line 34: | Line 45: | ||
This strategy typically yields 0:40, but with flawless execution 0:39 is possible. | This strategy typically yields 0:40, but with flawless execution 0:39 is possible. | ||
| − | == Aquatic Ruin 1 == | + | == [https://www.youtube.com/watch?v=xHuEhsmWjzI Aquatic Ruin 1] [https://www.youtube.com/watch?v=T5LIoh7SerA alt. strats]== |
*This stage has uneven ground throughout, so it's very important to make the jumps in this stage very accurately. The first one should be made just after the ground level dips slightly, which should clear the pillar. | *This stage has uneven ground throughout, so it's very important to make the jumps in this stage very accurately. The first one should be made just after the ground level dips slightly, which should clear the pillar. | ||
*After the loop, jump from behind the right pillar (similar to Chemical Plant 1) and you should land on the log up ahead. | *After the loop, jump from behind the right pillar (similar to Chemical Plant 1) and you should land on the log up ahead. | ||
| Line 42: | Line 53: | ||
This is the first stage where the times can be quite variable, anything from 0:21 to 0:24 is in acceptable range here. | This is the first stage where the times can be quite variable, anything from 0:21 to 0:24 is in acceptable range here. | ||
| − | == Aquatic Ruin 2 == | + | == [https://www.youtube.com/watch?v=AWjXVzmhBjs Aquatic Ruin 2] == |
| − | *The key jump in this stage is the underwater one that hits the underside of the pillar and keeps speed throughout the entire underwater section. The exact frame you have to jump on depends on at what pixels you hit the spring at. There are situations where there are 1 frame, 2 frames grouped together and 2 frames spaced out. The exact position you have to jump from also varies slightly meaning this jump is essentially luck. A visual cue you can use is to watch the bubbles you go past just before the jump: as they hit the very left edge of the screen, hold jump. This does have the disadvantage of taking your eye off Sonic, which means you won't know if you've missed the jump - if you jump too high and you notice it early, you can let the jump go and do a spindash from the raised platform after the four arrow shooters. | + | *The key jump in this stage is the underwater one that hits the underside of the pillar and keeps speed throughout the entire underwater section. The exact frame you have to jump on depends on at what pixels you hit the spring at. There are situations where there are 1 frame, 2 frames grouped together and 2 frames spaced out. The exact position you have to jump from also varies slightly meaning this jump is essentially luck. A visual cue you can use is to watch the bubbles you go past just before the jump: as they hit the very left edge of the screen, hold jump. This does have the disadvantage of taking your eye off Sonic, which means you won't know if you've missed the jump - if you jump too high and you notice it early, you can let the jump go and do a spindash from the raised platform after the four arrow shooters. If you don't find the jump worth it you can do a safe strat as demonstrated [https://www.youtube.com/watch?v=1XXGuRbcu3c here] without too much of a time loss. |
*On the spindash to the springboard to get out of the water, this should be a 1-tap and you should also tap left just before going up. This should regulate your speed well enough that you can hold right and sneak underneath the bugs here since the height you get is roughly proportional to the speed you enter it on. | *On the spindash to the springboard to get out of the water, this should be a 1-tap and you should also tap left just before going up. This should regulate your speed well enough that you can hold right and sneak underneath the bugs here since the height you get is roughly proportional to the speed you enter it on. | ||
*At the end of this stage is a glitch that causes the boss to skip its blowing up animation: if you land the last hit on the exact frame the boss starts swinging its hammer it will exit the arena straight away and allow you to get to the capsule about 3 seconds quicker. It costs about half a second over an optimal boss fight to attempt, though. An audio cue you can use here is to release the final spindash on the fourth of five ascending notes in the boss music. | *At the end of this stage is a glitch that causes the boss to skip its blowing up animation: if you land the last hit on the exact frame the boss starts swinging its hammer it will exit the arena straight away and allow you to get to the capsule about 3 seconds quicker. It costs about half a second over an optimal boss fight to attempt, though. An audio cue you can use here is to release the final spindash on the fourth of five ascending notes in the boss music. | ||
| Line 49: | Line 60: | ||
If everything goes well, this strat generally yields 0:41-0:43. Missing the underwater jump is the biggest single mistake you can make, and costs anywhere from 2-5 seconds depending on how you miss it. Getting the boss glitch saves 3 seconds over those times, but shouldn't be relied upon. | If everything goes well, this strat generally yields 0:41-0:43. Missing the underwater jump is the biggest single mistake you can make, and costs anywhere from 2-5 seconds depending on how you miss it. Getting the boss glitch saves 3 seconds over those times, but shouldn't be relied upon. | ||
| − | == Casino Night 1 == | + | == [https://www.youtube.com/watch?v=fXjq7WqTNYQ Casino Night 1] == |
*A tap jump just as the ground becomes flat again after the first slope should put you behind the speed shoes. If it looks like you're going to hit them, you can save it by holding jump to bounce over the bumpers up ahead. | *A tap jump just as the ground becomes flat again after the first slope should put you behind the speed shoes. If it looks like you're going to hit them, you can save it by holding jump to bounce over the bumpers up ahead. | ||
*The blue block at 0:05 is on the [[Sonic_the_Hedgehog_game_mechanics_and_glitches#Camera_timer|camera timer]], so you want to get to it as quickly as possible to make it start its cycle. As it moves upwards, time the jump when the top of the block lines up with this part of the background. | *The blue block at 0:05 is on the [[Sonic_the_Hedgehog_game_mechanics_and_glitches#Camera_timer|camera timer]], so you want to get to it as quickly as possible to make it start its cycle. As it moves upwards, time the jump when the top of the block lines up with this part of the background. | ||
| Line 59: | Line 70: | ||
If this route is executed correctly, it finishes in 0:27 or 0:28. | If this route is executed correctly, it finishes in 0:27 or 0:28. | ||
| − | == Casino Night 2 == | + | == [https://www.youtube.com/watch?v=eQRx3jnXy5k Casino Night 2] [https://www.youtube.com/watch?v=Wq2F2zEoSeg alt. strats] == |
*When jumping to the second speed shoe, pull back a little bit on the jump, otherwise it's possible to clear the box. | *When jumping to the second speed shoe, pull back a little bit on the jump, otherwise it's possible to clear the box. | ||
| − | *After the checkpoint, it's possible to bounce up to the | + | *After the checkpoint, it's possible to bounce up to the top path or fall through to the bottom path. The top path is roughly 1-1.5 seconds faster but also harder. If you take the bottom path, when holding the second spring down, release as the spring reaches this height (watch for the top of the spring to come into line with the top of the blue section of the wall immediately to the left), and be sure not to hold right to exit until Sonic is entirely over the bumper to the right: |
[[Image:Sonic2_CN2-1.png]]<br /> | [[Image:Sonic2_CN2-1.png]]<br /> | ||
| − | If you take the top path, try | + | If you take the top path, try to jump onto the spring and then hold a jump button to instantly start charging and also avoid accidentally jumping if you happen to pass over it. About a third of a second for a charge is enough to get you up. If you see Tails flying as you shoot up it's worth it to wait an extra half second for him to catch up to you and help break one of the three bouncy things, while it's not if you don't. |
*For the last spring in the stage, you want to release jump when the bottom side of the spring is roughly halfway between the second and third last coils of the spring, and then hold nothing: | *For the last spring in the stage, you want to release jump when the bottom side of the spring is roughly halfway between the second and third last coils of the spring, and then hold nothing: | ||
[[Image:Sonic2_CN2-2.png]]<br /> | [[Image:Sonic2_CN2-2.png]]<br /> | ||
| Line 71: | Line 82: | ||
A good time on this stage is between 0:56 and 1:00. A solid boss fight is key to this time, as the stage is fairly straightforward. | A good time on this stage is between 0:56 and 1:00. A solid boss fight is key to this time, as the stage is fairly straightforward. | ||
| − | == Hill Top 1 == | + | == [https://www.youtube.com/watch?v=wsXLQ4DcE8M Hill Top 1] == |
*Start with a very fast 1-tap spindash and jump to clear the ramp. Land on the cable platform and spindash - if you spindash from the platform above a spike enemy will spawn right where you land, and you have no rings... | *Start with a very fast 1-tap spindash and jump to clear the ramp. Land on the cable platform and spindash - if you spindash from the platform above a spike enemy will spawn right where you land, and you have no rings... | ||
*After spindashing into the S-tube, start holding left as you approach the ramp and hit the gap. If you get it just perfect you can land on the right hand side of the ball in the seesaw, but more often than not you should fall to the left hand side and jump over it. If you land on the right you should make a small jump onto the platform moving up and down in the lava (which is roughly in a vertical line with the rightmost ring in the set of nine up above). This platform will be at its highest point if the stage has gone well so far. Alternatively you can do a small jump to the other side of the seesaw, then as you walk off tap left then piano roll a jump on the platform below. | *After spindashing into the S-tube, start holding left as you approach the ramp and hit the gap. If you get it just perfect you can land on the right hand side of the ball in the seesaw, but more often than not you should fall to the left hand side and jump over it. If you land on the right you should make a small jump onto the platform moving up and down in the lava (which is roughly in a vertical line with the rightmost ring in the set of nine up above). This platform will be at its highest point if the stage has gone well so far. Alternatively you can do a small jump to the other side of the seesaw, then as you walk off tap left then piano roll a jump on the platform below. | ||
*As shown in [http://www.youtube.com/watch?v=STFY0eakEPU this video], it's possible to get a super high bounce off the first seesaw here, such that you skip the second one and go to the platform above. This actually has to do with your actions at the start: if you can get Tails to jump straight up like this, he'll fall in the pit trying to follow you and not have enough time to respawn. The game still stores his speed in memory, however, until he drops out of his flying state when returning. When Sonic hits the seesaw, the game actually checks '''both''' characters' speeds, and uses the higher one to determine how far to throw the ball up. This saves two seconds if you can pull it off. This is why you should not spindash on the first seesaw just in case since a spindash will be stored in the air and thus you have to burn it on the ground before the spring in order to not accidentally spindash off the platform later. | *As shown in [http://www.youtube.com/watch?v=STFY0eakEPU this video], it's possible to get a super high bounce off the first seesaw here, such that you skip the second one and go to the platform above. This actually has to do with your actions at the start: if you can get Tails to jump straight up like this, he'll fall in the pit trying to follow you and not have enough time to respawn. The game still stores his speed in memory, however, until he drops out of his flying state when returning. When Sonic hits the seesaw, the game actually checks '''both''' characters' speeds, and uses the higher one to determine how far to throw the ball up. This saves two seconds if you can pull it off. This is why you should not spindash on the first seesaw just in case since a spindash will be stored in the air and thus you have to burn it on the ground before the spring in order to not accidentally spindash off the platform later. | ||
| − | *Land on the next cable platform, and start running off it as you go through the third ring, facing left as you land in the lava to ensure you get knocked back to the right. As the platform falls it takes you with it in your invincibility time. The zip is possible to do between the following frames: | + | *Land on the next cable platform, and start running off it as you go through anywhere between the first and the third ring, facing left as you land in the lava to ensure you get knocked back to the right. As the platform falls it takes you with it in your invincibility time. The zip is possible to do between the following frames: |
[[Image:HT1.png]] [[Image:HT1 2.png]]<br /> | [[Image:HT1.png]] [[Image:HT1 2.png]]<br /> | ||
| − | *A tiny tap to the left will increase the chance of getting a good zip where you don't have to bounce on the spring in order to proceed. | + | *A tiny tap to the left to get some pixels between Sonic and the right wall before falling through the lava will increase the chance of getting a good zip where you don't have to bounce on the spring in order to proceed. |
*The most common and consistent methods of timing the zip is as soon as the bottom of the lava passes between "RINGS" and "TIME" or when the right rectangle hits the top of the screen (left picture). | *The most common and consistent methods of timing the zip is as soon as the bottom of the lava passes between "RINGS" and "TIME" or when the right rectangle hits the top of the screen (left picture). | ||
*After getting up on the correct floor, spindash and jump into the corridor roof in order to trigger the earthquake as soon as possible. | *After getting up on the correct floor, spindash and jump into the corridor roof in order to trigger the earthquake as soon as possible. | ||
| − | *In the ideal case, the third door in the underground section closes behind you just as the clock ticks to 0:30. Wait for the platforms underneath you to move upwards a little bit. If you stand still in the same position as the video, as the "earthquake platform" comes up underneath you Sonic will run on the spot, once this happens you can jump into the gap onto the rock and be safe. If you got to the third door by 0:30, jump in this hallway and roll off the platform in the lava, which should be at the top of its cycle, and you should roll through the gap without touching the lava at all. If you have no rings at this point, there are three at the end of this hallway, | + | *In the ideal case, the third door in the underground section closes behind you just as the clock ticks to 0:30. Wait for the platforms underneath you to move upwards a little bit. If you stand still in the same position as the video, as the "earthquake platform" comes up underneath you Sonic will run on the spot, once this happens you can jump into the gap onto the rock and be safe. If you got to the third door by 0:30, jump in this hallway and roll off the platform in the lava, which should be at the top of its cycle, and you should roll through the gap without touching the lava at all. If you have no rings at this point, there are three at the end of this hallway, you can reach them by doing a 6-tap in the hallway then cancel your roll as you won't have enough height to reach them otherwise. If you're not confident in the speed you can simply do a jump at the right time to reach them. |
Ideal time here is 0:40 if the stage is more or less flawless. If your start isn't quite perfect, or you miss being launched over the ball of the seesaw at 0:10, or you don't luck out and get the extended jump height, it's impossible to do the fastest strat in the underground section, and 0:42 is the result. | Ideal time here is 0:40 if the stage is more or less flawless. If your start isn't quite perfect, or you miss being launched over the ball of the seesaw at 0:10, or you don't luck out and get the extended jump height, it's impossible to do the fastest strat in the underground section, and 0:42 is the result. | ||
| − | == Hill Top 2 == | + | == [https://www.youtube.com/watch?v=wsXLQ4DcE8M Hill Top 2] == |
The early platform cycle is quite attainable in this stage, but it depends on one particular jump at the start. | The early platform cycle is quite attainable in this stage, but it depends on one particular jump at the start. | ||
*Start with a 3 tap spindash and jump almost immediately after releasing it. This should clear the initial ramp. As soon as you do, let the jump go because if you let it go too long, you'll land on the downslope and take too long to stop and spindash again. Ideally you hit the yellow spring at a very low 0:06. If you miss the initial jump, you can still make the regular cycle - but you still have plenty of time for that. | *Start with a 3 tap spindash and jump almost immediately after releasing it. This should clear the initial ramp. As soon as you do, let the jump go because if you let it go too long, you'll land on the downslope and take too long to stop and spindash again. Ideally you hit the yellow spring at a very low 0:06. If you miss the initial jump, you can still make the regular cycle - but you still have plenty of time for that. | ||
| Line 89: | Line 100: | ||
*To clear the rock just after the spring trap, you have to leave the jump very late, so that you're virtually jumping off the side of the spring. The jump should also be as small as possible. As you pass the rock you should also hold right to make the speed cap kick in so you don't run into the 10 ring box and lose momentum. | *To clear the rock just after the spring trap, you have to leave the jump very late, so that you're virtually jumping off the side of the spring. The jump should also be as small as possible. As you pass the rock you should also hold right to make the speed cap kick in so you don't run into the 10 ring box and lose momentum. | ||
*Jump over the first cable platform, let go of right for maybe a quarter of a second and then hold it again. If the whole stage has gone correctly up to this point, this platform should be at the bottom part of its cycle. You need to learn how long this drop is, because you don't have a lot of time to react to make the next jump. A piano roll will help you get the jump off the platform but depending on your subpixels it's possible to clip through it. | *Jump over the first cable platform, let go of right for maybe a quarter of a second and then hold it again. If the whole stage has gone correctly up to this point, this platform should be at the bottom part of its cycle. You need to learn how long this drop is, because you don't have a lot of time to react to make the next jump. A piano roll will help you get the jump off the platform but depending on your subpixels it's possible to clip through it. | ||
| − | *When jumping on the first yellow spring up to the boss, | + | *When jumping on the first yellow spring up to the boss, slow down a bit to avoid hitting the wall next to it as you'll dodge the ceiling at the top and land straight on the second spring instead of having to make an extra jump. |
*The most consistent method to kill the boss is to simply continue your roll until you get stopped by the platform. Then you jump up on the platform and stop holding right until you stop (for 1 frame if possible) then continue to hold right and roll off the platform. Alternatively you can also do a mid-jump and then roll off. | *The most consistent method to kill the boss is to simply continue your roll until you get stopped by the platform. Then you jump up on the platform and stop holding right until you stop (for 1 frame if possible) then continue to hold right and roll off the platform. Alternatively you can also do a mid-jump and then roll off. | ||
*When jumping for this capsule, hold back a little bit and use the incline. | *When jumping for this capsule, hold back a little bit and use the incline. | ||
Ideal time here is 0:57 on the early cycle, 0:59 on the half early cycle, and 1:01 on the regular cycle. | Ideal time here is 0:57 on the early cycle, 0:59 on the half early cycle, and 1:01 on the regular cycle. | ||
| − | == Mystic Cave 1 == | + | == [https://www.youtube.com/watch?v=YK8jOgN4U1I Mystic Cave 1] == |
For the most part, this stage explains itself. There are a number of smaller optimisations you can do, many of which are visible in [http://www.youtube.com/watch?v=XITYKwkolNE TeeNTee314's video] of this stage, but following the path in the run linked above gets at worst 0:33 consistently. | For the most part, this stage explains itself. There are a number of smaller optimisations you can do, many of which are visible in [http://www.youtube.com/watch?v=XITYKwkolNE TeeNTee314's video] of this stage, but following the path in the run linked above gets at worst 0:33 consistently. | ||
*Beating the crusher at the start can save some time. A consistent way to beat it is to slow down a tad after the middle ring of the first triple set, jump and release when you're just above the second set of rings. Do a tiny brake at the platform and continue on. The jump in the first slope is not recommended if rolling. | *Beating the crusher at the start can save some time. A consistent way to beat it is to slow down a tad after the middle ring of the first triple set, jump and release when you're just above the second set of rings. Do a tiny brake at the platform and continue on. The jump in the first slope is not recommended if rolling. | ||
| Line 102: | Line 113: | ||
*When reaching the final 2 crushers you can do a 6-tap to get to the goal post fast which could net you a 31 flat with an otherwise perfect stage. However this is quite inconsistent as you'll usually fall into the hole right before the goal post. The recommended method is to jump over them both then do a 6 tap with a jump into the ceiling to keep your speed plus avoiding this hole. | *When reaching the final 2 crushers you can do a 6-tap to get to the goal post fast which could net you a 31 flat with an otherwise perfect stage. However this is quite inconsistent as you'll usually fall into the hole right before the goal post. The recommended method is to jump over them both then do a 6 tap with a jump into the ceiling to keep your speed plus avoiding this hole. | ||
| − | == Mystic Cave 2 == | + | == [https://www.youtube.com/watch?v=304LOAvdXOc Mystic Cave 2] == |
*A 6-tap followed by a tiny jump can earn you half a second if you get it right, but this is quite hard to get right so a simple 6-tap up the slope is recommended. | *A 6-tap followed by a tiny jump can earn you half a second if you get it right, but this is quite hard to get right so a simple 6-tap up the slope is recommended. | ||
*You cannot pass the bridge until it's fully lowered, so spindash and make a spindash across it as soon as it it. Then do a piano roll to jump off the crumbling bridge into the spikes to stop you, and finally a 3 tap to get down to the crushing platform from which you do a 6-tap. | *You cannot pass the bridge until it's fully lowered, so spindash and make a spindash across it as soon as it it. Then do a piano roll to jump off the crumbling bridge into the spikes to stop you, and finally a 3 tap to get down to the crushing platform from which you do a 6-tap. | ||
*When you bounce up, hug the left wall, do a 3-tap off the crumbling bridge followed by a jump and run up to the whisps (flies). If you feel this is hard, a simple jump to the ring box followed by a spindash is sufficient. | *When you bounce up, hug the left wall, do a 3-tap off the crumbling bridge followed by a jump and run up to the whisps (flies). If you feel this is hard, a simple jump to the ring box followed by a spindash is sufficient. | ||
| − | *Stop at the first whisp and spindash off the ledge. Hit the speedcap as you come close to the slope and do another spindash on top of it. Hold right as you go off the platform to consistently hit the platform below. A 3-tap plus full jump as Sonic will make it across this gap | + | *Stop at the first whisp and spindash off the ledge. Hit the speedcap as you come close to the slope and do another spindash on top of it. Hold right as you go off the platform to consistently hit the platform below. A 3-tap plus full jump as Sonic will make it across this gap, alternatively you can do a 6-tap and a half-jump. |
*Do 3 taps the whole way until the final spindash before reaching the boss room. | *Do 3 taps the whole way until the final spindash before reaching the boss room. | ||
*Here's how you should set yourself up for the boss fight: | *Here's how you should set yourself up for the boss fight: | ||
[[Image:Sonic2_MC2bad.png]]<br /> | [[Image:Sonic2_MC2bad.png]]<br /> | ||
| − | The spikes at the start of the boss fight can fall in multiple different patterns. The safest place to stand is here, in line with the right edge of Robotnik's hitbox as he falls. The picture above depicts one of two patterns where a spike drops here, and on those patterns | + | The spikes at the start of the boss fight can fall in multiple different patterns. The safest place to stand is here, in line with the right edge of Robotnik's hitbox as he falls. The picture above depicts one of two patterns where a spike drops here, and on those patterns you should move back into the middle once you identify it. Both patterns are characterised by the first two spikes falling on the far right and then the far left. Tails will get hit 2, so don't jump too soon. After 4 hits, spindash and you will get the rest before Robotnik has the chance to move away.<br /> |
This is one of the simplest stages in the run, and really should be 0:42-0:43 every time. | This is one of the simplest stages in the run, and really should be 0:42-0:43 every time. | ||
| − | == Oil Ocean 1 == | + | == [https://www.youtube.com/watch?v=Eot_rwpyjrM Oil Ocean 1] == |
*Do a 6-tap and roll through the start, until going through the first enemy. | *Do a 6-tap and roll through the start, until going through the first enemy. | ||
| − | *Jump on top of the cap of the fiery thing and spindash off it as it goes up. Alternatively jump to the platform just right | + | *Jump on top of the cap of the fiery thing and spindash off it as it goes up. Alternatively jump to the platform just right of it and spindash off of that. |
| − | *Hold down and you should clear the first obstacle, after which you either do 2 tiny jumps followed by 1 big one or 2 big ones to get up the ledge without | + | *Hold down as you come with speed and you should clear the first obstacle, after which you either do 2 tiny jumps followed by 1 big one or 2 big ones to get up the ledge without getting stopped. |
| − | *The IL strat here is to spindash and do frame perfect jumps across. However you should simply run and rolljump off the last upside down U shaped platform. | + | *The IL strat here is to spindash and do frame perfect, subpixel dependent jumps across. However you should simply run and rolljump off the last upside down U shaped platform. |
| − | *If your speed is good, either roll or hit right as you hit the oil to keep your momentum and try not to jump until you're under the | + | *If your speed is good, either roll or hit right as you hit the oil to keep your momentum and try not to jump until you're under the oil canisters as this will save time (though if you think you're close to dying, don't refrain not to jump). |
| − | *As you get to the 2nd stop, do a slow 3-tap and a late jump to clear it, then another slow 3-tap to clear the 2nd one. You might want to brake slightly as you climb the stairs. Then do a full jump to get stopped by the solid and do a 6-tap off the | + | *As you get to the 2nd stop, do a slow 3-tap and a late jump to clear it, then another slow 3-tap to clear the 2nd one. You might want to brake slightly as you climb the stairs. Then do a full jump to get stopped by the solid canister to the right of the green cap and do a 6-tap off the rising platform. |
*As soon as the last cannon reaches the score/time/rings, do 2 full jumps to clear the final fan. If you're low in the oil or passed the cannon while in the air you can make adjustments however. | *As soon as the last cannon reaches the score/time/rings, do 2 full jumps to clear the final fan. If you're low in the oil or passed the cannon while in the air you can make adjustments however. | ||
*Missing the jump up to it costs four seconds waiting for it to stop. | *Missing the jump up to it costs four seconds waiting for it to stop. | ||
This route normally gets 0:32 if executed correctly. | This route normally gets 0:32 if executed correctly. | ||
| − | == Oil Ocean 2 == | + | == [https://www.youtube.com/watch?v=fozh69qyY4Q Oil Ocean 2] == |
*By holding right the whole time after landing on the 2nd oil cap gives you a glitch called "Mega Sonic" which in a nutshell doubles your jump power, acceleration and top speed. | *By holding right the whole time after landing on the 2nd oil cap gives you a glitch called "Mega Sonic" which in a nutshell doubles your jump power, acceleration and top speed. | ||
| − | * | + | *Land on the ramp next to the green sideways spring while facing right, then release all input. You should be pushed up inside the wall. Then simply hold right and you should level wrap to the boss. |
| − | + | ||
| − | + | ||
| − | + | ||
| − | + | ||
*While off screen, you should hold nothing until you see the approach to the boss arena come into view, specifically when you see the last sign post at which point you should start holding left. Once Sonic appears at the right edge of the screen, do a full size jump into the pit and roll. As soon as you hear the sound for the first hit, do a small jump. This should get at least the next 6 hits; if you have to spindash for the last one, hold down and time a spindash as mashing might make you accidentally jump. Then jump quickly to make sure you get out of the pit. | *While off screen, you should hold nothing until you see the approach to the boss arena come into view, specifically when you see the last sign post at which point you should start holding left. Once Sonic appears at the right edge of the screen, do a full size jump into the pit and roll. As soon as you hear the sound for the first hit, do a small jump. This should get at least the next 6 hits; if you have to spindash for the last one, hold down and time a spindash as mashing might make you accidentally jump. Then jump quickly to make sure you get out of the pit. | ||
This method should give times between 0:41 and 0:42. | This method should give times between 0:41 and 0:42. | ||
| − | == Metropolis 1 == | + | If you find the boss strat too hard, you could take a look at [https://www.youtube.com/watch?v=QA0V1hAky3E this alternative route] which wastes 10 seconds compared to the wrap, but saves 10 seconds compared to not getting a 1 cycle boss. |
| − | + | ||
| + | == [https://www.youtube.com/watch?v=A83ISl_WTx0 Metropolis 1] [https://www.youtube.com/watch?v=LRjgWSgiRTQ safer alt. strats] == | ||
*When exiting the first mesh cylinder, activate the speed cap if Tails didn't follow you or your spindash was slow and spindash up this ramp. Otherwise just jump up with your momentum. | *When exiting the first mesh cylinder, activate the speed cap if Tails didn't follow you or your spindash was slow and spindash up this ramp. Otherwise just jump up with your momentum. | ||
*Run off the green ledge above the two brown moving platforms rather than jumping. This should ensure that you land in the gap just by holding right every time. | *Run off the green ledge above the two brown moving platforms rather than jumping. This should ensure that you land in the gap just by holding right every time. | ||
| − | *When bouncing up the yellow springs, hold right for about two bounces worth of time, this should let you bounce out without clipping the right edge on the way up | + | *When bouncing up the yellow springs, hold right for about two bounces worth of time, this should let you bounce out without clipping the right edge on the way up. Keep an eye on Tails here: if he appears while you're bouncing upwards, he should appear at the bottom of the next ramp, so you want to make the speed cap kick in after exiting. If he doesn't, he should appear at the top, so don't activate the speed cap and go up the ramp, where he should be waiting below another set of yellow springs. |
*Hold jump on the next set of yellow springs, as this makes you go up much faster. | *Hold jump on the next set of yellow springs, as this makes you go up much faster. | ||
*Make sure both Sonic and Tails charge spindashes on these bolts, if both characters are on one of these their speed stacks. | *Make sure both Sonic and Tails charge spindashes on these bolts, if both characters are on one of these their speed stacks. | ||
| Line 144: | Line 152: | ||
*When doing the former method, you should do one small and one full jump to accelerate the screen scrolling as much as possible. | *When doing the former method, you should do one small and one full jump to accelerate the screen scrolling as much as possible. | ||
*When you do the latter method though, the bolt will crush you as soon as it reappears on screen, unless you jump within a four frame window. Using a visual cue (as the last asteron is reaching the top of the screen) is difficult too, because the screen scrolls much faster when you're in the air than when you land, and you land just before you need to make the jump. | *When you do the latter method though, the bolt will crush you as soon as it reappears on screen, unless you jump within a four frame window. Using a visual cue (as the last asteron is reaching the top of the screen) is difficult too, because the screen scrolls much faster when you're in the air than when you land, and you land just before you need to make the jump. | ||
| − | *WARNING: The boxes with arrows sticking out are on the universal timer | + | *WARNING: The boxes with arrows sticking out are on the universal timer. If you make the spindash over the three arrow boxes at 0:47, the last platform will have the arrow pointing up and it will hit you. If you can see the second arrow platform facing left, then the third one will be facing up. Hold your spindash back to prevent this from happening, if necessary. |
The safer screenwrap method gives times of about 0:57 to 1:00, and the risky screenwrap method saves a further 4 seconds. | The safer screenwrap method gives times of about 0:57 to 1:00, and the risky screenwrap method saves a further 4 seconds. | ||
| − | == Metropolis 2 == | + | == [https://www.youtube.com/watch?v=8wttC145NuQ Metropolis 2] == |
*Make sure you're facing left as you take the hit. This will cause you to bounce to the right and land on the falling platform. Move to the left of it if at all possible. | *Make sure you're facing left as you take the hit. This will cause you to bounce to the right and land on the falling platform. Move to the left of it if at all possible. | ||
*Just as the bottom of the platform appears from behind the foreground, do a full jump out to the right, then when you land do another small one, and tap left to zip upon landing. Alternatively, stand on the left of the platform, then start holding right as you see the bottom of the lava, then jump as soon as you see the platform. | *Just as the bottom of the platform appears from behind the foreground, do a full jump out to the right, then when you land do another small one, and tap left to zip upon landing. Alternatively, stand on the left of the platform, then start holding right as you see the bottom of the lava, then jump as soon as you see the platform. | ||
| Line 159: | Line 167: | ||
This should get 0:16 every time. | This should get 0:16 every time. | ||
| − | == Metropolis 3 == | + | == [https://www.youtube.com/watch?v=qDwApyrc2DU Metropolis 3] == |
*How the zip works here is, by inching towards the edge of this platform, Tails moves off it and causes it to fall. On the first two frames that the platform falls, Sonic can initiate a zip by pressing right: | *How the zip works here is, by inching towards the edge of this platform, Tails moves off it and causes it to fall. On the first two frames that the platform falls, Sonic can initiate a zip by pressing right: | ||
[[Image:Sonic2_Met3-1.png]] [[Image:Sonic2_Met3-2.png]]<br /> | [[Image:Sonic2_Met3-1.png]] [[Image:Sonic2_Met3-2.png]]<br /> | ||
| Line 172: | Line 180: | ||
Getting the level wrap first try will net a time somewhere between 0:44 and 0:49. Each time you have to reset it and try it again costs 8-10 seconds on top of that. | Getting the level wrap first try will net a time somewhere between 0:44 and 0:49. Each time you have to reset it and try it again costs 8-10 seconds on top of that. | ||
| − | == Sky Chase == | + | If you don't want to do the wrap, you can play through [https://www.youtube.com/watch?v=7WGwBYqeflY this route] instead. |
| + | |||
| + | == [https://www.youtube.com/watch?v=Cx8qmnIR84A Sky Chase] == | ||
Don't die. Be at the right side of the stage at the end to ensure 2:06. | Don't die. Be at the right side of the stage at the end to ensure 2:06. | ||
| − | * | + | *There is a way to get a 2:05, but it's not consistent and the risk of dying is large. Simply do a 6-tap and jump off the plane just as the transition is due and you'll hopefully get it. |
| + | |||
| + | You can keep a combo going by not jumping or standing on the turtles. Simply roll or spindash into all enemies and you can gain a lot of lives. This is recommended if you have problems defeating the last boss. | ||
| − | == Wing Fortress == | + | == [https://www.youtube.com/watch?v=mikyrgtrk4s Wing Fortress] == |
| + | *As you start the stage, do a 6-tap that is released on exactly 3 seconds ingame time, then do another 6-tap on the booster as it sends you right. | ||
| + | If you do a 6-tap in the corridor and jump to the ceiling to cancel it, you can jump to the ceiling above the Clucker and then trigger the speedcap on the "long" step of the stairs, trigger the speedcap as you run off that then tap left while falling down to make sure you hit the platform to make a jump. The platforms are on a universal timer and thus your time reaching this will influence the timing of your jump immensely. | ||
*The platforms that pop out from the side of the ship ignore all the timer rules of the rest of the game and operate on a global timer from power-on instead. In practice this means you can lose as much as four seconds here waiting for them to open. | *The platforms that pop out from the side of the ship ignore all the timer rules of the rest of the game and operate on a global timer from power-on instead. In practice this means you can lose as much as four seconds here waiting for them to open. | ||
*The speed cap applies to these ziplines, too, which means if you hold right on them you'll simply walk off. On the zipline after the checkpoint this will cause you to die. | *The speed cap applies to these ziplines, too, which means if you hold right on them you'll simply walk off. On the zipline after the checkpoint this will cause you to die. | ||
| − | * | + | *On the second last zipline of the stage, quickly 1-tap spindash as you pass through the first of the 3 rings it takes you through and you should trigger the slope glitch. If you stop in the middle of the platform up ahead, you've succeeded. |
| − | + | *Try to hit the steepest part of the slope up ahead, and once you begin zipping, rather than hold left simply tap it over and over - doing this means you'll consistently be able to spindash to land hits on the boss. You have to move into the middle of the arena to start the fight, then you want to a) make the boss move to the left (optional) and b) move into one of these two positions: | |
| − | + | [[Image:Sonic2_WF-2.png]] [[Image:Sonic2_WF-1.png]]<br /> | |
| − | [[Image: | + | Then, as you see Sonic's feet change state, charge and hold a spindash. |
| − | + | *After getting 8 hits, release the spindash and hold left. Once out of the wall, tap right and then left to stop rolling, and do a full jump as close to 7 seconds after you got the first hit on the boss to trigger the cutscene as soon as possible. | |
| − | + | If you do this correctly you'll get 1:44-1:47 consistently, depending on platform luck. | |
| − | + | ||
| − | == Death Egg == | + | == [https://www.youtube.com/watch?v=Ry-wZVbx3Gc Death Egg] == |
*If you get the final hit on Silver Sonic on the exact frame he switches from standing straight up to leaning forward, he simply disappears and you can't progress to the final boss. As a result, in serious runs, it's worth delaying the last four hits by a quarter of a second to play it safe. | *If you get the final hit on Silver Sonic on the exact frame he switches from standing straight up to leaning forward, he simply disappears and you can't progress to the final boss. As a result, in serious runs, it's worth delaying the last four hits by a quarter of a second to play it safe. | ||
*If you don't feel confident with getting 10 hits before leaving the ground, you can get 9 hits by only jumping over the flame in the first phase, at the cost of only one second. | *If you don't feel confident with getting 10 hits before leaving the ground, you can get 9 hits by only jumping over the flame in the first phase, at the cost of only one second. | ||
| − | A 10-2 final boss results in a 0:50, and a 9-3 results in a 0:51. | + | A 10-2 final boss results in a 0:50 (0:49 if done flawlessly), and a 9-3 results in a 0:51. |
Latest revision as of 23:01, 12 December 2017
Contents
- 1 Forewords
- 2 Rules and Timing
- 3 Emerald Hill 1
- 4 Emerald Hill 2
- 5 Chemical Plant 1
- 6 Chemical Plant 2
- 7 Aquatic Ruin 1 alt. strats
- 8 Aquatic Ruin 2
- 9 Casino Night 1
- 10 Casino Night 2 alt. strats
- 11 Hill Top 1
- 12 Hill Top 2
- 13 Mystic Cave 1
- 14 Mystic Cave 2
- 15 Oil Ocean 1
- 16 Oil Ocean 2
- 17 Metropolis 1 safer alt. strats
- 18 Metropolis 2
- 19 Metropolis 3
- 20 Sky Chase
- 21 Wing Fortress
- 22 Death Egg
Forewords
The current fastest known time is 14:58 by mike89. Sonic 2 has a rich speedrunning history with lots of people contributing with strats, glitches and routes. What is presented here are not necessarily the fastest routes known, but rather what is typically thought of as reasonable in a single-segment speedrun.
All acts here have an accompanying video that serves as examples of the routes described. These videos were made using Gens11 and all GMV's are available for download here if there's a certain set of inputs you're interested in. If you are more interested in the fastest possible strats, for example for IL's, it's recommended to check out TeeNTee314's and Wersterlobe's individual level runs.
If you download the GMV's, a recommendation is to check out the Gens version on TASvideos which allows you to check solids, hitboxes, angles, what's happening offscreen etc.
Unless otherwise stated, you should start each stage with a 6 tap spindash.
Rules and Timing
This game uses the ingame-timer as the method of timing the run. It starts in Emerald Hill 1 and ends during the fadeout as your roll out of the Death Egg. If you don't feel like adding all the times together yourself you can use a program such as ShitSplit made by setz. In the instance of a death you simply add that time as you would a stage. If you respawn at a star post after dying or going to a special stage you add the delta between the death and the star post spawn time (i.e. you die at 1:00 and respawn at 0:50 by the star post, then add 10 seconds).
Any use of level select/debug mode functions are prohibited and runs should not be done with these enabled. Since the timer doesn't increment when frame advance is used, this will void the run even if accidental. Do note that this also means that a run where you game over without continues is lost.
Since the timer is framebased, 50Hz is fine to use competitively. It is however also slower in real time and gives an unfair advantage, so 60Hz is preferred.
Emerald Hill 1
Pretty simple stage, just follow the run above.
- After collecting the speed shoes, you want to start your roll just as you go through the third ring on the ramp. Ideally you want to land on the left hand side of the invincibility box up ahead, which means you can just hold right for the remainder of the stage. If you hit the right hand side of the invincibility, you're too high and will miss the 10 ring box up ahead unless you hold back a little to adjust.
- If you land on the loop with the up-right facing spring, tap left just after hitting it, then switch back to right, which will ensure you don't get stopped by the corner up ahead.
This method almost always gets 0:20, but if all your spindashes are good and you get this jump over the first yellow spring then 0:19 is very possible.
Emerald Hill 2
Again, relatively straightforward, make sure to hold down as you cross the bridge at the start.
- The ideal case is, after the speed shoes, to do a full jump on one of the following two frames, such that you pass by the right hand side of the moving platform in this gap (use the pink flower in the background as reference):
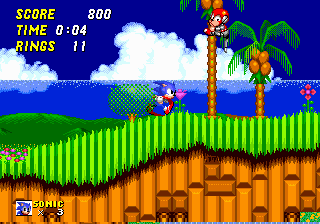
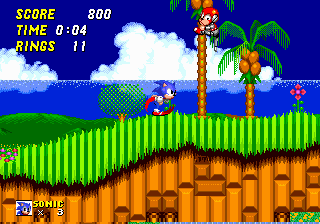
Unlike the older method for this jump, this will never cause your momentum to come to a dead stop when you land. If you get a low jump (ie. you jumped off the downslope), just pull back and go through the gap slowly on the left, 0:38 is still very attainable from here.
- After the checkpoint, jump off the quarter-pipe, letting go of the jump slightly above the top of the ramp, then holding it again before landing on the invincibility box. If done correctly, you should be able to hold right and bounce on the buzzbomber up ahead, land on the spikes and hold right to the boss.
Typical run here is 0:38, but 0:37 is possible with very clean execution.
Chemical Plant 1
- Start with a 3 tap spindash and jump.
- Make sure you jump at some point so you're running through the first loop, as you want to activate the speed cap when jumping over the spring.
- The yellow blocks here are a universal timer object that always clear the way at 0:11, so any time lost up to this point doesn't matter, as long as it gets here for 0:11. It's actually possible to beat this block cycle and save two seconds but nobody's done it in a SS before - however, Paraxade has in this IL of the stage.
- After the yellow blocks, you go through two loops that exit downwards, and a third regular loop - behind the right pillar of this loop is a steep ramp, as you pass behind it, jump, hold right to activate the speed cap and hit the gap in the wall. If you hit the ceiling of the hallway you jump into you keep a fair bit of speed which makes 0:22 much more likely.
This typically gets 0:23, but by using sinewave jumps and hitting the ceiling at the end, 0:22 is possible. It's also possible to beat the block cycle with very aggressive play at the start of the stage and get 0:20, but it's very difficult and not considered worth attempting at this time.
Chemical Plant 2
- Start with a 3 tap spindash and just hold right. You should bounce off the enemy, hit a wall and take off down the slope, and just as you're about to land Tails should jump.
- You should see three cross-ramps as you go down this slope - jump anywhere between the second and third ramps you see, then jump off as you approach the top of the vertical slope such that you land in the gap where the door is. If done correctly, the door should open. Make sure to stand on the ramp on the left of the door to activate the path switcher that lets you go to the bottom path ahead.
- After a loop comes the big jump up to the top of the stage, which can be made significantly easier by jumping with no direction pressed, and then holding right to activate the speed cap. If you hold right as you jump, your jump will be significantly smaller.
- For the last jump in the stage, just mash the buttons after you go off the platform before it.
This strategy typically yields 0:40, but with flawless execution 0:39 is possible.
Aquatic Ruin 1 alt. strats
- This stage has uneven ground throughout, so it's very important to make the jumps in this stage very accurately. The first one should be made just after the ground level dips slightly, which should clear the pillar.
- After the loop, jump from behind the right pillar (similar to Chemical Plant 1) and you should land on the log up ahead.
- It's worth taking a little extra time to make sure the next spindash is good, as if it's not strong you can get flipped out of it by the springboard up ahead, wasting time. Learn when to start holding right again after going off this edge, too, as you don't want to be rolling for the upcoming jump.
- The next jump is the most difficult in the stage, since both Sonic and the slopes are obscured by leaves in the foreground. The ideal case is a large jump that clears the entire pool of water and lands on the speed shoes from the top, but if you miss that you can save it by landing on the second shark, or just behind the speed shoes. Another consistent method that still yields 21 if done correctly is to jump at the last pillar and bounce on the first shark located just at the right of the waterfall. IMPORTANT: no matter what happens, make sure you always hit the speed shoes from the top, since if you hit them from the side, a very unhelpful glitch will come into play: if speed shoes take effect underwater, as soon as you breach the water level they will stop working.
- After this there's one final jump through the loop to end the stage, you need to hit the steepest part of the ramp (which is partially obscured again), and pull back slightly before hitting the side of the loop. If you touch it you get kind of "stuck" in the side of the loop and have to make another jump to get over the top of it. An alternative to this is to jump off the rotating platforms and bounce on the whisps (flies) which works very well if you didn't touch the water at any time (these platforms use a camera timer).
This is the first stage where the times can be quite variable, anything from 0:21 to 0:24 is in acceptable range here.
Aquatic Ruin 2
- The key jump in this stage is the underwater one that hits the underside of the pillar and keeps speed throughout the entire underwater section. The exact frame you have to jump on depends on at what pixels you hit the spring at. There are situations where there are 1 frame, 2 frames grouped together and 2 frames spaced out. The exact position you have to jump from also varies slightly meaning this jump is essentially luck. A visual cue you can use is to watch the bubbles you go past just before the jump: as they hit the very left edge of the screen, hold jump. This does have the disadvantage of taking your eye off Sonic, which means you won't know if you've missed the jump - if you jump too high and you notice it early, you can let the jump go and do a spindash from the raised platform after the four arrow shooters. If you don't find the jump worth it you can do a safe strat as demonstrated here without too much of a time loss.
- On the spindash to the springboard to get out of the water, this should be a 1-tap and you should also tap left just before going up. This should regulate your speed well enough that you can hold right and sneak underneath the bugs here since the height you get is roughly proportional to the speed you enter it on.
- At the end of this stage is a glitch that causes the boss to skip its blowing up animation: if you land the last hit on the exact frame the boss starts swinging its hammer it will exit the arena straight away and allow you to get to the capsule about 3 seconds quicker. It costs about half a second over an optimal boss fight to attempt, though. An audio cue you can use here is to release the final spindash on the fourth of five ascending notes in the boss music.
- Make sure to jump on the incline when hitting the capsule. Nothing worse than losing a second due to a bad capsule jump.
If everything goes well, this strat generally yields 0:41-0:43. Missing the underwater jump is the biggest single mistake you can make, and costs anywhere from 2-5 seconds depending on how you miss it. Getting the boss glitch saves 3 seconds over those times, but shouldn't be relied upon.
Casino Night 1
- A tap jump just as the ground becomes flat again after the first slope should put you behind the speed shoes. If it looks like you're going to hit them, you can save it by holding jump to bounce over the bumpers up ahead.
- The blue block at 0:05 is on the camera timer, so you want to get to it as quickly as possible to make it start its cycle. As it moves upwards, time the jump when the top of the block lines up with this part of the background.
- The flipper at 0:12 is where this stage gets tricky. The objective is to launch the flipper slightly after landing on it, such that you land on the platform on the other side of the pit of bumpers. Immediately after landing, you want to do a two-thirds height jump (the really tricky part) to pass through all of the bumpers up ahead, then another jump to pass underneath the blue block ahead. There's a few ways this can happen with the bumpers: if you miss all of them, or only hit the very right edge of the bottom one, the jump through the gap is easy. However, if you get bumped upwards by the bottom bumper, the top one will shoot you at a difficult angle giving you very little time to make the next jump. This is easily noticed however and a "piano roll" as you land should help you make it through.
- Sometimes the launch off the flipper goes too high and bounces off the shield box: if this happens, you can still save it by being stopped by the top corner of the ramp in the ceiling, and moving right into the gap as you fall. You need to do this in two bounces or the blue block will stop your next jump, however.
- In total you have about one second worth of error between picking up the speed shoes and the jump from the two boxes across the top of the stage. This jump has to reach the top path: missing it costs at least 3 seconds, probably more considering the unreliability of the bumpers below.
- When rolling down the flipper at the top of the stage, release right then very quickly hold it again, and keep it held all the way through the fall. This will, more often than not, make Sonic fall through the left-facing flipper at the bottom. Missing it depends on subpixels and cannot be manipulated in real-time.
- As you land from the last flipper, you should mash the jump buttons because it's possible that you will simply stop dead upon hitting the ground.
If this route is executed correctly, it finishes in 0:27 or 0:28.
Casino Night 2 alt. strats
- When jumping to the second speed shoe, pull back a little bit on the jump, otherwise it's possible to clear the box.
- After the checkpoint, it's possible to bounce up to the top path or fall through to the bottom path. The top path is roughly 1-1.5 seconds faster but also harder. If you take the bottom path, when holding the second spring down, release as the spring reaches this height (watch for the top of the spring to come into line with the top of the blue section of the wall immediately to the left), and be sure not to hold right to exit until Sonic is entirely over the bumper to the right:
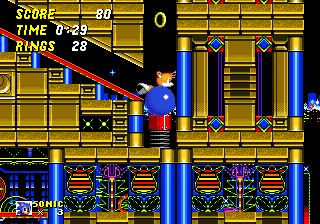
If you take the top path, try to jump onto the spring and then hold a jump button to instantly start charging and also avoid accidentally jumping if you happen to pass over it. About a third of a second for a charge is enough to get you up. If you see Tails flying as you shoot up it's worth it to wait an extra half second for him to catch up to you and help break one of the three bouncy things, while it's not if you don't.
- For the last spring in the stage, you want to release jump when the bottom side of the spring is roughly halfway between the second and third last coils of the spring, and then hold nothing:
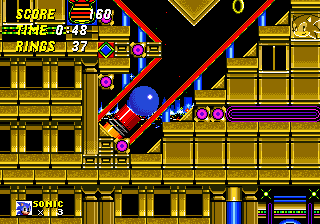
The spring stays in this position for eight frames and only four of them will give you the best result: falling straight between the two flippers facing opposite directions at the bottom. From here (or wherever you end up), spindash to the boss. You'll see two columns of lights near the edge of the platform, jump from between these and you'll make it into the right hand corner of the boss arena.
- For the boss, 1-tap spindash, tap left a couple of times and run up the left hand side. Do a full size jump once you hit the vertical part of the slope on the left - if done correctly you should land on the boss and be able to bounce on it for the remaining hits. When doing this, try to make Sonic bounce back towards the middle, so you can keep bouncing on him wherever he moves.
- If your bounce is too low and you think you're going to get hit by the boss's claws before you get hit 3, you can use the blue bumper in the centre of the arena to save yourself. This bounce is always sufficient height to get the remaining hits.
A good time on this stage is between 0:56 and 1:00. A solid boss fight is key to this time, as the stage is fairly straightforward.
Hill Top 1
- Start with a very fast 1-tap spindash and jump to clear the ramp. Land on the cable platform and spindash - if you spindash from the platform above a spike enemy will spawn right where you land, and you have no rings...
- After spindashing into the S-tube, start holding left as you approach the ramp and hit the gap. If you get it just perfect you can land on the right hand side of the ball in the seesaw, but more often than not you should fall to the left hand side and jump over it. If you land on the right you should make a small jump onto the platform moving up and down in the lava (which is roughly in a vertical line with the rightmost ring in the set of nine up above). This platform will be at its highest point if the stage has gone well so far. Alternatively you can do a small jump to the other side of the seesaw, then as you walk off tap left then piano roll a jump on the platform below.
- As shown in this video, it's possible to get a super high bounce off the first seesaw here, such that you skip the second one and go to the platform above. This actually has to do with your actions at the start: if you can get Tails to jump straight up like this, he'll fall in the pit trying to follow you and not have enough time to respawn. The game still stores his speed in memory, however, until he drops out of his flying state when returning. When Sonic hits the seesaw, the game actually checks both characters' speeds, and uses the higher one to determine how far to throw the ball up. This saves two seconds if you can pull it off. This is why you should not spindash on the first seesaw just in case since a spindash will be stored in the air and thus you have to burn it on the ground before the spring in order to not accidentally spindash off the platform later.
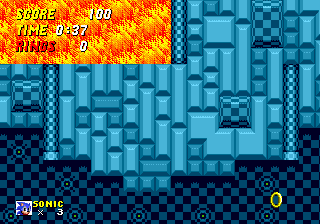
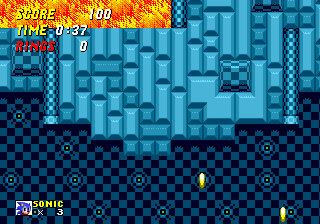
- Land on the next cable platform, and start running off it as you go through anywhere between the first and the third ring, facing left as you land in the lava to ensure you get knocked back to the right. As the platform falls it takes you with it in your invincibility time. The zip is possible to do between the following frames:
- A tiny tap to the left to get some pixels between Sonic and the right wall before falling through the lava will increase the chance of getting a good zip where you don't have to bounce on the spring in order to proceed.
- The most common and consistent methods of timing the zip is as soon as the bottom of the lava passes between "RINGS" and "TIME" or when the right rectangle hits the top of the screen (left picture).
- After getting up on the correct floor, spindash and jump into the corridor roof in order to trigger the earthquake as soon as possible.
- In the ideal case, the third door in the underground section closes behind you just as the clock ticks to 0:30. Wait for the platforms underneath you to move upwards a little bit. If you stand still in the same position as the video, as the "earthquake platform" comes up underneath you Sonic will run on the spot, once this happens you can jump into the gap onto the rock and be safe. If you got to the third door by 0:30, jump in this hallway and roll off the platform in the lava, which should be at the top of its cycle, and you should roll through the gap without touching the lava at all. If you have no rings at this point, there are three at the end of this hallway, you can reach them by doing a 6-tap in the hallway then cancel your roll as you won't have enough height to reach them otherwise. If you're not confident in the speed you can simply do a jump at the right time to reach them.
Ideal time here is 0:40 if the stage is more or less flawless. If your start isn't quite perfect, or you miss being launched over the ball of the seesaw at 0:10, or you don't luck out and get the extended jump height, it's impossible to do the fastest strat in the underground section, and 0:42 is the result.
Hill Top 2
The early platform cycle is quite attainable in this stage, but it depends on one particular jump at the start.
- Start with a 3 tap spindash and jump almost immediately after releasing it. This should clear the initial ramp. As soon as you do, let the jump go because if you let it go too long, you'll land on the downslope and take too long to stop and spindash again. Ideally you hit the yellow spring at a very low 0:06. If you miss the initial jump, you can still make the regular cycle - but you still have plenty of time for that.
- As long as you make it to the checkerboard patterned background by 0:17 you can make the early cycle here - that should give you just enough time to catch the platform at 0:21 as it's moving up. If you miss this, it's possible to catch it on the way down and still make it to the higher platform before it moves out of reach at 0:24, but this obviously costs two seconds over the "full" early cycle.
- To clear the rock just after the spring trap, you have to leave the jump very late, so that you're virtually jumping off the side of the spring. The jump should also be as small as possible. As you pass the rock you should also hold right to make the speed cap kick in so you don't run into the 10 ring box and lose momentum.
- Jump over the first cable platform, let go of right for maybe a quarter of a second and then hold it again. If the whole stage has gone correctly up to this point, this platform should be at the bottom part of its cycle. You need to learn how long this drop is, because you don't have a lot of time to react to make the next jump. A piano roll will help you get the jump off the platform but depending on your subpixels it's possible to clip through it.
- When jumping on the first yellow spring up to the boss, slow down a bit to avoid hitting the wall next to it as you'll dodge the ceiling at the top and land straight on the second spring instead of having to make an extra jump.
- The most consistent method to kill the boss is to simply continue your roll until you get stopped by the platform. Then you jump up on the platform and stop holding right until you stop (for 1 frame if possible) then continue to hold right and roll off the platform. Alternatively you can also do a mid-jump and then roll off.
- When jumping for this capsule, hold back a little bit and use the incline.
Ideal time here is 0:57 on the early cycle, 0:59 on the half early cycle, and 1:01 on the regular cycle.
Mystic Cave 1
For the most part, this stage explains itself. There are a number of smaller optimisations you can do, many of which are visible in TeeNTee314's video of this stage, but following the path in the run linked above gets at worst 0:33 consistently.
- Beating the crusher at the start can save some time. A consistent way to beat it is to slow down a tad after the middle ring of the first triple set, jump and release when you're just above the second set of rings. Do a tiny brake at the platform and continue on. The jump in the first slope is not recommended if rolling.
- The spiked platform that comes out of the wall won't move until you're a bit into the platform on which it rests, so a 3 tap off the stair where the spikes come out then a timed tiny jump is recommended.
- If you're going too fast or slow you'll miss the vine that opens up the path below you after the moving spiked sideway pillars, say aim for a middlepoint of speed by doing a small jump to get out of rolling after a 6-tap.
- When jumping on top of the unlowered bridge, you can either do a 1-tap and 3 tiny jumps to climb up or a 6-tap to save a few frames by skipping a jump, but this is not recommended unless you're already behind.
- When reaching the final 2 crushers you can do a 6-tap to get to the goal post fast which could net you a 31 flat with an otherwise perfect stage. However this is quite inconsistent as you'll usually fall into the hole right before the goal post. The recommended method is to jump over them both then do a 6 tap with a jump into the ceiling to keep your speed plus avoiding this hole.
Mystic Cave 2
- A 6-tap followed by a tiny jump can earn you half a second if you get it right, but this is quite hard to get right so a simple 6-tap up the slope is recommended.
- You cannot pass the bridge until it's fully lowered, so spindash and make a spindash across it as soon as it it. Then do a piano roll to jump off the crumbling bridge into the spikes to stop you, and finally a 3 tap to get down to the crushing platform from which you do a 6-tap.
- When you bounce up, hug the left wall, do a 3-tap off the crumbling bridge followed by a jump and run up to the whisps (flies). If you feel this is hard, a simple jump to the ring box followed by a spindash is sufficient.
- Stop at the first whisp and spindash off the ledge. Hit the speedcap as you come close to the slope and do another spindash on top of it. Hold right as you go off the platform to consistently hit the platform below. A 3-tap plus full jump as Sonic will make it across this gap, alternatively you can do a 6-tap and a half-jump.
- Do 3 taps the whole way until the final spindash before reaching the boss room.
- Here's how you should set yourself up for the boss fight:

The spikes at the start of the boss fight can fall in multiple different patterns. The safest place to stand is here, in line with the right edge of Robotnik's hitbox as he falls. The picture above depicts one of two patterns where a spike drops here, and on those patterns you should move back into the middle once you identify it. Both patterns are characterised by the first two spikes falling on the far right and then the far left. Tails will get hit 2, so don't jump too soon. After 4 hits, spindash and you will get the rest before Robotnik has the chance to move away.
This is one of the simplest stages in the run, and really should be 0:42-0:43 every time.
Oil Ocean 1
- Do a 6-tap and roll through the start, until going through the first enemy.
- Jump on top of the cap of the fiery thing and spindash off it as it goes up. Alternatively jump to the platform just right of it and spindash off of that.
- Hold down as you come with speed and you should clear the first obstacle, after which you either do 2 tiny jumps followed by 1 big one or 2 big ones to get up the ledge without getting stopped.
- The IL strat here is to spindash and do frame perfect, subpixel dependent jumps across. However you should simply run and rolljump off the last upside down U shaped platform.
- If your speed is good, either roll or hit right as you hit the oil to keep your momentum and try not to jump until you're under the oil canisters as this will save time (though if you think you're close to dying, don't refrain not to jump).
- As you get to the 2nd stop, do a slow 3-tap and a late jump to clear it, then another slow 3-tap to clear the 2nd one. You might want to brake slightly as you climb the stairs. Then do a full jump to get stopped by the solid canister to the right of the green cap and do a 6-tap off the rising platform.
- As soon as the last cannon reaches the score/time/rings, do 2 full jumps to clear the final fan. If you're low in the oil or passed the cannon while in the air you can make adjustments however.
- Missing the jump up to it costs four seconds waiting for it to stop.
This route normally gets 0:32 if executed correctly.
Oil Ocean 2
- By holding right the whole time after landing on the 2nd oil cap gives you a glitch called "Mega Sonic" which in a nutshell doubles your jump power, acceleration and top speed.
- Land on the ramp next to the green sideways spring while facing right, then release all input. You should be pushed up inside the wall. Then simply hold right and you should level wrap to the boss.
- While off screen, you should hold nothing until you see the approach to the boss arena come into view, specifically when you see the last sign post at which point you should start holding left. Once Sonic appears at the right edge of the screen, do a full size jump into the pit and roll. As soon as you hear the sound for the first hit, do a small jump. This should get at least the next 6 hits; if you have to spindash for the last one, hold down and time a spindash as mashing might make you accidentally jump. Then jump quickly to make sure you get out of the pit.
This method should give times between 0:41 and 0:42.
If you find the boss strat too hard, you could take a look at this alternative route which wastes 10 seconds compared to the wrap, but saves 10 seconds compared to not getting a 1 cycle boss.
Metropolis 1 safer alt. strats
- When exiting the first mesh cylinder, activate the speed cap if Tails didn't follow you or your spindash was slow and spindash up this ramp. Otherwise just jump up with your momentum.
- Run off the green ledge above the two brown moving platforms rather than jumping. This should ensure that you land in the gap just by holding right every time.
- When bouncing up the yellow springs, hold right for about two bounces worth of time, this should let you bounce out without clipping the right edge on the way up. Keep an eye on Tails here: if he appears while you're bouncing upwards, he should appear at the bottom of the next ramp, so you want to make the speed cap kick in after exiting. If he doesn't, he should appear at the top, so don't activate the speed cap and go up the ramp, where he should be waiting below another set of yellow springs.
- Hold jump on the next set of yellow springs, as this makes you go up much faster.
- Make sure both Sonic and Tails charge spindashes on these bolts, if both characters are on one of these their speed stacks.
- This is where you can decide how much risk you're willing to take. After jumping off the second bolt, you can either do a 3-tap spindash, bounce off the mantis, land on the bolt, run left on it to bring it down to the bottom, and then screenwrap - or, duck to bring the screen all the way down, then do the 6-tap spindash which will initiate the screenwrap as you go up the ramp.
- When doing the former method, you should do one small and one full jump to accelerate the screen scrolling as much as possible.
- When you do the latter method though, the bolt will crush you as soon as it reappears on screen, unless you jump within a four frame window. Using a visual cue (as the last asteron is reaching the top of the screen) is difficult too, because the screen scrolls much faster when you're in the air than when you land, and you land just before you need to make the jump.
- WARNING: The boxes with arrows sticking out are on the universal timer. If you make the spindash over the three arrow boxes at 0:47, the last platform will have the arrow pointing up and it will hit you. If you can see the second arrow platform facing left, then the third one will be facing up. Hold your spindash back to prevent this from happening, if necessary.
The safer screenwrap method gives times of about 0:57 to 1:00, and the risky screenwrap method saves a further 4 seconds.
Metropolis 2
- Make sure you're facing left as you take the hit. This will cause you to bounce to the right and land on the falling platform. Move to the left of it if at all possible.
- Just as the bottom of the platform appears from behind the foreground, do a full jump out to the right, then when you land do another small one, and tap left to zip upon landing. Alternatively, stand on the left of the platform, then start holding right as you see the bottom of the lava, then jump as soon as you see the platform.
- From above the spikes, hold right and let go at the right time to level wrap. Releasing right on any of these four frames will cause the level wrap to work:
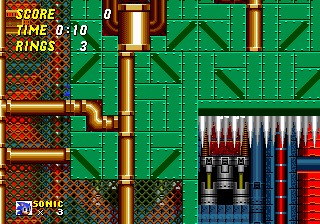
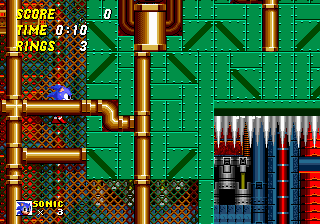
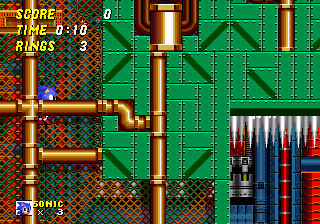
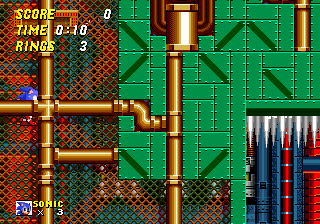
NOTE: Testing on Gens reveals that the window on that emulator is actually different - the four frame window occurs two frames earlier (so the first two frames will still work, as well as the two before those, but the latter two will not).
- As this ramp appears on screen, start holding left:
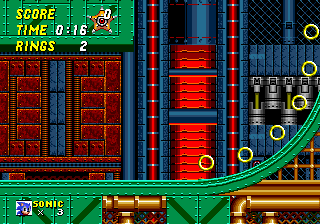
This should get 0:16 every time.
Metropolis 3
- How the zip works here is, by inching towards the edge of this platform, Tails moves off it and causes it to fall. On the first two frames that the platform falls, Sonic can initiate a zip by pressing right:
- Releasing right at the right time is the tricky part. As usual there's a multitude of frames it will work on, but they're separated into two 2-frame windows, as shown here:
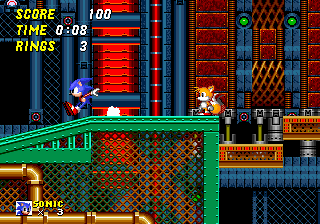
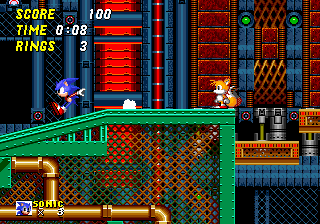
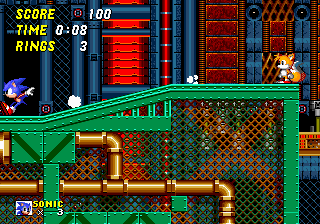
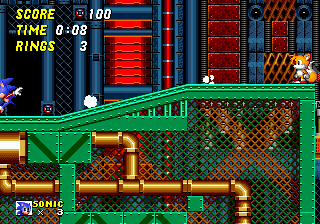
If you happen to pause on one of the three frames in between, hold right, release it as soon as possible after unpausing, and pray.
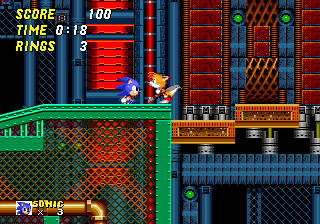
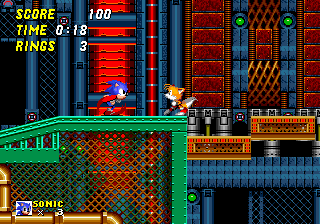
- If it's one of the following, holding right on any frame as close to the unpause as possible (except by holding right as you unpause in the case of the left picture since that'd trigger the speedcap) will make you wrap.
- Watch the position of Sonic very carefully during the boss fight. For hit 1, you want to release the spindash as soon as Robotnik faces right. For hit 4 you want to release it when you can see the two consecutive orbs pass in front of Robotnik. For hit 7, just roll into him from the right.
Getting the level wrap first try will net a time somewhere between 0:44 and 0:49. Each time you have to reset it and try it again costs 8-10 seconds on top of that.
If you don't want to do the wrap, you can play through this route instead.
Sky Chase
Don't die. Be at the right side of the stage at the end to ensure 2:06.
- There is a way to get a 2:05, but it's not consistent and the risk of dying is large. Simply do a 6-tap and jump off the plane just as the transition is due and you'll hopefully get it.
You can keep a combo going by not jumping or standing on the turtles. Simply roll or spindash into all enemies and you can gain a lot of lives. This is recommended if you have problems defeating the last boss.
Wing Fortress
- As you start the stage, do a 6-tap that is released on exactly 3 seconds ingame time, then do another 6-tap on the booster as it sends you right.
If you do a 6-tap in the corridor and jump to the ceiling to cancel it, you can jump to the ceiling above the Clucker and then trigger the speedcap on the "long" step of the stairs, trigger the speedcap as you run off that then tap left while falling down to make sure you hit the platform to make a jump. The platforms are on a universal timer and thus your time reaching this will influence the timing of your jump immensely.
- The platforms that pop out from the side of the ship ignore all the timer rules of the rest of the game and operate on a global timer from power-on instead. In practice this means you can lose as much as four seconds here waiting for them to open.
- The speed cap applies to these ziplines, too, which means if you hold right on them you'll simply walk off. On the zipline after the checkpoint this will cause you to die.
- On the second last zipline of the stage, quickly 1-tap spindash as you pass through the first of the 3 rings it takes you through and you should trigger the slope glitch. If you stop in the middle of the platform up ahead, you've succeeded.
- Try to hit the steepest part of the slope up ahead, and once you begin zipping, rather than hold left simply tap it over and over - doing this means you'll consistently be able to spindash to land hits on the boss. You have to move into the middle of the arena to start the fight, then you want to a) make the boss move to the left (optional) and b) move into one of these two positions:
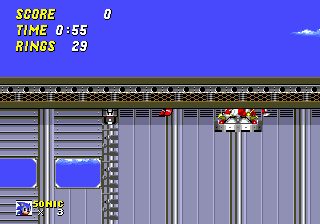
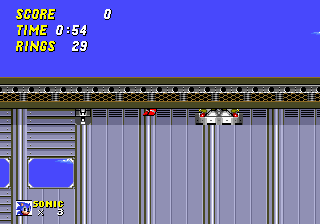
Then, as you see Sonic's feet change state, charge and hold a spindash.
- After getting 8 hits, release the spindash and hold left. Once out of the wall, tap right and then left to stop rolling, and do a full jump as close to 7 seconds after you got the first hit on the boss to trigger the cutscene as soon as possible.
If you do this correctly you'll get 1:44-1:47 consistently, depending on platform luck.
Death Egg
- If you get the final hit on Silver Sonic on the exact frame he switches from standing straight up to leaning forward, he simply disappears and you can't progress to the final boss. As a result, in serious runs, it's worth delaying the last four hits by a quarter of a second to play it safe.
- If you don't feel confident with getting 10 hits before leaving the ground, you can get 9 hits by only jumping over the flame in the first phase, at the cost of only one second.
A 10-2 final boss results in a 0:50 (0:49 if done flawlessly), and a 9-3 results in a 0:51.
