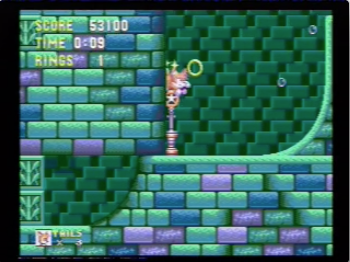
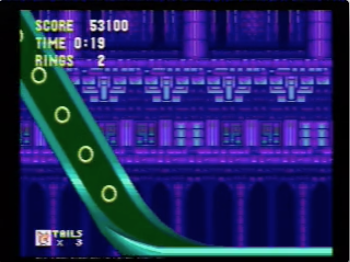
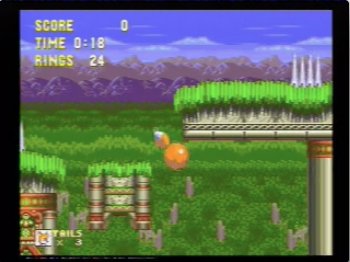
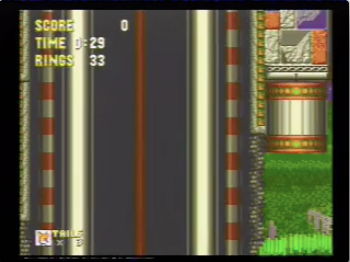
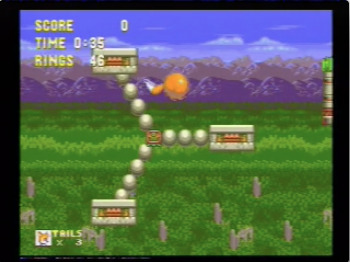
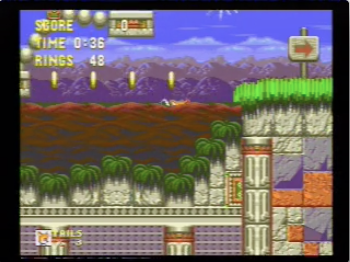
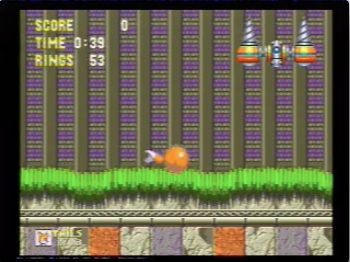
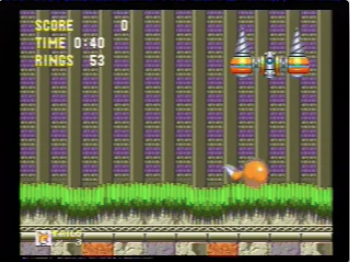
Difference between revisions of "Sonic 3 and Knuckles/Tails"
From SDA Knowledge Base
(Updated Hidden Palace) |
m |
||
| (15 intermediate revisions by 2 users not shown) | |||
| Line 2: | Line 2: | ||
= Current Fastest Time = | = Current Fastest Time = | ||
| − | [http://www.youtube.com/watch?v= | + | [http://www.youtube.com/watch?v=IXJ8bQfZ7dU 24:37 by HDL] |
| Line 11: | Line 11: | ||
Click the level names to see videos that demonstrate the single segment routes. | Click the level names to see videos that demonstrate the single segment routes. | ||
| − | Unless otherwise stated, you should start each stage with a [[ | + | Unless otherwise stated, you should start each stage with a [[Sonic_the_Hedgehog/Game_Mechanics_and_Glitches#Rolling_and_Spindashing|6-tap spin dash]]. |
| Line 21: | Line 21: | ||
*Hit the underside of the fire shield and time a flight so you go straight under the zip line (slightly faster, but requires more precision). | *Hit the underside of the fire shield and time a flight so you go straight under the zip line (slightly faster, but requires more precision). | ||
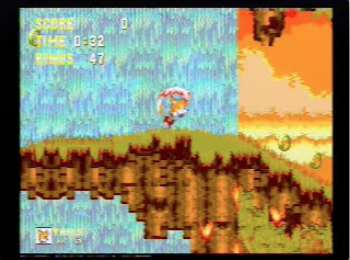
| − | If you use the 1st method you want to clear or land on the rock. If you don't have enough speed, you'll have to time a single flight just before approaching the rock. With the 2nd method, you must be aware of how much height you have and time a single flight if you're too low (but not too early as you'll fly straight into the Monkey Dude). Jump again at the 1st or 2nd ring to clear the yellow spring. When going through the loops in Angel Island, never follow a loop jump with a roll, because the unique angle AI loops have will actually slow you down. Loop jump and maintain your run. After the starpost, there are two methods for clearing the gap and 4 yellow springs: | + | If you use the 1st method you want to clear or land on the rock. If you don't have enough speed, you'll have to time a single flight just before approaching the rock. With the 2nd method, you must be aware of how much height you have and time a single flight if you're too low (but not too early as you'll fly straight into the Monkey Dude). Jump again at the 1st or 2nd ring to clear the yellow spring. When going through the loops in Angel Island, never follow a loop jump with a roll, because the unique angle AI loops have will actually slow you down. Loop jump and maintain your run. After the starpost, there are two methods for clearing the gap and 4 yellow springs: [[File:AI1-1.png|300px|thumb|right|There's a small gap in between the platform and ground where you're airborne.]] |
*Jump from the slanted ground at the 1st-2nd rings and fly so that you land on the rock up ahead. | *Jump from the slanted ground at the 1st-2nd rings and fly so that you land on the rock up ahead. | ||
*Jump at the very edge and bump the ceiling (slightly faster, but risky; only works if you have a really fast spin dash and jump almost as late as possible). | *Jump at the very edge and bump the ceiling (slightly faster, but risky; only works if you have a really fast spin dash and jump almost as late as possible). | ||
| − | After landing on the crumbling platform, wait until you clear the small gap between it and the stable ground. | + | After landing on the crumbling platform, wait until you clear the small gap between it and the stable ground. |
| + | |||
| + | Jump from the ground and bump the ceiling to keep your speed, then roll to hit the Catakiller, Jr (you'll get hit if you don't have enough speed). Piano all 3 buttons when landing on the rock to increase the chances of jumping from it. If your spin dash at the starpost was really fast, then you'll go over the rock. Be aware of your speed and jump from the crumbling platform just past it. | ||
'''Boss''': Just before the boss music cues, fly straight up for the 1st hit, then jump repeatedly for the rest. Make sure you grab the water shield, it will prevent breaking the wall in act 2 with a jump, as that is a property of the fire shield. | '''Boss''': Just before the boss music cues, fly straight up for the 1st hit, then jump repeatedly for the rest. Make sure you grab the water shield, it will prevent breaking the wall in act 2 with a jump, as that is a property of the fire shield. | ||
| Line 39: | Line 41: | ||
Use a 3-tap spin dash to enter the tube. When exiting the tube, jump as soon as you touch the 2nd crumbling platform. The start positions for the swinging ropes in Angel Island are based on the power on timer (as soon as you turn your console on) as well as a few other factors. After flying up to the top route you will see one behind you, use it as a reference to know where the 2nd one will be (they are synced). After your spin dash you want to avoid grabbing the 2nd rope, so you may have to jump over it. If you do, time the jump just before you hit the enemy so that he'll reduce your upward speed and you can land quicker. The 3rd rope is not necessarily synced with the other two, so after hitting the Bloominator make sure you roll upon landing so as to slightly reduce your hit box size. | Use a 3-tap spin dash to enter the tube. When exiting the tube, jump as soon as you touch the 2nd crumbling platform. The start positions for the swinging ropes in Angel Island are based on the power on timer (as soon as you turn your console on) as well as a few other factors. After flying up to the top route you will see one behind you, use it as a reference to know where the 2nd one will be (they are synced). After your spin dash you want to avoid grabbing the 2nd rope, so you may have to jump over it. If you do, time the jump just before you hit the enemy so that he'll reduce your upward speed and you can land quicker. The 3rd rope is not necessarily synced with the other two, so after hitting the Bloominator make sure you roll upon landing so as to slightly reduce your hit box size. | ||
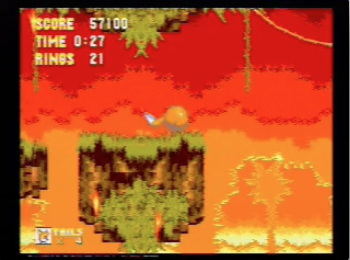
| − | After going past the 2 loops, there will be a small piece of flat ground followed by a twisted edge that launches you forward. | + | [[File:AI2-1.png|300px|thumb|left|Rolling shortens your hit box, which sometimes helps if the rope passes by.]] |
| + | |||
| + | After going past the 2 loops, there will be a small piece of flat ground followed by a twisted edge that launches you forward. | ||
| + | |||
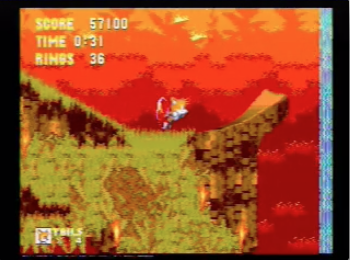
| + | [[File:AI2-2.png|300px|thumb|right|You want to jump from the flat ground and fly up. If you miss and get launched, taking the two yellow springs is only a tad slower.]] | ||
| + | |||
| + | Near the two waterfall platforms you want to jump up and fly, then 6-tap off the bridge and jump. The slope might kill your momentum. If that happens, release to neutral until you are near the bottom of the slope to prevent activating the [[Sonic_the_Hedgehog/Game_Mechanics_and_Glitches#Horizontal_Movement_Lock|movement lock]], then 1-tap up the slope. | ||
After the last starpost, stand right next to the breakable wall and do a 1-tap spin dash. Inputs in the tube are not recognized, and the tube can actually do a few different things based on your speed upon entering (faster spin dashes increase the chances of getting bad tube luck) and subpixels. You can either go very fast unhindered, get slowed down, go fast and then slowed down near the end, or even get sent in reverse. If you go very fast, simply hold right when exiting. If you're slowed down, land on the ground and spin dash, then continue to hold right without jumping so that you maintain a high run speed after Robotnik appears. | After the last starpost, stand right next to the breakable wall and do a 1-tap spin dash. Inputs in the tube are not recognized, and the tube can actually do a few different things based on your speed upon entering (faster spin dashes increase the chances of getting bad tube luck) and subpixels. You can either go very fast unhindered, get slowed down, go fast and then slowed down near the end, or even get sent in reverse. If you go very fast, simply hold right when exiting. If you're slowed down, land on the ground and spin dash, then continue to hold right without jumping so that you maintain a high run speed after Robotnik appears. | ||
| Line 73: | Line 81: | ||
= [http://www.youtube.com/watch?v=aWG1hmbWbnI Hydrocity 2] = | = [http://www.youtube.com/watch?v=aWG1hmbWbnI Hydrocity 2] = | ||
| − | Spin dash immediately. You can deal with the upcoming slope in a few different ways: | + | Spin dash immediately. You can deal with the upcoming slope in a few different ways: [[File:HC2-1.png|300px|thumb|right|The wall should be aligned with the top of the slope.]] |
*Bump the ceiling before it to break into a run, this way you can slow down a little and control your jump. | *Bump the ceiling before it to break into a run, this way you can slow down a little and control your jump. | ||
*Jump from a very specific part of the slope to get the correct trajectory (riskier and not faster). | *Jump from a very specific part of the slope to get the correct trajectory (riskier and not faster). | ||
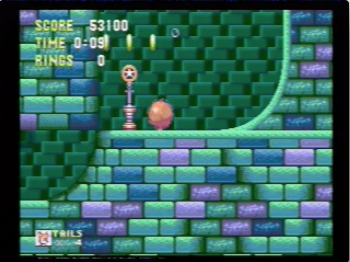
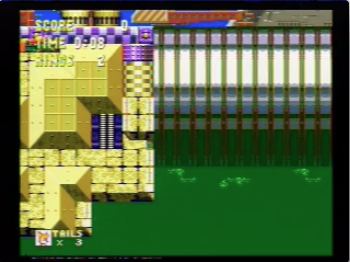
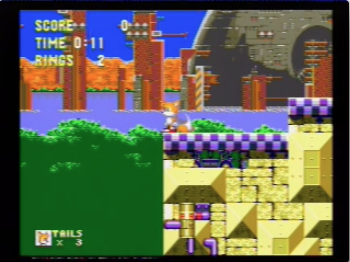
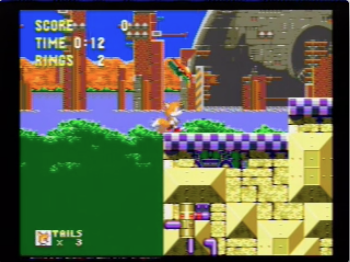
| − | You should hit the starpost at 0:07, then trigger the wall. When the bottom of the wall aligns with the top of the slope, full jump left | + | You should hit the starpost at 0:07, then trigger the wall. When the bottom of the wall aligns with the top of the slope, full jump left towards the wall, then hold right and swim just before the apex of your jump. You should get pushed into the ground and die from an invisible object. The time of the screen fadeout should be 0:12. When you return, a simple 1-tap, low jump, and roll will suffice. Jump and start swimming just before reaching the apex, holding right the entire time. You want to touch the rings just when you hit the apex. |
| + | |||
| + | [[File:HC2-2.png|300px|thumb|center|Go no further than the 3 rings.]] | ||
| + | [[File:HC2-3.png|300px|thumb|right|Release when the tube is on the left.]] | ||
| + | |||
| + | The wall will push you into the floor; continue holding right until you get the [[Sonic_the_Hedgehog/Game_Mechanics_and_Glitches#Level_wrap|level wrap]] and fall down (you'll see the screen move downward). At this point face left and rev your spin dash. At around 0:19 - 0:20 you will see a blue tube on screen, this is when you release the spin dash. When you get near the boss room, jump to gain a bit of extra height. | ||
'''Boss''': Jump out of the water and fly such that you are not at the top of the screen, but close. If you hit Robotnik at the top, Tails will "stick" to the top and you won't be able to get more hits. Wait until he comes down a bit and then fly into him repeatedly 4 times. Mash the buttons quickly after the 3rd hit and move a bit left. You'll get the 4th hit quicker and get a good bounce down/right to avoid his propeller. Jump after landing and bounce for the remaining 4 hits. | '''Boss''': Jump out of the water and fly such that you are not at the top of the screen, but close. If you hit Robotnik at the top, Tails will "stick" to the top and you won't be able to get more hits. Wait until he comes down a bit and then fly into him repeatedly 4 times. Mash the buttons quickly after the 3rd hit and move a bit left. You'll get the 4th hit quicker and get a good bounce down/right to avoid his propeller. Jump after landing and bounce for the remaining 4 hits. | ||
| Line 85: | Line 98: | ||
Acceptable time: 0:33 + 0:05 | Acceptable time: 0:33 + 0:05 | ||
| + | |||
| + | |||
= [http://www.youtube.com/watch?v=54ebm4nExdY Marble Garden 1] = | = [http://www.youtube.com/watch?v=54ebm4nExdY Marble Garden 1] = | ||
| − | Follow the path normally. When you get near the yellow diagonal spring, there are two options: | + | Follow the path normally. When you get near the yellow diagonal spring, there are two options: [[File:MG1-1.png|300px|thumb|right|You can make this cycle if you get here quick enough. Otherwise let the platform move up.]] |
*Jump from the slanted ground just before the spring. Bump into the wall, hold left, and then fly right before touching the ceiling. This will let you clear the blue spinner and land on the slope without risk of your momentum being interrupted. | *Jump from the slanted ground just before the spring. Bump into the wall, hold left, and then fly right before touching the ceiling. This will let you clear the blue spinner and land on the slope without risk of your momentum being interrupted. | ||
*Hit the spring without holding anything, then hold left midway through (slightly faster, but big risk of the slope stopping you). | *Hit the spring without holding anything, then hold left midway through (slightly faster, but big risk of the slope stopping you). | ||
| − | When doing the [[ | + | When doing the [[Sonic_the_Hedgehog/Game_Mechanics_and_Glitches#Screen_wrap|screen wrap]], you want to hold right and jump when the black background is towards the left. |
| + | |||
| + | [[File:MG1-2.png|300px|thumb|center|Jump when you see this.]] | ||
| + | |||
| + | After using the fire shield to enter the wall, hold left to [[Sonic_the_Hedgehog/Game_Mechanics_and_Glitches#Zip|zip]] to the right. Jump from the slope until you go past the center of the rotating platforms, then fly to the right. Continue and fall in the mud, then full jump just before bumping the wall and fly right before the apex of the jump. | ||
| + | |||
| + | [[File:MG1-3.png]] [[File:MG1-4.png]] | ||
| + | |||
| + | [[File:MG1-5.png]] [[File:MG1-6.png]] | ||
| − | '''Boss''': You'll come into this room rolling. Make note of the uneven ground; if you jump from the wrong spot you'll miss the first hit entirely. You want to get 5 hits before he goes off screen (6 is possible, but it will actually result in a bad pattern for the act 2 boss). He will always appear on the far left, so fly up and stay at the top of the screen. If you only got 4 hits, stand on the left and hit him between the drills. | + | '''Boss''': You'll come into this room rolling. Make note of the uneven ground; if you jump from the wrong spot you'll miss the first hit entirely (either of the 2 spots above will work). You want to get 5 hits before he goes off screen (6 is possible, but it will actually result in a bad pattern for the act 2 boss). He will always appear on the far left, so fly up and stay at the top of the screen. If you only got 4 hits, stand on the left and hit him between the drills. |
Time to aim for: 0:47 | Time to aim for: 0:47 | ||
| Line 115: | Line 138: | ||
= [http://www.youtube.com/watch?v=wj5gYjdjz0A Carnival Night 1] = | = [http://www.youtube.com/watch?v=wj5gYjdjz0A Carnival Night 1] = | ||
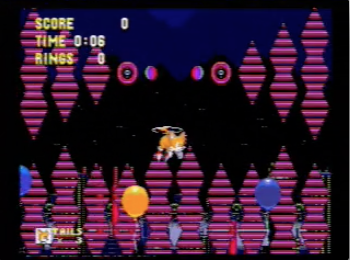
| − | + | [[File:CN1-1.png|300px|thumb|left|Aim for the blue balloon. Use the lights above it as guides.]] | |
An important tidbit to keep in mind at the start is that you cannot spin dash immediately when landing from Tails's auto flight. You cannot move for a few frames upon landing, so delay your spin dash appropriately. A 6-tap here is actually detrimental, but go for it anyway to increase the likelihood of 5-tap speed, then jump and fly into the 3rd or 4th balloon. When you land on the ring monitors, you will gain rightward momentum automatically from the wheel glitch, so counteract it by tapping left enough to land on the floor just before falling off the ledge. Remember not to jump, as it removes wheel glitch. | An important tidbit to keep in mind at the start is that you cannot spin dash immediately when landing from Tails's auto flight. You cannot move for a few frames upon landing, so delay your spin dash appropriately. A 6-tap here is actually detrimental, but go for it anyway to increase the likelihood of 5-tap speed, then jump and fly into the 3rd or 4th balloon. When you land on the ring monitors, you will gain rightward momentum automatically from the wheel glitch, so counteract it by tapping left enough to land on the floor just before falling off the ledge. Remember not to jump, as it removes wheel glitch. | ||
| − | Stand near the bottom of the slope and do a quick 2-tap and hold right (make sure the spikes are out and not retracted). Continue holding right until you hit a platform, then switch to left. When you move around the platform and begin falling left, switch to holding right to grab rings, go through the fire shield, and under the balloons. Rev once after the fire shield simply to get into spin dash mode, then do a 3-tap after going under the blue ballon. Note: if you hold down for too long before spin dashing you will break your leftward momentum and fall down. After the 3-tap, start another spin dash and release it just before the level wrap so as to keep the camera as far right as possible | + | Stand near the bottom of the slope and do a quick 2-tap and hold right (make sure the spikes are out and not retracted). Continue holding right until you hit a platform, then switch to left. When you move around the platform and begin falling left, switch to holding right to grab rings, go through the fire shield, and under the balloons. Rev once after the fire shield simply to get into spin dash mode, then do a 3-tap after going under the blue ballon. Note: if you hold down for too long before spin dashing you will break your leftward momentum and fall down. After the 3-tap, start another spin dash and release it just before the level wrap so as to keep the camera as far right as possible. |
| + | |||
| + | [[File:CN1-2.png|300px|thumb|right|Once you touch the ceiling, count the groups of red poles and release your spin dash after the 3rd set.]] | ||
| + | |||
| + | After the level wrap, do two more spin dashes to the left, and maintain your position by alternating between left and neutral. Keep in mind that Tails will move down faster than he walks up, so you should be holding left a bit longer than neutral. | ||
'''Boss''': Hold left and maintain your position just below the ring counter. Make note of the purplish column in the background. When the spinning top is to the immediate right of the leftmost column, hold down to roll and land on it. Alternatively, you can hold left the entire time and then roll as the top bounces off the bottom of the screen. You will not roll while still moving up, so make sure you release to neutral a bit early. Hold your spin dash and get hit. When the top nears the right wall, spin dash into the wall or tap right to push against it and then release immediately (you want to always have the same position on the top). Depending on your position when you first landed on the top, you will have hit the boss at a different time. This changes when you have to start walking and the roll off the top onto the boss. | '''Boss''': Hold left and maintain your position just below the ring counter. Make note of the purplish column in the background. When the spinning top is to the immediate right of the leftmost column, hold down to roll and land on it. Alternatively, you can hold left the entire time and then roll as the top bounces off the bottom of the screen. You will not roll while still moving up, so make sure you release to neutral a bit early. Hold your spin dash and get hit. When the top nears the right wall, spin dash into the wall or tap right to push against it and then release immediately (you want to always have the same position on the top). Depending on your position when you first landed on the top, you will have hit the boss at a different time. This changes when you have to start walking and the roll off the top onto the boss. | ||
| − | + | [[File:CN1-3.png]] [[File:CN1-4.png]] | |
| + | |||
| + | If the boss is in this position in relation to the background (left), you'll have to start walking left a bit before the top hits him (right). If the boss is a bit further left, then you must start walking when the top bounces off him, and the roll must be timed sooner. | ||
| + | |||
| + | [[File:CN1-5.png]] | ||
| + | |||
| + | Roll as the top reaches this position. This boss is very frame-dependent, so you won't always see the same result. You'll have to react to the top's bounces and dodge it accordingly. | ||
Time to aim for: 0:54 | Time to aim for: 0:54 | ||
| Line 130: | Line 163: | ||
= [http://www.youtube.com/watch?v=JrPPG3Gw284 Carnival Night 2] = | = [http://www.youtube.com/watch?v=JrPPG3Gw284 Carnival Night 2] = | ||
| − | + | [[File:CN2-1.png|300px|thumb|right|You want to stay in between these walls until you reach the boss.]] | |
Hold left while exiting the boosters until you land on the cylinder. After bumping the ceiling in flight, hug the middle of the curve just to the right and fly while holding left. If you fail and run out of flight, land on the spiral and fall through it, then go to the cylinder and bounce from the balloon again. | Hold left while exiting the boosters until you land on the cylinder. After bumping the ceiling in flight, hug the middle of the curve just to the right and fly while holding left. If you fail and run out of flight, land on the spiral and fall through it, then go to the cylinder and bounce from the balloon again. | ||
| Line 143: | Line 176: | ||
= [http://www.youtube.com/watch?v=xaGLEgnSREs Ice Cap] = | = [http://www.youtube.com/watch?v=xaGLEgnSREs Ice Cap] = | ||
| − | + | [[File:IC-1.png|300px|thumb|left|This is one of 3 frames that will work.]] [[File:IC-2.png|300px|thumb|right|Wait until you can no longer see the slope on the top left, then hold right.]] | |
Make your way to the falling ice platform, and note the blue portions of the background. When the top of the blue background ice to the immediate left is aligned with the top of the platform, hold right and you'll activate slope glitch once the platform breaks the pillar. Jump and fall straight down. From here you have three options: | Make your way to the falling ice platform, and note the blue portions of the background. When the top of the blue background ice to the immediate left is aligned with the top of the platform, hold right and you'll activate slope glitch once the platform breaks the pillar. Jump and fall straight down. From here you have three options: | ||
| Line 150: | Line 183: | ||
*Jump and avoid the 1st slope altogether, landing directly on the 2nd one, and roll. | *Jump and avoid the 1st slope altogether, landing directly on the 2nd one, and roll. | ||
| − | The 2nd method is recommended because it avoids the possibility of entering the wall with a low y-position, which will cause you to exit the upcoming wall hitting the ice block where the spring is. Upon entering the wall hold left, then hold right after you can no longer see the slope on the top left part of the screen, and lastly switch back to left as you exit the wall and continue to hold it. This will give you the perfect trajectory to avoid being interrupted by objects in the level. Since the map area for Ice Cap 2 loads midway through the tunnel that leads to the act 1 boss, and Ice Cap 2 does not wrap vertically, you will die if you continue to fall without jumping. Wait until the right moment | + | The 2nd method is recommended because it avoids the possibility of entering the wall with a low y-position, which will cause you to exit the upcoming wall hitting the ice block where the spring is. Upon entering the wall hold left, then hold right after you can no longer see the slope on the top left part of the screen, and lastly switch back to left as you exit the wall and continue to hold it. This will give you the perfect trajectory to avoid being interrupted by objects in the level. |
| + | |||
| + | [[File:IC1-3.png|300px|thumb|left|Jump once Tails goes off the bottom of the screen. Pausing helps here.]] [[File:IC1-4.png|300px|thumb|right|Land on this spot.]] | ||
| + | |||
| + | Since the map area for Ice Cap 2 loads midway through the tunnel that leads to the act 1 boss, and Ice Cap 2 does not wrap vertically, you will die if you continue to fall without jumping. Wait until the right moment, then jump and make note of your location. Depending on where you appear, you will have to consider different things: | ||
*If you got hit by the frost hazard, you will be able to spin dash upon landing. Jump over the blue platform so you don't lose your slope glitch and proceed into the Sonic & Tails tunnel. | *If you got hit by the frost hazard, you will be able to spin dash upon landing. Jump over the blue platform so you don't lose your slope glitch and proceed into the Sonic & Tails tunnel. | ||
*''Sonic & Tails tunnel'': Look at the small mounds of snow on the ground. Jump onto the right side of the 2nd one from the ice pillar so that slope glitch gets a downward angle. Hold right to clip into the ground and zip for a level wrap. After the wrap, hold left for about 2 seconds, then right for 1 second, then left for 1 second and jump. You should notice the screen shift downward indicating a lower y-position. Hold right and jump twice, then wait for the boss to trigger and jump down. | *''Sonic & Tails tunnel'': Look at the small mounds of snow on the ground. Jump onto the right side of the 2nd one from the ice pillar so that slope glitch gets a downward angle. Hold right to clip into the ground and zip for a level wrap. After the wrap, hold left for about 2 seconds, then right for 1 second, then left for 1 second and jump. You should notice the screen shift downward indicating a lower y-position. Hold right and jump twice, then wait for the boss to trigger and jump down. | ||
*''Knuckles tunnel'': Be very careful not to land on top of the bridge, ice block, or breakable platform to the right. These are all sprites and will remove your slope glitch. Also take care not to go too far to the right where the ice block is, because an ice pillar will shut behind you and you won't have enough space to get a quick level wrap (a backup strategy here exists, but it is slower). Use the 3rd mound from the bridge for the level wrap (the ones before that are not far enough, you'll wind up zipping straight into the bridge and lose slope glitch). After the wrap, hold right for 1 second, then jump when you see the tunnel just before the boss room. | *''Knuckles tunnel'': Be very careful not to land on top of the bridge, ice block, or breakable platform to the right. These are all sprites and will remove your slope glitch. Also take care not to go too far to the right where the ice block is, because an ice pillar will shut behind you and you won't have enough space to get a quick level wrap (a backup strategy here exists, but it is slower). Use the 3rd mound from the bridge for the level wrap (the ones before that are not far enough, you'll wind up zipping straight into the bridge and lose slope glitch). After the wrap, hold right for 1 second, then jump when you see the tunnel just before the boss room. | ||
| + | |||
| + | [[File:IC1-5.png]] [[File:IC1-6.png]] | ||
'''Boss''': With slope glitch still active, you can gain an upward trajectory from the mound on the left. Before the boss appears, jump and land on the far left edge of the screen. As the boss comes down, full jump when his platform is fully visible and land on the small upward slope. Continue walking to the right using this angle to gain height, then jump near the right edge of the screen and get the 1st hit. After this hit, fly ''just'' as you start to descend and roll when you land on the platform. Continue holding left and then jump to the right once you stop rolling for the following hits so you bounce leftward. After the 5th hit, move left and full jump off, then as you near the jump's apex, hold right and bounce repeatedly for the remaining 3 hits. | '''Boss''': With slope glitch still active, you can gain an upward trajectory from the mound on the left. Before the boss appears, jump and land on the far left edge of the screen. As the boss comes down, full jump when his platform is fully visible and land on the small upward slope. Continue walking to the right using this angle to gain height, then jump near the right edge of the screen and get the 1st hit. After this hit, fly ''just'' as you start to descend and roll when you land on the platform. Continue holding left and then jump to the right once you stop rolling for the following hits so you bounce leftward. After the 5th hit, move left and full jump off, then as you near the jump's apex, hold right and bounce repeatedly for the remaining 3 hits. | ||
| Line 164: | Line 203: | ||
= [http://www.youtube.com/watch?v=bappYVpwcJ8 Launch Base 1] = | = [http://www.youtube.com/watch?v=bappYVpwcJ8 Launch Base 1] = | ||
| − | + | [[File:LB1-1.png|300px|thumb|right|Jump when the Flybot appears.]] | |
Hold right and jump as soon as you touch the alarm. Run straight into the Orbinaut, and keep holding right (do not jump, it will make the Flybot's position less consistent). The Flybot will dive left and go off screen, make sure it doesn't go too far or it'll disappear. Walk slowly towards the cylinder, from here there are two options: | Hold right and jump as soon as you touch the alarm. Run straight into the Orbinaut, and keep holding right (do not jump, it will make the Flybot's position less consistent). The Flybot will dive left and go off screen, make sure it doesn't go too far or it'll disappear. Walk slowly towards the cylinder, from here there are two options: | ||
| Line 170: | Line 209: | ||
*Touch it at 7 1/2 seconds and hold left to hug the wall. As you reach the bottom and swing upwards, hold right and jump before the mid point so you drop down, taking note of the Flybot's position (don't let him get too close yet). | *Touch it at 7 1/2 seconds and hold left to hug the wall. As you reach the bottom and swing upwards, hold right and jump before the mid point so you drop down, taking note of the Flybot's position (don't let him get too close yet). | ||
| − | The first method is easier and more consistent. The second is only slightly riskier, but is 1 second faster. Once you jump down, make your way to the ledge above the yellow spring. Stand a bit to the right of it, if you are too close to the edge the following setup won't work. Hold up to shift the screen and wait for the Flybot to hit you. | + | The first method is easier and more consistent. The second is only slightly riskier, but is 1 second faster. Once you jump down, make your way to the ledge above the yellow spring. Stand a bit to the right of it, if you are too close to the edge the following setup won't work. Hold up to shift the screen and wait for the Flybot to hit you. |
| + | |||
| + | [[File:LB1-2.png]] [[File:LB1-3.png]] | ||
| + | |||
| + | Alternatively, you can stand near the edge to make the Flybot dive sooner, which is faster (you'll have to move a bit to the right after he passes you though, which reduces the amount of time you have to shift the screen). Hold right after getting hit and when you land inside the spikes you will be ejected into the wall, zip, and then level wrap. Face left and hold down to appear in the boss room. | ||
'''Boss''': Given that Sonic and Tails are only meant to defeat one of these, it's not necessary to destroy both. You'll have to do this fight with no rings for the best time. | '''Boss''': Given that Sonic and Tails are only meant to defeat one of these, it's not necessary to destroy both. You'll have to do this fight with no rings for the best time. | ||
| Line 180: | Line 223: | ||
= [http://www.youtube.com/watch?v=vAxGe0KrhjE Launch Base 2] = | = [http://www.youtube.com/watch?v=vAxGe0KrhjE Launch Base 2] = | ||
| − | + | [[File:LB2-1.png|300px|thumb|left|This spot nets the best result.]] [[File:LB2-2.png|300px|thumb|right|Jump here to bounce on the Ribbot. You may have to jump sooner depending on your speed.]] | |
This level involves several big, strict-timing jumps. You will be immediately faced with 3 possible outcomes right after your spin dash and jump at the curve of the pipe: | This level involves several big, strict-timing jumps. You will be immediately faced with 3 possible outcomes right after your spin dash and jump at the curve of the pipe: | ||
| Line 191: | Line 234: | ||
The biggest (and toughest) jump in this level comes after hitting the red switch and passing the flamethrower. Roll down the pipe and be sure to jump near the bottom so you break into a run. This is important as it'll give you aerial control for the upcoming jump. When running up the pipe, there is a smaller curve near the top. Jump as late as possible on the curve (just before the flat ground) to get the best trajectory. If you jump early or from the middle, you risk bumping parts of the ceiling that will force you to fly and land on the starpost platform. If this happens, you can still save it by reacting and releasing jump before you bump the ceiling, allowing you to retain most of your momentum. | The biggest (and toughest) jump in this level comes after hitting the red switch and passing the flamethrower. Roll down the pipe and be sure to jump near the bottom so you break into a run. This is important as it'll give you aerial control for the upcoming jump. When running up the pipe, there is a smaller curve near the top. Jump as late as possible on the curve (just before the flat ground) to get the best trajectory. If you jump early or from the middle, you risk bumping parts of the ceiling that will force you to fly and land on the starpost platform. If this happens, you can still save it by reacting and releasing jump before you bump the ceiling, allowing you to retain most of your momentum. | ||
| − | After getting past the Orbinaut and rolling down the pipe, you want to brake at a certain point. There is an invisible path swapper here that will enable you to go left without going up the pipe you came. When jumping into the spinning platform, jump from the middle of the curve so you get the best trajectory on your flight. | + | [[File:LB2-3.png]] [[File:LB2-4.png]] |
| + | |||
| + | After getting past the Orbinaut and rolling down the pipe, you want to brake at a certain point. There is an invisible [[Sonic_the_Hedgehog_game_mechanics_and_glitches#Path_switchers|path swapper]] here that will enable you to go left without going up the pipe you came. When jumping into the spinning platform, jump from the middle of the curve so you get the best trajectory on your flight. | ||
| + | |||
| + | [[File:LB2-5.png]] [[File:LB2-6.png]] | ||
Near the end, after taking the spinning platform up, you'll do the last big jump. Where you jump from is not as important as the position of the screen; you need to make sure the screen does not drop down past a certain point. Ideally you want to jump just as you hit the downward curve before the last starpost, so that you get the perfect flight. Jump too late and you'll be too low, so earlier is better here. After the jump, hold left briefly so you reduce the chance of bumping into the wall. | Near the end, after taking the spinning platform up, you'll do the last big jump. Where you jump from is not as important as the position of the screen; you need to make sure the screen does not drop down past a certain point. Ideally you want to jump just as you hit the downward curve before the last starpost, so that you get the perfect flight. Jump too late and you'll be too low, so earlier is better here. After the jump, hold left briefly so you reduce the chance of bumping into the wall. | ||
| + | |||
| + | [[File:LB2-7.png]] | ||
Fly along the ceiling keeping the screen as high as possible, otherwise you won't be able to fly over the invisible wall. | Fly along the ceiling keeping the screen as high as possible, otherwise you won't be able to fly over the invisible wall. | ||
| Line 345: | Line 394: | ||
= [http://www.youtube.com/watch?v=b3E9DGYaPKk Sky Sanctuary] = | = [http://www.youtube.com/watch?v=b3E9DGYaPKk Sky Sanctuary] = | ||
| + | |||
| + | Hold right at the start so that you scroll the screen all the way. The moving bar past the bridge is a screen-based object, and will start moving at this point. Don't move the screen left or you will reset its position and risk having it be in your way. | ||
Face left when shifting the screen down so that if you accidentally spin dash, you don't fall to your death. Time your flight descent carefully. | Face left when shifting the screen down so that if you accidentally spin dash, you don't fall to your death. Time your flight descent carefully. | ||
| − | '''Boss''': Use hit invincibility to avoid Mecha Sonic's ambiguity. Don't stand on the far right edge of the screen, as the same thing that can happen in LR1 can also happen here (face left and spin dash sometimes results in going nowhere). Instead, | + | '''Boss''': Use hit invincibility to avoid Mecha Sonic's ambiguity. Don't stand on the far right edge of the screen, as the same thing that can happen in LR1 can also happen here (face left and spin dash sometimes results in going nowhere). Instead, move a bit to the left after the 1st hit so that you can always spin dash correctly without sticking to the edge. |
Time to aim for: 0:55 | Time to aim for: 0:55 | ||
| Line 359: | Line 410: | ||
Fairly straightforward level that is purely about optimized movement. Use background references to get all the hits in the machine quickly. | Fairly straightforward level that is purely about optimized movement. Use background references to get all the hits in the machine quickly. | ||
| − | '''Boss''': Start by flying into him to lose your lightning shield and gain invincibility. Fly underneath him for the hits instead of jumping from the sides. Depending on when you hit him, the spheres will explode in different locations. | + | '''Boss''': Start by flying into him to lose your lightning shield and gain invincibility. Fly underneath him for the hits instead of jumping from the sides. Depending on when you hit him, the spheres will explode in different locations. Try to time your hits to manipulate the sphere explosions, then dodge the spikes accordingly. You want to be especially careful about taking a hit after getting the 8th hit on him, as it will significantly reduce the amount of time you have to correctly position yourself for phase 2. |
| − | + | ||
| − | + | ||
| − | + | Watch the explosions carefully. After about 2 seconds a part of the structure will break off, and then another part will break off. You want to jump and fly ''just'' before the 2nd piece breaks off. This will let you land on one of his platforms as he pulls them out, and have enough time to rev spin dash. The rotations of the platforms are based entirely on whether you are on the left or right sides of the boss. You can manipulate them so they never hit you by timing your bounces. After the spin dash, hold left for the 1st hit, then bounce on the ride side twice, and once again on the left side. At this point you have to choose which side to bounce on based on the positions of the platforms, as frames are very important and they won't necessarily be the same every time. Adjust as needed, bouncing on either side for the remaining 4 hits. | |
Time to aim for: 1:26 | Time to aim for: 1:26 | ||
| Line 374: | Line 423: | ||
Like HC2, you'll have to die to unload the act 1 map area. Using spikes at the start should only waste 4 seconds. | Like HC2, you'll have to die to unload the act 1 map area. Using spikes at the start should only waste 4 seconds. | ||
| − | When attempting to enter the wall, you want to pay close attention to Tails's sneaker. You want to get the sneaker as close to the wall without being ejected. Use pause to help time this. Once in the wall, zip to the left. If you go too far, you'll get stuck in a pocket of air, so pay close attention to the bottom of the screen. You want to slow down once you see the parts of the background that constantly move. Position yourself so the pipe on the left is aligned with the left of the HUD (make sure you're facing right and not left). Jump straight, and when you land hold right to zip and level wrap. | + | When attempting to enter the wall, you want to pay close attention to Tails's sneaker. You want to get the sneaker as close to the wall without being ejected. Use pause to help time this. Once in the wall, zip to the left. If you go too far, you'll get stuck in a pocket of air, so pay close attention to the bottom of the screen. You want to slow down once you see the parts of the background that constantly move. Position yourself so the pipe on the left is aligned with the left of the HUD (make sure you're facing right and not left). There should be a small gap between the pipe and the left side of the screen. Jump straight, and when you land hold right to zip and level wrap. |
After the wrap, continue holding right and jump towards the end of your brake sound effect. Time your flight before the apex of your jump and continue flying. As the screen nears the boss, stop flying and wait half a second, then tap flight once so you appear in the boss room guaranteed. | After the wrap, continue holding right and jump towards the end of your brake sound effect. Time your flight before the apex of your jump and continue flying. As the screen nears the boss, stop flying and wait half a second, then tap flight once so you appear in the boss room guaranteed. | ||
| − | '''Boss 1''': Stand on the ceiling and to the right. Do 1-tap spin dashes when the objects stick to the ceiling. | + | '''Boss 1''': Stand on the ceiling and to the right. Do 1-tap spin dashes when the objects stick to the ceiling. Do a 6-tap on the last object to make it finish the boss several frames faster. |
'''Boss 2''': You want to spin dash in between the hands as they drop down each time. The directions you should face are: | '''Boss 2''': You want to spin dash in between the hands as they drop down each time. The directions you should face are: | ||
| Line 389: | Line 438: | ||
After the 2nd one, you'll wind up next to the left edge of the screen. Immediately jump to the right. This will manipulate the boss so that he also moves right. Otherwise he will move left and some fingers will be in unfavorable positions. | After the 2nd one, you'll wind up next to the left edge of the screen. Immediately jump to the right. This will manipulate the boss so that he also moves right. Otherwise he will move left and some fingers will be in unfavorable positions. | ||
| − | + | For this next phase, you want to stay under the fire, as it can't hit you if you are far enough left. Jump and hit the left side of the nose while moving right, so that you are bounced to the left. Make sure you are moving left enough so as not to land on the floor or you risk getting hit. There is no risk of falling into the pit, as you will always get a bounce. Then simply bounce 3 more times, doing a higher jump on the last hit to avoid a low bounce that could risk killing you. | |
| − | For the last phase, jump after the explosion sound effect stops, then jump to bounce on Robotnik. After hitting him on the right side, jump when landing to accelerate faster. If you hit him while touching the edge of the screen, you won't bounce to the left, useful for the 8th hit. | + | For the last phase, jump after the explosion sound effect stops, then jump to bounce on Robotnik. After hitting him on the right side, jump when landing to accelerate faster. If you hit him while touching the edge of the screen, you won't bounce to the left, useful for the 8th hit. Otherwise if you bounce left, simply piano the buttons upon landing to guarantee a jump and prevent death. |
| − | Time to aim for: 1: | + | Time to aim for: 1:57 + 0:04 |
Acceptable time: 2:00 + 0:04 | Acceptable time: 2:00 + 0:04 | ||
Latest revision as of 11:58, 31 October 2015
Contents
- 1 Current Fastest Time
- 2 Angel Island 1
- 3 Angel Island 2
- 4 Hydrocity 1
- 5 Hydrocity 2
- 6 Marble Garden 1
- 7 Marble Garden 2
- 8 Carnival Night 1
- 9 Carnival Night 2
- 10 Ice Cap
- 11 Launch Base 1
- 12 Launch Base 2
- 13 Mushroom Hill 1
- 14 Mushroom Hill 2
- 15 Flying Battery 1
- 16 Flying Battery 2
- 17 Sandopolis 1
- 18 Sandopolis 2
- 19 Lava Reef 1
- 20 Lava Reef 2
- 21 Hidden Palace
- 22 Sky Sanctuary
- 23 Death Egg 1
- 24 Death Egg 2
Current Fastest Time
Preliminary Notes
Tails's flight ability is heavily influenced by physics. It takes on the physics you currently have while entering flight, and also affects physics in its own way. Many sections require precise timing of flight. This is really hard to explain and is something best understood by developing a feel for it. For more specific game engine details, refer to Sonic the Hedgehog game mechanics and glitches.
Click the level names to see videos that demonstrate the single segment routes.
Unless otherwise stated, you should start each stage with a 6-tap spin dash.
Angel Island 1
Start by taking the top route and rolling into the speed shoes on the left (with near perfect, TAS-like execution, the bottom route is fastest at the start). Do a 3-tap spin dash to the right, bump the ceiling with flight, and make sure not to fly afterwards. Jump upon collecting the 2nd ring and after bumping the ceiling, time your flight so you maintain speed but don't miss the ledge. There are two options for this next part:
- Slow down and jump to the left of the fire shield in such a way that you don't bounce downward and can clear the zip line with a flight.
- Hit the underside of the fire shield and time a flight so you go straight under the zip line (slightly faster, but requires more precision).
- Jump from the slanted ground at the 1st-2nd rings and fly so that you land on the rock up ahead.
- Jump at the very edge and bump the ceiling (slightly faster, but risky; only works if you have a really fast spin dash and jump almost as late as possible).
After landing on the crumbling platform, wait until you clear the small gap between it and the stable ground.
Jump from the ground and bump the ceiling to keep your speed, then roll to hit the Catakiller, Jr (you'll get hit if you don't have enough speed). Piano all 3 buttons when landing on the rock to increase the chances of jumping from it. If your spin dash at the starpost was really fast, then you'll go over the rock. Be aware of your speed and jump from the crumbling platform just past it.
Boss: Just before the boss music cues, fly straight up for the 1st hit, then jump repeatedly for the rest. Make sure you grab the water shield, it will prevent breaking the wall in act 2 with a jump, as that is a property of the fire shield.
Time to aim for: 0:47 (Note: a 0:46 here is possible but extremely rare.)
Acceptable time: 048
Angel Island 2
Use a 3-tap spin dash to enter the tube. When exiting the tube, jump as soon as you touch the 2nd crumbling platform. The start positions for the swinging ropes in Angel Island are based on the power on timer (as soon as you turn your console on) as well as a few other factors. After flying up to the top route you will see one behind you, use it as a reference to know where the 2nd one will be (they are synced). After your spin dash you want to avoid grabbing the 2nd rope, so you may have to jump over it. If you do, time the jump just before you hit the enemy so that he'll reduce your upward speed and you can land quicker. The 3rd rope is not necessarily synced with the other two, so after hitting the Bloominator make sure you roll upon landing so as to slightly reduce your hit box size.
After going past the 2 loops, there will be a small piece of flat ground followed by a twisted edge that launches you forward.
Near the two waterfall platforms you want to jump up and fly, then 6-tap off the bridge and jump. The slope might kill your momentum. If that happens, release to neutral until you are near the bottom of the slope to prevent activating the movement lock, then 1-tap up the slope.
After the last starpost, stand right next to the breakable wall and do a 1-tap spin dash. Inputs in the tube are not recognized, and the tube can actually do a few different things based on your speed upon entering (faster spin dashes increase the chances of getting bad tube luck) and subpixels. You can either go very fast unhindered, get slowed down, go fast and then slowed down near the end, or even get sent in reverse. If you go very fast, simply hold right when exiting. If you're slowed down, land on the ground and spin dash, then continue to hold right without jumping so that you maintain a high run speed after Robotnik appears.
Boss: Keep running until you hit the right side of the screen, then do a quick 1-tap spin dash to the left. Wait a slight moment and jump, you'll bounce repeatedly for a very easy quick kill. Depending on your timing, you might bounce too low and get hit by a fireball on the left. To always avoid this, make sure you are in-between the two guns around the 4th bounce, then move back to the left.
Time to aim for: 1:26
Acceptable time: 1:29
Hydrocity 1
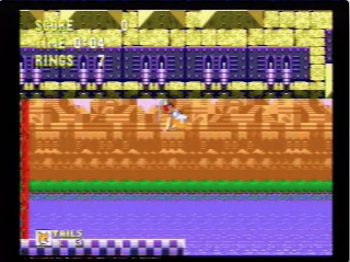
Hold right while the level starts and begin a single flight after the title card leaves the screen. Once aligned with the rightmost purple column in the background, hold left and land so that the hand in the ground doesn't appear. After hitting the red spring and landing there are two options:
- Do a 1-tap spin dash and do not loop jump. Hold right and you will land on top of the next loop. Slightly after crossing the center of the loop, jump and tap flight 4 times (this will let you land in the perfect spot).
- Do a 6-tap and jump off the ramp, then time a loop jump, followed by a slope jump, and then a single flight just as you go off the top of the screen. You should land quickly on the left side of the loop; do a 6-tap, mid jump, then a single flight, and finally brake a little once you land.
Do a full jump off the wall and hold it. Hug the wall to the left, bounce off the lightning shield, and the spring will push you to the right. Hold right and, once off screen, release jump and quickly fly (alternatively, hold jump and mash the other two buttons). The longer you take to enter flight after releasing jump, the more speed you'll lose. Make sure to stay off screen.
Once you see the next wall, stop flying and count the green blocks. After the 8th one, roll and adjust your aerial speed if necessary so you land and roll just before the invincibility (go too fast and you'll bounce on it). Once off the loop, release right just before landing and Tails will do one of two things:
- He will come to a complete stop, allowing you to spin dash (most common occurrence).
- He will keep moving (you'll have to react to this and let him continue moving).
Boss: When spin dashing through the loop, do not jump. Simply hold right and let Tails land. Once landed, face left and wait a short moment, then 6-tap up the wall. When you go off screen, hold right and bounce off the boss once, then adjust your position so you miss him. Land on flat ground, then jump and swim just before breaching the surface, this will give you an easy superflight. Use the invincibility for the remaining 5 hits.
Time to aim for: 0:35 (0:34 is possible but very rare.)
Acceptable time: 0:37
Hydrocity 2
Spin dash immediately. You can deal with the upcoming slope in a few different ways:- Bump the ceiling before it to break into a run, this way you can slow down a little and control your jump.
- Jump from a very specific part of the slope to get the correct trajectory (riskier and not faster).
You should hit the starpost at 0:07, then trigger the wall. When the bottom of the wall aligns with the top of the slope, full jump left towards the wall, then hold right and swim just before the apex of your jump. You should get pushed into the ground and die from an invisible object. The time of the screen fadeout should be 0:12. When you return, a simple 1-tap, low jump, and roll will suffice. Jump and start swimming just before reaching the apex, holding right the entire time. You want to touch the rings just when you hit the apex.
The wall will push you into the floor; continue holding right until you get the level wrap and fall down (you'll see the screen move downward). At this point face left and rev your spin dash. At around 0:19 - 0:20 you will see a blue tube on screen, this is when you release the spin dash. When you get near the boss room, jump to gain a bit of extra height.
Boss: Jump out of the water and fly such that you are not at the top of the screen, but close. If you hit Robotnik at the top, Tails will "stick" to the top and you won't be able to get more hits. Wait until he comes down a bit and then fly into him repeatedly 4 times. Mash the buttons quickly after the 3rd hit and move a bit left. You'll get the 4th hit quicker and get a good bounce down/right to avoid his propeller. Jump after landing and bounce for the remaining 4 hits.
Time to aim for: 0:32 + 0:05 (from death)
Acceptable time: 0:33 + 0:05
Marble Garden 1
Follow the path normally. When you get near the yellow diagonal spring, there are two options:- Jump from the slanted ground just before the spring. Bump into the wall, hold left, and then fly right before touching the ceiling. This will let you clear the blue spinner and land on the slope without risk of your momentum being interrupted.
- Hit the spring without holding anything, then hold left midway through (slightly faster, but big risk of the slope stopping you).
When doing the screen wrap, you want to hold right and jump when the black background is towards the left.
After using the fire shield to enter the wall, hold left to zip to the right. Jump from the slope until you go past the center of the rotating platforms, then fly to the right. Continue and fall in the mud, then full jump just before bumping the wall and fly right before the apex of the jump.
Boss: You'll come into this room rolling. Make note of the uneven ground; if you jump from the wrong spot you'll miss the first hit entirely (either of the 2 spots above will work). You want to get 5 hits before he goes off screen (6 is possible, but it will actually result in a bad pattern for the act 2 boss). He will always appear on the far left, so fly up and stay at the top of the screen. If you only got 4 hits, stand on the left and hit him between the drills.
Time to aim for: 0:47
Acceptable time: 0:49
Marble Garden 2
After doing the level wrap, it's important to raise the screen position before it passes the boss room. Face left and do a 2-tap spin dash, you'll stop in the perfect position (there's a small chance the slope will interrupt you, simply do another 2-tap if that happens).
Boss: Stand on the small slope near the right and face right. Time a spin dash so that you release a 1-tap as the left drill reaches the midway point of the screen. Walk right and jump when you collect the ring to hit Robotnik, then jump again and hold left after the 2nd hit. Before he enters the ground, stand on the left side of him and release a spin dash right before his invincibility ends. The purpose of this is to bounce off him staying as far left as possible and hitting the spikes on the left quickly. After the bounce, make sure to face left during the roll. Another quick spin dash to get to the left wall, and another spin dash to hit him as he comes up (too slow and you'll bounce off him and to the right). Make sure not to release that spin dash too early or you will still bounce to the right even if you got to the left side in time. Jump twice to get 2 more hits for this cycle, then 2 more times when he comes down the diagonal path.
Time to aim for: 0:45
Acceptable time: 0:46
Carnival Night 1
An important tidbit to keep in mind at the start is that you cannot spin dash immediately when landing from Tails's auto flight. You cannot move for a few frames upon landing, so delay your spin dash appropriately. A 6-tap here is actually detrimental, but go for it anyway to increase the likelihood of 5-tap speed, then jump and fly into the 3rd or 4th balloon. When you land on the ring monitors, you will gain rightward momentum automatically from the wheel glitch, so counteract it by tapping left enough to land on the floor just before falling off the ledge. Remember not to jump, as it removes wheel glitch.
Stand near the bottom of the slope and do a quick 2-tap and hold right (make sure the spikes are out and not retracted). Continue holding right until you hit a platform, then switch to left. When you move around the platform and begin falling left, switch to holding right to grab rings, go through the fire shield, and under the balloons. Rev once after the fire shield simply to get into spin dash mode, then do a 3-tap after going under the blue ballon. Note: if you hold down for too long before spin dashing you will break your leftward momentum and fall down. After the 3-tap, start another spin dash and release it just before the level wrap so as to keep the camera as far right as possible.
After the level wrap, do two more spin dashes to the left, and maintain your position by alternating between left and neutral. Keep in mind that Tails will move down faster than he walks up, so you should be holding left a bit longer than neutral.
Boss: Hold left and maintain your position just below the ring counter. Make note of the purplish column in the background. When the spinning top is to the immediate right of the leftmost column, hold down to roll and land on it. Alternatively, you can hold left the entire time and then roll as the top bounces off the bottom of the screen. You will not roll while still moving up, so make sure you release to neutral a bit early. Hold your spin dash and get hit. When the top nears the right wall, spin dash into the wall or tap right to push against it and then release immediately (you want to always have the same position on the top). Depending on your position when you first landed on the top, you will have hit the boss at a different time. This changes when you have to start walking and the roll off the top onto the boss.
If the boss is in this position in relation to the background (left), you'll have to start walking left a bit before the top hits him (right). If the boss is a bit further left, then you must start walking when the top bounces off him, and the roll must be timed sooner.
Roll as the top reaches this position. This boss is very frame-dependent, so you won't always see the same result. You'll have to react to the top's bounces and dodge it accordingly.
Time to aim for: 0:54
Acceptable time: 0:56
Carnival Night 2
Hold left while exiting the boosters until you land on the cylinder. After bumping the ceiling in flight, hug the middle of the curve just to the right and fly while holding left. If you fail and run out of flight, land on the spiral and fall through it, then go to the cylinder and bounce from the balloon again.
Once in the ceiling keep holding left until you start moving faster, then tap right and release to neutral, followed by holding right for a second. This will allow you to spin dash "up" the wall so that you exit from the top and begin falling to the right. When Tails begins moving rightward, tap left a few times (how long you hold left with each tap determines how many times you have to tap it), then alternate between right and neutral (holding right a tad longer). You want to try and maintain a stable, centered position. If you go too high or low, you will be stopped by walls. You can continue by releasing to neutral (if too high), or holding right (too low). Once you get past the wall and see the boss area, roll to fall down and then jump and fly in midair (otherwise you risk falling straight through the floor and dying).
Boss: Stand on the far right side. As soon as Robotnik is visible, fly straight up and you should trade hits. Grab a ring and then use your invincibility to fly into him 3 times. You will get hit again as he drops his ball. Fly into him from the ground, landing in between each hit, for the remaining 4 hits. There are other methods for doing this fight that vary between 1-3 seconds and have varying degrees of risk.
Time to aim for: 0:36
Acceptable time: 0:39
Ice Cap
Make your way to the falling ice platform, and note the blue portions of the background. When the top of the blue background ice to the immediate left is aligned with the top of the platform, hold right and you'll activate slope glitch once the platform breaks the pillar. Jump and fall straight down. From here you have three options:
- Tap jump once as soon as you land on the steep slope, then roll upon landing on the 2nd.
- Wait a split second upon landing on the slope, then tap jump twice (the 1st will not properly jump off, but the 2nd will) and roll on the next slope.
- Jump and avoid the 1st slope altogether, landing directly on the 2nd one, and roll.
The 2nd method is recommended because it avoids the possibility of entering the wall with a low y-position, which will cause you to exit the upcoming wall hitting the ice block where the spring is. Upon entering the wall hold left, then hold right after you can no longer see the slope on the top left part of the screen, and lastly switch back to left as you exit the wall and continue to hold it. This will give you the perfect trajectory to avoid being interrupted by objects in the level.
Since the map area for Ice Cap 2 loads midway through the tunnel that leads to the act 1 boss, and Ice Cap 2 does not wrap vertically, you will die if you continue to fall without jumping. Wait until the right moment, then jump and make note of your location. Depending on where you appear, you will have to consider different things:
- If you got hit by the frost hazard, you will be able to spin dash upon landing. Jump over the blue platform so you don't lose your slope glitch and proceed into the Sonic & Tails tunnel.
- Sonic & Tails tunnel: Look at the small mounds of snow on the ground. Jump onto the right side of the 2nd one from the ice pillar so that slope glitch gets a downward angle. Hold right to clip into the ground and zip for a level wrap. After the wrap, hold left for about 2 seconds, then right for 1 second, then left for 1 second and jump. You should notice the screen shift downward indicating a lower y-position. Hold right and jump twice, then wait for the boss to trigger and jump down.
- Knuckles tunnel: Be very careful not to land on top of the bridge, ice block, or breakable platform to the right. These are all sprites and will remove your slope glitch. Also take care not to go too far to the right where the ice block is, because an ice pillar will shut behind you and you won't have enough space to get a quick level wrap (a backup strategy here exists, but it is slower). Use the 3rd mound from the bridge for the level wrap (the ones before that are not far enough, you'll wind up zipping straight into the bridge and lose slope glitch). After the wrap, hold right for 1 second, then jump when you see the tunnel just before the boss room.
Boss: With slope glitch still active, you can gain an upward trajectory from the mound on the left. Before the boss appears, jump and land on the far left edge of the screen. As the boss comes down, full jump when his platform is fully visible and land on the small upward slope. Continue walking to the right using this angle to gain height, then jump near the right edge of the screen and get the 1st hit. After this hit, fly just as you start to descend and roll when you land on the platform. Continue holding left and then jump to the right once you stop rolling for the following hits so you bounce leftward. After the 5th hit, move left and full jump off, then as you near the jump's apex, hold right and bounce repeatedly for the remaining 3 hits.
Time to aim for: 0:59
Acceptable time: 1:02
Launch Base 1
Hold right and jump as soon as you touch the alarm. Run straight into the Orbinaut, and keep holding right (do not jump, it will make the Flybot's position less consistent). The Flybot will dive left and go off screen, make sure it doesn't go too far or it'll disappear. Walk slowly towards the cylinder, from here there are two options:
- Touch the cylinder at around 8 seconds and continue to walk slowly at a steady pace, then jump from the bottom.
- Touch it at 7 1/2 seconds and hold left to hug the wall. As you reach the bottom and swing upwards, hold right and jump before the mid point so you drop down, taking note of the Flybot's position (don't let him get too close yet).
The first method is easier and more consistent. The second is only slightly riskier, but is 1 second faster. Once you jump down, make your way to the ledge above the yellow spring. Stand a bit to the right of it, if you are too close to the edge the following setup won't work. Hold up to shift the screen and wait for the Flybot to hit you.
Alternatively, you can stand near the edge to make the Flybot dive sooner, which is faster (you'll have to move a bit to the right after he passes you though, which reduces the amount of time you have to shift the screen). Hold right after getting hit and when you land inside the spikes you will be ejected into the wall, zip, and then level wrap. Face left and hold down to appear in the boss room.
Boss: Given that Sonic and Tails are only meant to defeat one of these, it's not necessary to destroy both. You'll have to do this fight with no rings for the best time.
Time to aim for: 0:45
Acceptable time: 0:46
Launch Base 2
This level involves several big, strict-timing jumps. You will be immediately faced with 3 possible outcomes right after your spin dash and jump at the curve of the pipe:
- Early: If you jumped too early, brake when you land and do another spin dash.
- Middle: The middle of the curve is your target. You'll get the best jump trajectory and speed. Just hold forward and you'll continue running when you land.
- Late: This is the 2nd best outcome; you'll roll jump onto the platform and break into a run, but if you hold forward your momentum will be interrupted upon landing. Hold back for half a second and then forward to prevent this.
Note that these 3 are general outcomes and some other variations exist. The next big jump is after the 1st starpost when you hit the red spring. Aim for the middle of this curve. Late is bad, earlier is better than late but you might have to time a flight to adjust your descent so you don't get bounced back by a left-facing spring.
The biggest (and toughest) jump in this level comes after hitting the red switch and passing the flamethrower. Roll down the pipe and be sure to jump near the bottom so you break into a run. This is important as it'll give you aerial control for the upcoming jump. When running up the pipe, there is a smaller curve near the top. Jump as late as possible on the curve (just before the flat ground) to get the best trajectory. If you jump early or from the middle, you risk bumping parts of the ceiling that will force you to fly and land on the starpost platform. If this happens, you can still save it by reacting and releasing jump before you bump the ceiling, allowing you to retain most of your momentum.
After getting past the Orbinaut and rolling down the pipe, you want to brake at a certain point. There is an invisible path swapper here that will enable you to go left without going up the pipe you came. When jumping into the spinning platform, jump from the middle of the curve so you get the best trajectory on your flight.
Near the end, after taking the spinning platform up, you'll do the last big jump. Where you jump from is not as important as the position of the screen; you need to make sure the screen does not drop down past a certain point. Ideally you want to jump just as you hit the downward curve before the last starpost, so that you get the perfect flight. Jump too late and you'll be too low, so earlier is better here. After the jump, hold left briefly so you reduce the chance of bumping into the wall.
Fly along the ceiling keeping the screen as high as possible, otherwise you won't be able to fly over the invisible wall.
Boss 1: Roll in to him while holding left. When you stop rolling, hold a spin dash for the remaining 7 hits. You can optionally release it after a hit, then face right and spin dash again quickly, but this is only faster in real time and does not offer in-game benefits.
Boss 2: Simply get into position near the right side and hold a spin dash. When he descends, he can appear on either side, but he is slow and easy to react to. Make sure to get the final hit as late as possible to save time.
Time to aim for: 1:20
Acceptable time: 1:26
Mushroom Hill 1
Start with a 3-tap. There is currently no consistent setup or method for doing the door clip, however you must keep a few things in mind:
- The door will always crush you if you are too far to the left.
- It will crush you if you are still or moving left.
- You need a specific rightward walking speed to succeed.
- You need to be under the right side of the door without being too far to the right.
- You need to be partially engulfed by the door.
Once in position, hold left and jump as the door covers Tails's head up until his mouth (use the white fur and do not jump before holding left). Upon entering the ground, zip to the left side without going too far. You want to be near the edge of the wall. Align the score (rightmost digit) with the orange tree in the background so there is a small gap between the wall and the score. From this position, 12 subpixels out of 256 will not work, and all the rest will. There is a 95.3125% chance of a successful level wrap, but only if you position yourself correctly. Once you wrap, hold left for about half a second to get into position to hit the boss safely. When the screen catches up, make the necessary adjustments if you're not in the right spot.
Boss: Fly straight into him from underneath. 2 hits is very easy and consistent. 3 is not that hard, but you risk dying for mistiming it. Spin dash to the right when the screen unlocks and jump as he nears the right edge of the screen. If you time 2 jumps correctly you can sneak in an extra hit before he chops the tree and moves his fire hit box.
Time to aim for: 0:39
Acceptable time: 0:42
Mushroom Hill 2
When you're blasted upwards by Knuckles, there is 1 frame at the apex of your ascent where the game considers you grounded. You can jump on this frame and fly to the red spring, which will save 3 seconds.
The majority of this level is straightforward, depending largely on jump and flight timings. The most important section to note is the big flight near the end. There are 2 ways of doing it:
- Fly around the apex of your jump and go right over the loop.
- Land on the loop and roll jump off the curve, flying right afterwards.
The 1st is recommended as it is much easier and more consistent, as well as gives you more leeway to adjust your aerial position. If you are too high up, you'll have to hold left slightly to avoid bumping into a floating piece of land. As you approach the area with the Dragonfly, piano all 3 buttons either once or twice (depending on height) to slow your descent, then roll to hit the Dragonfly.
When flying up the shaft, there are 2 path swappers near the top on the left and right sides. Stick to the left until you reach the ground with the red spring, as that will open the path to the top where the shields are.
Boss: Fly on the edge of the screen when getting hit to guarantee that you won't be knocked to the left. Use the invincibility to spin dash and get 6 hits, then pursue him and jump to start running. There are 2 small mushrooms on the ground, when the 1st one is scrolled off screen do a full jump for the 7th hit, and another quick one for the 8th. Make sure you fly if necessary to avoid the spikes, as you will always have 0 rings here.
Time to aim for: 1:00
Acceptable time: 1:03
Flying Battery 1
The "leap of faith" depends on making the platform cycle in time, so the first section has little room for error. You want to reach the platform at around 20 seconds. Low jump to the right without bumping the wall. As soon as you're below it, piano A, B, and C twice (so 6 presses total) to get the perfect descent. When the floor above you is almost off screen, fly again to bump the ceiling. Continue bumping the ceiling with only small gaps between each flight (make sure not to fly too quickly or you will stick to the ceiling for a moment and lose a lot of speed). After 5 bumps, descend a bit and then continue bumping the next ceiling.
Boss: Don't get hit. Jump and land to the right of the yellow switch after the 6th hit, before he's destroyed. This will activate slope glitch for the next act. Move to the right edge of the screen to reset your horizontal subpixels to 0.
Time to aim for: 1:26
Acceptable time: 1:28
Flying Battery 2
It's important that you begin a spin dash before the title card goes away, otherwise Tails will switch from a normal standing position to a teetering one. Landing on sprites or touching the spinning object will take away slope glitch.
As the screen shifts, 6-tap and time a jump so you bump the wall, holding right as you do so. Once you land on the sloped ceiling, hold left and Tails will begin to run down at an angle. Release to neutral just before entering the floor, and mind the orange "windows" in the center of each square. Once Tails is in the floor, watch the center windows carefully, then hold left once they touch the left edge of the screen.
When jumping on the next slope to enter the wall, do not hold anything. Tails will zip automatically and holding left will actually slow him down. Once the starpost goes off screen, jump and fly to the right until you trigger the platforms to move, then fly left and land on the edge of a platform. Take care not to stand on one too long, as it will kill Tails. Jump and fly to each one quickly to gain height, then follow the path normally. The rising platform near the boss room will be solid until it stops, so you'll have to time a flight carefully to avoid bumping it and losing momentum.
Boss: He moves 10 times before swinging upwards, but you can also use a visual reference. Land in between the spikes just before he swings up and roll to hit as early as possible. Slow down, jump for another hit, then hold spin dash for the rest.
Time to aim for: 1:13
Acceptable time: 1:15
Sandopolis 1
The key to landing directly on the ground above the sandfall is jumping from the right spot. At the start, hold right when jumping out, then jump from the small curved ground and keep holding right. When in the sandfall, do 2 quick jumps, followed by a 3rd delayed jump.
To get the proper zip from the wall, you need to enter it while around the middle of the loop's pillar (slightly to the right works too). Hold right for the whole thing to guarantee the level wrap.
Boss: Make sure you're not on the right side or too far left when the door opens. When he lands nears the quicksand, count 3 seconds and jump into him to get hit. Use the invincibility to hit him from the right side, then hold right to scroll the screen before he touches the sand. This will make the signpost miss the ring monitor in the ground. Before the signpost stops spinning, jump and fly up to the top of the screen, then fly once more after bumping it. This wastes just enough real time to put the object cycles in the perfect position for the next act.
Time to aim for: 1:10
Acceptable time: 1:11
Sandopolis 2
The most important goal at the start is making the spike pillar cycle around 38-40 seconds in. There is some slight margin for error. When you reach the moving platform at around 29 seconds, you want to jump from the flat ground. Hug the wall and hold left to go straight through the ground (on extremely rare occasions, this will not work). Spin dash into the light switch to get a favorable pattern, as reaching this point quick enough means you have to wait for the spike pillar cycle anyway. If you get here late, avoid the switch altogether and focus on the cycles. Make sure not to release the sand later on, as that will cause you to die when attempting the zip in the wall. Before the screen wrap at the 2 horizontal doors, use the position of the previous spike pillar as a reference to know where the next one will be. That way you won't have to stop to prevent getting crushed. If you make it here without any mistakes, the pillar in the wall will still be in your way for a second, so bump into it and then spin dash as it moves up.
When jumping over the spike pillar near the water shield, fly and release to neutral when landing on the crumbling platform. Tails will not stop his flight animation as long as you are not holding left/right, which will enable him to drop down faster than running off.
Boss: Use the pillars in the background as references to time your 1st jump. After breaking his barrier, you have to carefully time flights so as not to waste too much time in the air, and without being too far left to get hit by the spikes on his hand. Stand right next to him when jumping to avoid bouncing to the left. After the 2nd hit, hold left in midair so you accelerate faster, then jump and hold right to break the barrier again. Repeat the process. Note: you cannot break the barrier immediately when it returns, so you will have to insert small delays before hitting it.
Time to aim for: 2:05
Acceptable time: 2:07
Lava Reef 1
Move left slightly at the start and roll when you land. You want to aim for a specific part of the ground to get a big speed boost. When you go past the 3 stalactites, jump after the 2nd one as the ground slants upward (where the big pole is). There is a part of the ground under the 3rd one that will randomly stop you if your subpixels are misaligned, so you always want to jump over that. There is a section after the doors close behind you where you can clip into the ground if your subpixels are aligned. It is very uncommon, but if it happens it saves 9 seconds.
When you hit the switch near the spiral, take note of the time. If it's at 15, simply spin dash into it. When you're launched to the left, hold right just enough to adjust your speed so that you land on the rock enemy, then jump off him and fly, still holding right so that you can safely land in between the lavafall and spikes. When the lava yields, do a 3-tap and jump off the slanted ground and fly to the fire shield. If you don't get a good jump, you'll fly towards the yellow spring. This is roughly the same speed so it doesn't matter which happens.
If the time was at 16 when you hit the switch, then wait until about 17-18 before spin dashing so that the lavafall cycle is favorable. Land on the rock enemy and jump off, but instead of landing near the spikes you can fly straight up and left as the lavafall will have already stopped.
On the left there is an enemy you hit to open the door. For some reason after hitting this enemy, there is a small period of time when you can crouch but cannot spin dash. Wait until the door is halfway open and then spin dash to avoid accidentally jumping. After taking the elevator down and spin dashing under the Fireworms, there is a chance that you'll hit the switch from above, which will stop your momentum. If this happens, don't rush towards the rotating mace, as its position is based on the screen and you will have slow momentum when triggering it. If you did not hit the switch early, you can simply run past the mace with no risk.
For stair clip, it's important that you jump from the breakable object, as it is flat ground and will give you a consistent jump height. You need a minimum of 75% spin dash speed to succeed. Jump and release on the 4th frame to clip. If even executed correctly, there is a small chance it will fail, depending on your vertical subpixels.
Boss: You can sometimes stick to the right edge of the screen if you stand there and spin dash left. Start the fight on the left side instead, standing a little bit away from the edge and facing left. Spin dash for the 1st hit and then jump for the rest, flying to get the 4th hit. When flying, move to where the targets will be or you risk getting hit. After destroying the left arm, spin dash and jump to the right, flying underneath the right arm for all 4 hits. Position yourself where the fire shield is and slightly to the right, so that when you jump you will consistently move at a leftward angle (when in doubt, look between the fingers to see where Tails jumped). When the hand appears, it'll bob 5 times. Jump on the 5th to get 3 hits.
Once he's done, stand on the far left edge of the screen. As the signpost falls down, note the bottom of the sign itself (not including the pole). When the bottom is almost aligned with Tails's head, walk right and then release to neutral once Tails is under the monitor.
Time to aim for: 1:35 (1:26 with subpixel clip)
Acceptable time: 1:42
Lava Reef 2
When the level starts, it has not yet fully loaded. It loads over time, so you want to delay your level wrap until just the right moment. Hold right when the timer is just under 7 seconds (about 6 & ¾). Hold left when the timer says 8, and when the screen catches up Tails will walk straight into the pipe. Continue holding left as you exit.
Once you get to the wall, fly a tad to the left and land on the left side of the stable platform. Your goal is to have the screen as left as possible without teetering. This screen positioning cannot be done while walking on the floor, the flight is necessary.
Spin dash quickly to the wall (there is actually some leeway with this), then immediately do 2 fast 1-tap spin dashes at the wall to pass through. Do the same for the 2nd wall.
Boss: Wave goodbye.
Time to aim for: 0:29
Acceptable time: 0:33
Hidden Palace
This is all about optimized brakes and spin dashes.
Boss: When he's more than halfway in his jump, jump and hit him underneath on the left side so he bounces right. Do this for all 8 hits and you'll save enough frames to get a 29 as opposed to 30.
Time to aim for: 0:29
Acceptable time: 0:30
Sky Sanctuary
Hold right at the start so that you scroll the screen all the way. The moving bar past the bridge is a screen-based object, and will start moving at this point. Don't move the screen left or you will reset its position and risk having it be in your way.
Face left when shifting the screen down so that if you accidentally spin dash, you don't fall to your death. Time your flight descent carefully.
Boss: Use hit invincibility to avoid Mecha Sonic's ambiguity. Don't stand on the far right edge of the screen, as the same thing that can happen in LR1 can also happen here (face left and spin dash sometimes results in going nowhere). Instead, move a bit to the left after the 1st hit so that you can always spin dash correctly without sticking to the edge.
Time to aim for: 0:55
Acceptable time: 0:57
Death Egg 1
Fairly straightforward level that is purely about optimized movement. Use background references to get all the hits in the machine quickly.
Boss: Start by flying into him to lose your lightning shield and gain invincibility. Fly underneath him for the hits instead of jumping from the sides. Depending on when you hit him, the spheres will explode in different locations. Try to time your hits to manipulate the sphere explosions, then dodge the spikes accordingly. You want to be especially careful about taking a hit after getting the 8th hit on him, as it will significantly reduce the amount of time you have to correctly position yourself for phase 2.
Watch the explosions carefully. After about 2 seconds a part of the structure will break off, and then another part will break off. You want to jump and fly just before the 2nd piece breaks off. This will let you land on one of his platforms as he pulls them out, and have enough time to rev spin dash. The rotations of the platforms are based entirely on whether you are on the left or right sides of the boss. You can manipulate them so they never hit you by timing your bounces. After the spin dash, hold left for the 1st hit, then bounce on the ride side twice, and once again on the left side. At this point you have to choose which side to bounce on based on the positions of the platforms, as frames are very important and they won't necessarily be the same every time. Adjust as needed, bouncing on either side for the remaining 4 hits.
Time to aim for: 1:26
Acceptable time: 1:32
Death Egg 2
Like HC2, you'll have to die to unload the act 1 map area. Using spikes at the start should only waste 4 seconds.
When attempting to enter the wall, you want to pay close attention to Tails's sneaker. You want to get the sneaker as close to the wall without being ejected. Use pause to help time this. Once in the wall, zip to the left. If you go too far, you'll get stuck in a pocket of air, so pay close attention to the bottom of the screen. You want to slow down once you see the parts of the background that constantly move. Position yourself so the pipe on the left is aligned with the left of the HUD (make sure you're facing right and not left). There should be a small gap between the pipe and the left side of the screen. Jump straight, and when you land hold right to zip and level wrap.
After the wrap, continue holding right and jump towards the end of your brake sound effect. Time your flight before the apex of your jump and continue flying. As the screen nears the boss, stop flying and wait half a second, then tap flight once so you appear in the boss room guaranteed.
Boss 1: Stand on the ceiling and to the right. Do 1-tap spin dashes when the objects stick to the ceiling. Do a 6-tap on the last object to make it finish the boss several frames faster.
Boss 2: You want to spin dash in between the hands as they drop down each time. The directions you should face are:
- Right
- Left
- Left
- Right
After the 2nd one, you'll wind up next to the left edge of the screen. Immediately jump to the right. This will manipulate the boss so that he also moves right. Otherwise he will move left and some fingers will be in unfavorable positions.
For this next phase, you want to stay under the fire, as it can't hit you if you are far enough left. Jump and hit the left side of the nose while moving right, so that you are bounced to the left. Make sure you are moving left enough so as not to land on the floor or you risk getting hit. There is no risk of falling into the pit, as you will always get a bounce. Then simply bounce 3 more times, doing a higher jump on the last hit to avoid a low bounce that could risk killing you.
For the last phase, jump after the explosion sound effect stops, then jump to bounce on Robotnik. After hitting him on the right side, jump when landing to accelerate faster. If you hit him while touching the edge of the screen, you won't bounce to the left, useful for the 8th hit. Otherwise if you bounce left, simply piano the buttons upon landing to guarantee a jump and prevent death.
Time to aim for: 1:57 + 0:04
Acceptable time: 2:00 + 0:04
